
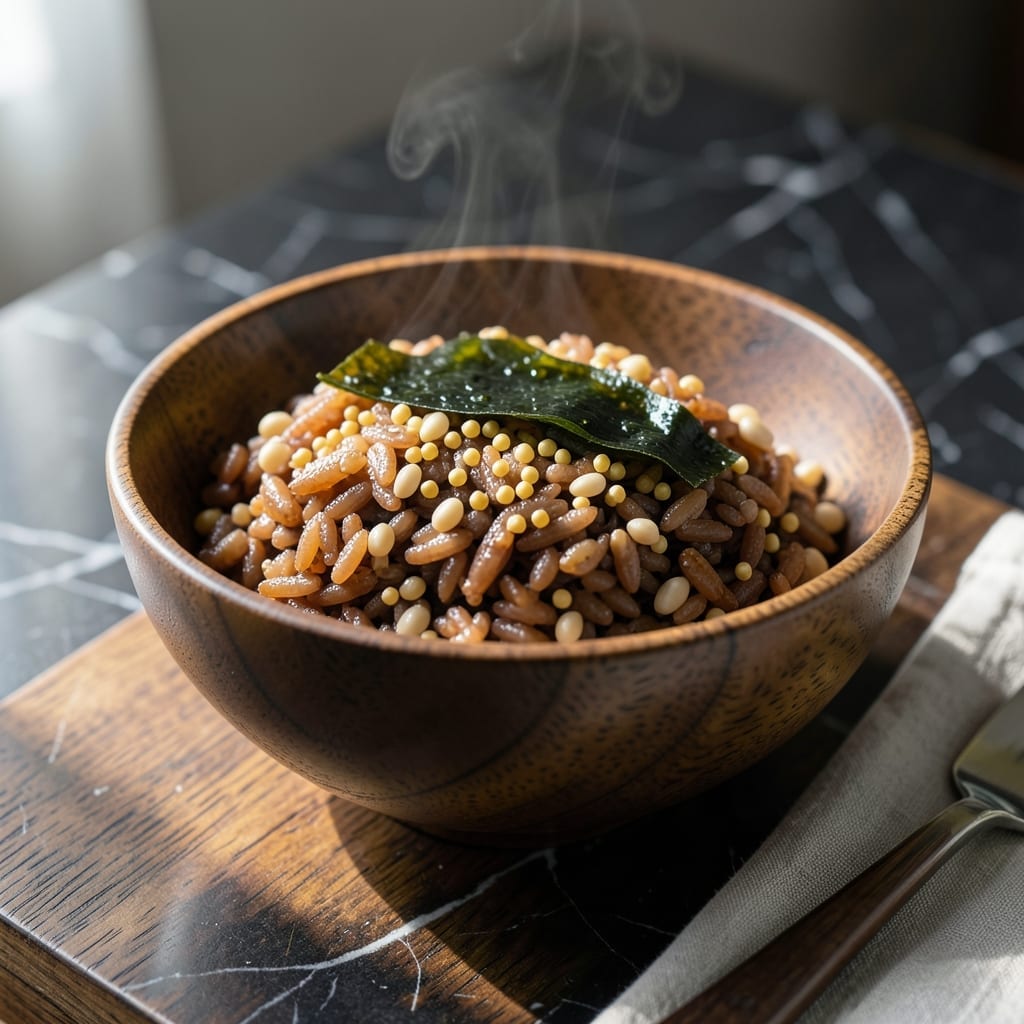
Achieving perfectly cooked Japanese multigrain rice is simpler than you might expect. This blend of brown rice, barley, and millet delivers a satisfyingly nutty texture that elevates any meal.
The key lies in the precise ratio of grains to water and proper soaking time. I’ve tested countless combinations to find the ideal balance that ensures each grain cooks evenly without turning mushy.
With just 40 minutes of hands-off cooking, you’ll have a pot of fragrant, fluffy rice with distinct layers of flavor and a delightful chew. The aroma alone makes it worth the effort.
Serve it as a base for bowls, alongside grilled proteins, or enjoy it on its own. This method guarantees consistent results every time.
Ingredients for Japanese Multigrain Rice
A simple blend of whole grains creates this fragrant, nutty rice dish with minimal effort.
| Ingredient | Amount | Notes |
|---|---|---|
| Brown Rice 🌾 | 1 ½ cups | Short or medium grain preferred |
| Barley 🌾 | ½ cup | Pearl or hulled variety |
| Millet 🌾 | ½ cup | White or yellow millet |
| Water 💧 | 3 ½ cups | Filtered for best results |
| Kombu Strip 🌿 | 1 piece | Optional for umami depth |
| Sake 🍶 | 2 tbsp | Dry variety preferred |
| Rice Vinegar 🍚 | 1 tsp | Adds subtle acidity |
| Sea Salt 🧂 | ½ tsp | Fine grain for even distribution |
| Sugar 🍚 | 1 tsp | Optional for balance |
| Toasted Sesame Seeds 🌰 | 1 tbsp | For garnish and crunch |
| Scallions 🧅 | 2 whole | Thinly sliced for serving |
The grains are the heart here. Short-grain brown rice gives that classic chewy texture, while pearl barley (easier to find) works better than hulled for consistent cooking. Japanese markets or Whole Foods bulk bins are goldmines for quality millet—look for bright, unbroken kernels. Kombu might seem niche, but any Asian grocery carries it (or order online). It’s worth the tiny effort for that extra depth.
No sake? Dry white wine works in a pinch. Skip the kombu if you must, but add half a teaspoon of soy sauce to the cooking water for similar umami. Pearl barley swaps easily for hulled (just soak it longer). The sesame seeds can be swapped with crushed peanuts for a different crunch. Don’t skip the rice vinegar—it brightens everything up (apple cider vinegar at half the amount works too).
Uncooked grains keep in airtight containers for 6 months (or freeze for 1 year). Cooked rice stays fresh 4-5 days in the fridge, reheats beautifully with a splash of water. The sesame seeds toast in 2 minutes—watch them close (they burn fast).
Why You’ll Love This Recipe
- Set and Forget: I just toss the grains and kombu in the rice cooker and walk away—no stirring, no fuss.
- Umami Boost: That little strip of kombu works magic, giving the brown rice, barley, and millet a deep, savory richness.
- Meal Prep MVP: Honestly, it’s my weekly staple—pairs with everything from miso salmon to simple roasted veggies.
- Stretches Farther: One batch feeds us for days, and it tastes even better reheated with a splash of water.
Step-by-Step Instructions for Japanese Multigrain Rice
This method delivers perfectly cooked grains with a satisfying nutty texture and balanced flavor.
Step 1: Rinse and Soak the Grains
Place the 1.5 cups brown rice, 0.5 cup barley, and 0.5 cup millet in a fine-mesh strainer. Rinse under cold running water, gently swirling with your hand, until the water runs clear. This removes excess starch and prevents a gummy texture.
Transfer the rinsed grains to your rice cooker pot or heavy-bottomed saucepan. Add the 1 piece kombu strip, 2 tbsp sake, 1 tsp rice vinegar, 0.5 tsp sea salt, and 1 tsp sugar. These flavor enhancers will infuse the grains as they cook.
Step 2: Add Water and Begin Cooking
Pour in the 3.5 cups water and stir gently to distribute the grains evenly. If using a rice cooker, select the standard white rice setting. For stovetop cooking, bring to a boil over medium-high heat, then immediately reduce to low heat and cover.
I prefer using filtered water here—it makes a noticeable difference in the final flavor. The water level should cover the grains by about 1 inch. Don’t be tempted to stir once cooking begins; this can break the grains and release too much starch.
Step 3: Cook and Rest for Optimal Texture
Allow the grains to cook undisturbed for 45-50 minutes. You’ll know it’s ready when all the water has been absorbed and small steam vents appear on the surface. The kombu will have softened and released its umami depth into the cooking liquid.
Once done, let the multigrain rice rest covered for 10-15 minutes. This crucial step allows the grains to steam gently, absorbing any remaining moisture and achieving that perfect, separate texture. The rice should be tender with a slight chew, and the barley and millet will have a pleasant, nutty bite.
Step 4: Fluff and Finish with Garnishes
Remove the kombu strip and discard. Using a rice paddle or wooden spoon, gently fold the grains from the bottom to the top. This fluffs the rice and distributes the flavors evenly without mashing the softer grains.
Transfer to a serving bowl and top with the 1 tbsp toasted sesame seeds and 2 whole scallions, thinly sliced. The sesame seeds add a delightful crunch and visual contrast, while the scallions provide a fresh, mild onion note that complements the earthy grains beautifully.
Pro Tips For Making Japanese Multigrain Rice
- Soak the Grains: Give the brown rice, barley, and millet a good 30-minute soak before cooking—this softens their tough outer layers and guarantees even cooking.
- Use Kombu Water: Wipe the kombu strip with a damp cloth, then soak it in your cooking water for 10 minutes before adding the grains. It infuses subtle umami without overpowering.
- Skip the Peek: Resist lifting the lid while cooking, even if you’re curious. Releasing steam drops the temperature and messes with the grains’ absorption.
- Rest Before Serving: Once done, let the rice sit covered for 10 minutes off the heat. This lets the grains steam through and stops them from turning mushy when stirred.
Perfect Pairings for This Dish
Protein Pairings
Grilled miso-glazed salmon is my top choice—the sweet-savory glaze complements the nutty rice perfectly. For a quicker option, try pan-seared teriyaki chicken thighs with skin crisped to golden perfection. 🍷
Vegetable Sides
Steamed bok choy with a drizzle of sesame oil keeps things light, while stir-fried shiitake mushrooms add earthy depth. I love roasted Japanese sweet potatoes for a heartier meal.
Soup Combinations
A warm bowl of miso soup with tofu and wakame makes a comforting pairing. For something richer, tonkotsu ramen broth with thinly sliced pork belly creates an umami-packed meal.
Pickled Accompaniments
Quick-pickled cucumbers with rice vinegar cut through the richness beautifully. I also recommend beni shoga (red pickled ginger) for a tangy, spicy kick between bites.
Add 1 tbsp pickled ginger per serving for authentic flavor. ✨
Beverage Pairings
Green tea, especially sencha or genmaicha, cleanses the palate between bites. For beer lovers, a crisp Sapporo or Asahi lager works wonderfully.
Nutrition Facts
Frequently Asked Questions
What grains work best for this blend?
Short-grain brown rice is essential for texture. Pair it with pearl barley and white millet for the most balanced flavor. These grains cook at similar rates and complement each other beautifully.
Can I make this without a rice cooker?
Use a heavy-bottomed pot with a tight lid. Bring to a boil over medium-high heat, then reduce to low and cook undisturbed for 45-50 minutes. The result will be just as good.
Why is resting the rice important?
Letting it rest for 10-15 minutes allows the grains to absorb any remaining moisture. This step ensures even texture and prevents a wet or uneven finish. It’s worth the wait!

- Mujadara Rice and Lentils Recipe: Earthy Spiced Lentils With Caramelized Onions - November 1, 2026
- Naija Fried Rice Recipe: Street-Style Spice With Veggie Crunch - November 1, 2026
- Mushy Rice Recipe: Fluffy Grains Transformed in Minutes - November 1, 2026