
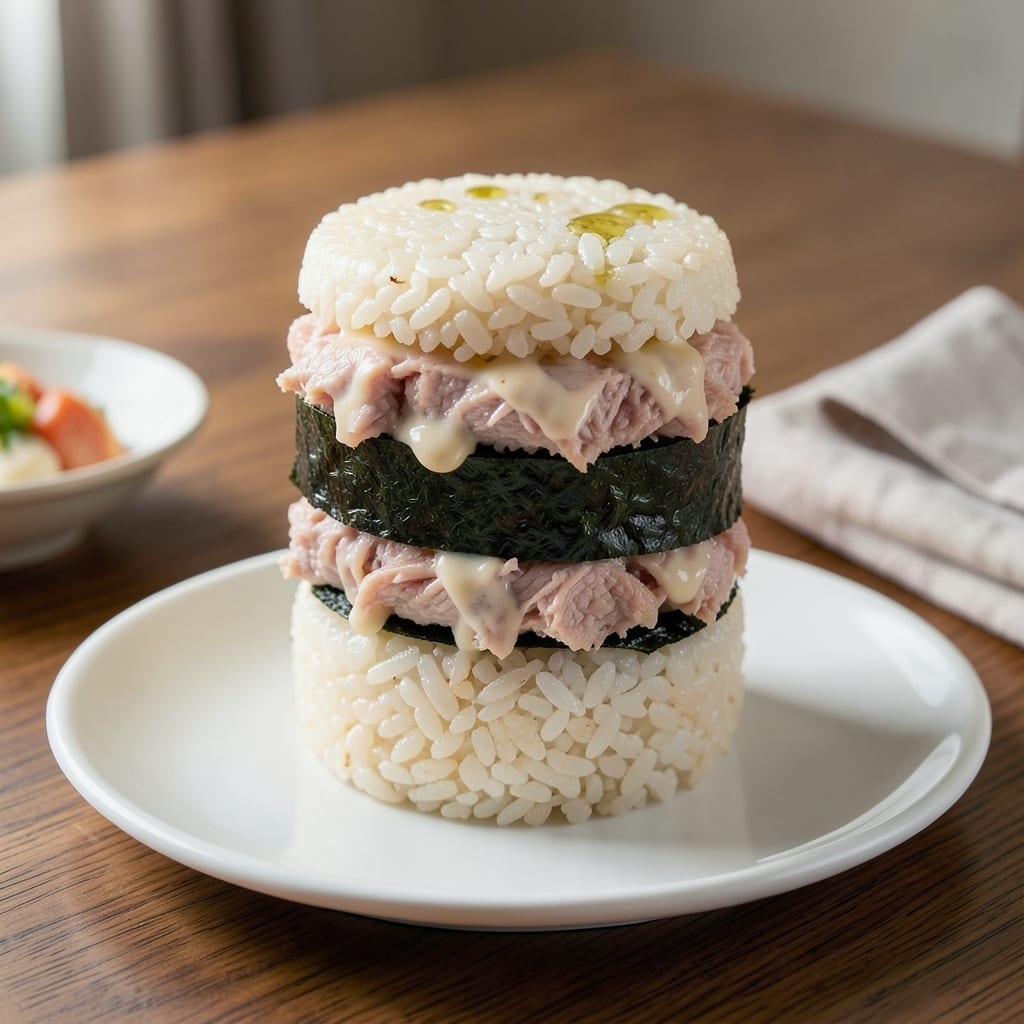
There’s a reason Japanese rice sandwiches have become a global favorite—they combine the comfort of a sandwich with the portability of onigiri. This version delivers a satisfying meal that’s as practical as it is delicious, perfect for lunches on the go.
The beauty lies in its simplicity: seasoned rice replaces bread, while fillings like tuna mayo or pickled plum add bursts of flavor. A sheet of nori wraps everything together, creating a neat, handheld package that stays intact until the first bite.
What makes this dish special is its versatility. You can customize the fillings to suit any taste, from savory salmon to vegetarian options. The rice itself can be adjusted with different seasonings for variety.
Ready in 20 minutes, this recipe turns humble ingredients into a meal that’s both nourishing and convenient. Here’s how to make it at home.
Ingredients for Japanese Rice Sandwich
Pantry raid time. Most of this is already in your kitchen or nearby store.
| Ingredient | Amount | Notes |
|---|---|---|
| Sushi Rice 🍚 | 2 cups | Short-grain, rinsed until clear |
| Water 💧 | 2 ½ cups | For cooking rice |
| Rice Vinegar 🍯 | 3 tbsp | Seasoned or plain variety |
| Granulated Sugar 🍬 | 1 tbsp | Dissolves into rice dressing |
| Salt 🧂 | ½ tsp | Fine grain preferred |
| Nori Sheets 🌿 | 2 sheets | Cut into strips for wrapping |
| Canned Tuna 🐟 | 1 can | Drained, in water or oil |
| Mayonnaise 🥚 | 3 tbsp | Japanese Kewpie preferred |
| Pickled Plum 🍑 | 2 pieces | Pitted, chopped (umeboshi) |
| Green Onions 🧅 | 2 whole | Thinly sliced for garnish |
| Soy Sauce 🫒 | 1 tbsp | Low-sodium for seasoning |
| Sesame Seeds 🌰 | 1 tsp | Toasted for garnish |
| Cucumber 🥒 | ½ whole | Sliced into matchsticks |
The rice is non-negotiable—short-grain sushi rice gives that sticky texture that holds everything together. Koshihikari or Nishiki brands are my go-tos, and you’ll find them at any Asian market or the international aisle. Rinse it until the water runs clear (seriously, don’t skip) to get rid of excess starch. For the nori, look for full sheets—they’re easier to work with than pre-cut strips (and cheaper).
No tuna? Canned salmon or shredded chicken work just as well. Swap the mayo for Greek yogurt if you’re avoiding eggs. Pickled plum not your thing? Pickled radish or umeboshi paste give a similar tang. The cucumber can be swapped for avocado slices (add a squeeze of lemon to keep them green). Want extra crunch? Toss in some shredded carrot.
Assembled sandwiches keep in the fridge for 1 day—the nori softens if left longer. Store rice and fillings separately for up to 3 days, then wrap fresh. Freeze the rice in portions for 1 month (thaw and re-season before using).
Why You’ll Love This Recipe
- Minimal Effort: I just mix sushi rice with vinegar, sugar, and salt—no fancy techniques, and the rice cooker does most of the work.
- Sweet-Tangy Bite: The rice vinegar and sugar give that signature sushi flavor, but stuffed in a sandwich it’s even more addictive.
- Lunchbox Hero: I pack these for picnics, work lunches, or quick snacks—no reheating needed, and they hold up all day.
- Budget Stretch: A big batch of sushi rice makes multiple sandwiches, so I save money and have leftovers for days.
Step-by-Step Instructions for Japanese Rice Sandwich
This method makes assembling these portable treats straightforward and foolproof every time.
Step 1: Cook and Season the Sushi Rice
Rinse the 2 cups Sushi Rice under cold water until the water runs clear. This removes excess starch and prevents gummy rice. Drain well, then combine with the 2.5 cups Water in a rice cooker or pot.
Cook according to your appliance’s instructions. Once done, transfer the hot rice to a large bowl. In a small saucepan, gently warm the 3 tbsp Rice Vinegar, 1 tbsp Granulated Sugar, and 0.5 tsp Salt until dissolved. Drizzle this mixture over the rice while folding gently with a rice paddle—this gives it that signature sticky yet separate texture.
Step 2: Prepare the Fillings
Drain the 1 can Canned Tuna thoroughly, then flake it into a bowl. Add the 3 tbsp Mayonnaise and 1 tbsp Soy Sauce, mixing until just combined. The filling should hold together but stay light.
For the second option, pit and chop the 2 pieces Pickled Plum finely. Thinly slice the 2 whole Green Onions and cut the 0.5 whole Cucumber into matchsticks. These additions bring bright, tangy contrast to the rich rice.
Step 3: Shape the Rice for Sandwiches
Wet your hands with water to prevent sticking, then divide the seasoned rice into four equal portions. Press each portion into a flat, rectangular shape about ½-inch thick on a piece of plastic wrap. The rice should hold its form but remain soft enough to mold.
Place a line of tuna salad or pickled plum mixture down the center of two rice rectangles. Top each with another rice rectangle, pressing the edges gently to seal. Wrap each sandwich tightly with plastic wrap and chill for 15 minutes to firm up.
Step 4: Wrap with Nori and Finish
Cut the 2 sheets Nori Sheets into strips wide enough to encircle each sandwich. Remove the plastic wrap from the chilled rice sandwiches and wrap each with a nori strip, pressing lightly to adhere.
Sprinkle the 1 tsp Sesame Seeds over the nori for a final touch. Slice each sandwich in half diagonally just before serving to reveal the colorful filling. The nori should stay crisp if served immediately.
Pro Tips For Making Japanese Rice Sandwich
- Rinse the Rice Thoroughly: Wash the sushi rice until the water runs clear—this removes excess starch so your rice sandwich filling stays firm and doesn’t turn mushy.
- Heat the Vinegar Mix: Gently warm the rice vinegar, sugar, and salt mixture before folding it into the rice; it dissolves faster and coats the grains more evenly.
- Use Warm Rice: Mix the seasoned vinegar into the rice while it’s still warm—it absorbs better and gives you that signature sticky texture for shaping.
- Press Firmly, Chill Briefly: Pack the rice tightly in your mold or by hand, then let it set in the fridge for 10 minutes so the sandwich holds its shape when sliced.
Health Benefits of These Flavors
Balanced Carbohydrates
Short-grain sushi rice provides complex carbohydrates that release energy slowly, keeping you full for hours. A serving of 1 cup cooked rice contains about 45g of carbs with minimal fat, making it an excellent fuel source for active days. 💪
Probiotic Benefits
Pickled plum (umeboshi) isn’t just flavorful—it’s packed with lactobacillus from fermentation, supporting gut health. The 2 pieces in this recipe contribute natural probiotics that aid digestion, especially when paired with fiber-rich rice.
Protein Boost
Canned tuna delivers 20g of protein per can, essential for muscle repair and satiety. The 3 tbsp mayonnaise adds healthy fats when using Kewpie, which contains egg yolks rich in choline for brain function.
Low-Calorie Option
At about 300-350 calories per sandwich, this meal is lighter than traditional bread-based options. The cucumber and green onions add crunch and volume with minimal calories, just 10-15 calories per serving.
Vitamin-Rich Ingredients
Nori sheets provide vitamin B12 and iodine, rare in plant foods. The sesame seeds sprinkled on top add calcium and zinc. Together, these ingredients create a nutritionally balanced handheld meal. ✨
Sodium Awareness
While soy sauce adds umami, it’s high in sodium. Using low-sodium soy sauce keeps the 1 tbsp in this recipe under 500mg sodium per serving. Balance it with the natural sweetness of seasoned rice.
Nutrition Facts
Frequently Asked Questions
Can I use regular rice instead of sushi rice?
Sushi rice is ideal for its sticky texture, but you can use short-grain white rice in a pinch. Avoid long-grain varieties like jasmine or basmati, as they won’t hold the shape. Rinse well and use 10% less water for firmer results.
How do I keep the nori from getting soggy?
Wrap the sandwiches just before serving, or store them with the nori separate. If prepping ahead, place a dry paper towel in the container to absorb moisture. Serve within 2 hours for the crispiest texture.
What are some vegetarian filling ideas?
Try avocado with a sprinkle of salt, or mix mashed chickpeas with mayo and a dash of soy sauce. Pickled vegetables like radish or carrot add tangy crunch. Seasoned tofu works well too.
Can I make these gluten-free?
Yes! Use tamari instead of soy sauce and ensure all other ingredients are certified gluten-free. The rice and nori are naturally gluten-free, so just check labels on fillings like mayo.

- Mujadara Rice and Lentils Recipe: Earthy Spiced Lentils With Caramelized Onions - November 1, 2026
- Naija Fried Rice Recipe: Street-Style Spice With Veggie Crunch - November 1, 2026
- Mushy Rice Recipe: Fluffy Grains Transformed in Minutes - November 1, 2026