
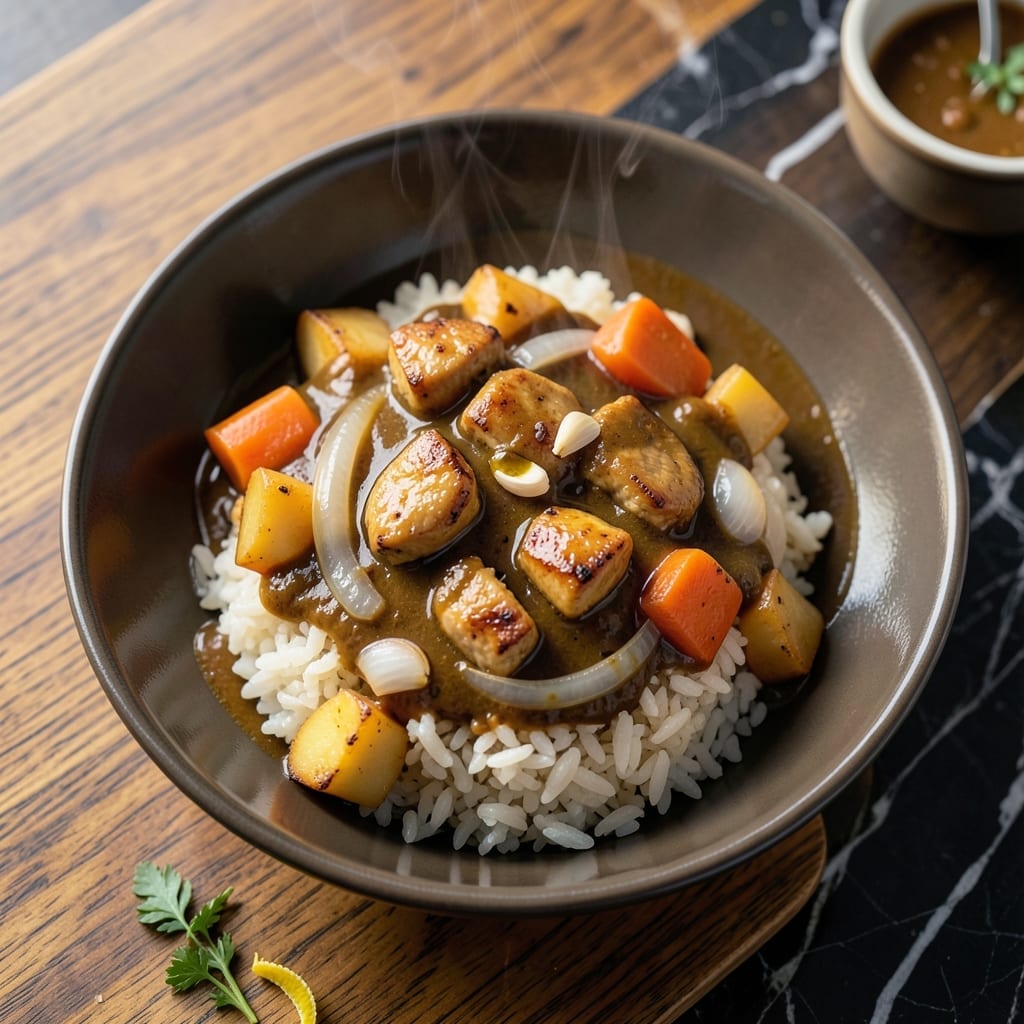
There’s something deeply comforting about a steaming bowl of Japanese curry rice that warms both body and soul. This dish transforms simple ingredients into a rich, savory experience that feels like a hug in culinary form.
Traditional Japanese curry strikes the perfect balance between sweet and savory, with tender meat and vegetables swimming in a thick, velvety sauce. The rice serves as the ideal canvas, soaking up every bit of that complex, aromatic gravy.
What sets this recipe apart is its ability to deliver restaurant-quality results with straightforward techniques. The sauce comes together through careful layering of spices and slow simmering, creating depth that’s impossible to achieve with shortcuts.
By the end, you’ll have a bowl that’s hearty, satisfying, and exactly what you’re looking for when comfort is the priority. The kind of meal that turns a simple dinner into something special.
Ingredients for Japanese Style Curry Rice
Simple, hearty ingredients create a deeply comforting bowl of Japanese-style curry rice.
| Ingredient | Amount | Notes |
|---|---|---|
| Japanese Curry Roux Blocks 🍛 | 4 pieces | S&B Golden Curry recommended |
| Chicken Thighs 🍗 | 1 ½ lb | Boneless, skinless, cut into bite-sized pieces |
| White Onion 🧅 | 1 whole | Thinly sliced for sweetness |
| Carrots 🥕 | 2 whole | Peeled and sliced into rounds |
| Potatoes 🥔 | 2 whole | Yukon Gold, peeled and cubed |
| Garlic Cloves 🧄 | 3 cloves | Minced for depth of flavor |
| Fresh Ginger Root 🌿 | 1 tbsp | Grated for freshness |
| Vegetable Oil 🫒 | 2 tbsp | Neutral oil for browning |
| Water 💧 | 4 cups | For simmering the curry |
| Japanese Short-Grain Rice 🍚 | 2 cups | Rinsed until water runs clear |
| Apple 🍏 | 1 whole | Grated for natural sweetness |
| Honey 🍯 | 1 tbsp | Balances savory flavors |
| Soy Sauce 🫙 | 1 tbsp | Low-sodium preferred for control |
The curry roux blocks are non-negotiable for authentic flavor. S&B Golden Curry (mild or medium) is the standard at Asian grocery stores and even some Walmart locations. For the meat, chicken thighs stay juicy through the long simmer—avoid breast, which dries out. Yukon Gold potatoes hold their shape better than russets. Fresh ginger makes a difference here (the jarred stuff lacks punch).
No chicken? Pork shoulder or beef chuck work beautifully—just extend the simmering time. Vegetarian? Swap in tofu or chickpeas. Out of apples? A tablespoon of sugar mimics the sweetness. For extra richness, add a spoonful of tonkatsu sauce if you have it. The rice must be short-grain—jasmine won’t absorb the sauce the same way.
Curry tastes even better the next day once flavors meld. Stores in the fridge for 4-5 days or freezes for 3 months. Reheat gently with a splash of water to thin the sauce. Cooked rice keeps 2-3 days but is best fresh.
Why You’ll Love This Recipe
- One Pot Wonder: I just toss the chicken, onions, carrots, and potatoes in a pot with the curry roux—minimal prep, maximum flavor.
- Rich Comfort: That deep, savory-sweet taste from the roux with tender chicken thighs is pure warmth in a bowl.
- Meal Prep Magic: Makes plenty, and honestly, it tastes even better the next day for lunch.
- Budget Friendly: Chicken thighs and humble veggies stretch far, feeding my family without breaking the bank.
Step-by-Step Instructions for Japanese Style Curry Rice
This method ensures a rich, velvety sauce and perfectly cooked rice to soak up every savory bite.
Step 1: Prepare the Rice Base
Rinse the 2 cups Japanese short-grain rice under cold water until the water runs clear. This removes excess starch and prevents gummy rice. Use a fine-mesh strainer for best results, swirling the rice with your hand to ensure thorough rinsing.
Combine the rinsed rice with 4 cups water in a medium saucepan. Bring to a boil over high heat, then reduce to low, cover, and simmer for 15 minutes. Remove from heat and let it rest, covered, for another 10 minutes to absorb all moisture.
Step 2: Brown the Protein and Aromatics
While the rice cooks, heat the 2 tbsp vegetable oil in a large pot or Dutch oven over medium-high heat. Add the 1.5 lb chicken thighs and sear for 5-6 minutes until lightly browned on all sides. The chicken doesn’t need to cook through at this stage—just develop color.
Add the 1 whole white onion, 3 cloves garlic cloves, and 1 tbsp fresh ginger root, stirring for 2-3 minutes until the onion softens and becomes translucent. The aroma should be fragrant and inviting, with the ginger and garlic releasing their essential oils.
Step 3: Build the Curry Foundation
Stir in the 2 whole carrots, 2 whole potatoes, 1 whole apple, 1 tbsp honey, and 1 tbsp soy sauce. Pour in the 4 cups water and bring to a boil over high heat. Reduce to medium-low and let it simmer for 10 minutes until the vegetables begin to soften.
The apple adds natural sweetness to balance the savory notes, while the honey and soy sauce deepen the umami profile. The potatoes should be slightly tender but still hold their shape when pierced with a fork.
Step 4: Finish with Roux and Simmer
Break the 4 pieces Japanese curry roux blocks into the pot and stir until fully dissolved. This will thicken the sauce almost immediately, coating the chicken and vegetables in a glossy, rich layer. Simmer for another 10-12 minutes over low heat, stirring occasionally to prevent sticking.
The sauce should thicken to a consistency that clings to the back of a spoon. The chicken thighs should be fork-tender, and the carrots and potatoes should be soft but not mushy. Taste and adjust seasoning if needed, though the roux typically provides balanced flavor.
Step 5: Serve Over Rice and Enjoy
Spoon the hot curry generously over the prepared rice, ensuring each serving gets a mix of chicken, vegetables, and plenty of sauce. The rice should be fluffy and slightly sticky, ready to soak up the rich, velvety curry.
Let the dish sit for 2-3 minutes before serving to allow the flavors to meld. The curry should be thick enough to coat the rice without being overly heavy. Serve immediately for the best texture and warmth.
Pro Tips For Making Japanese Style Curry Rice
- Brown the Meat: Sear the chicken thighs until deeply golden before adding veggies—I learned this the hard way after my early curries tasted flat from underdeveloped flavor.
- Cut Evenly: Chop carrots and potatoes into similar-sized pieces, about 1-inch cubes, so everything cooks through at the same time without mushy bits or hard centers.
- Skip the Peeling: Leave the potato skins on for texture and nutrients, but give them a good scrub first—saves time and adds a nice rustic bite to the curry.
- Bloom the Roux: Crumble the curry roux blocks into the simmering broth and let them dissolve fully for 2-3 minutes, stirring constantly, to avoid lumpy sauce.
Common Mistakes When Making Perfect Results
Skipping the Rinse
Never skip rinsing the 2 cups Japanese short-grain rice—unrinsed rice releases excess starch, creating a gummy texture instead of the fluffy, separate grains you want. I use a fine-mesh strainer and swirl the rice with my hand until the water runs completely clear, which usually takes 3-4 rinses. 💡
Overcrowding the Pot
Using a pot that’s too small causes uneven cooking and makes stirring difficult. A 5-6 quart Dutch oven is ideal for this recipe. The chicken and vegetables need room to cook evenly without steaming each other. I learned this the hard way with unevenly cooked potatoes.
Under-Simmering the Roux
Adding the 4 pieces Japanese curry roux blocks too late or not simmering long enough results in a thin, watery sauce. The roux needs 10-12 minutes of simmering after dissolving to reach the perfect velvety consistency. Stir frequently to prevent sticking at the bottom.
Using Wrong Potatoes
Russet potatoes fall apart in curry—their high starch content turns them mushy. Stick with Yukon Gold potatoes as specified; their medium starch holds shape while still absorbing flavors. Cut them into 1.5-inch cubes so they cook through without breaking down. 🥔
Skipping the Apple
The 1 whole grated apple isn’t just for sweetness—it adds natural pectin that helps thicken the sauce. Without it, your curry might taste flat or one-dimensional. I tried omitting it once and the flavor depth suffered noticeably.
Rushing the Rest
Let the finished curry rest off heat for 5-10 minutes before serving. This allows the sauce to thicken further and the flavors to meld completely. The rice also needs its 10-minute rest after cooking to achieve the perfect texture for soaking up that rich sauce.
Nutrition Facts
Frequently Asked Questions
Can I use a different protein?
Pork shoulder or beef chuck work equally well. Just extend the simmering time to 20-25 minutes for tenderness. For a vegetarian option, tofu or chickpeas are great substitutes.
Why do I need to add an apple?
The apple adds natural sweetness and pectin, which helps thicken the sauce. It balances the savory flavors perfectly. If you don’t have one, use 1 tablespoon sugar instead.
Can I prepare this ahead of time?
Yes! The curry actually tastes better the next day as the flavors meld. It keeps in the fridge for 4-5 days or can be frozen for up to 3 months.
What kind of rice should I use?
Stick with Japanese short-grain rice for the best texture. It’s sticky enough to soak up the rich sauce beautifully. Avoid jasmine or basmati—they won’t hold the curry as well.

- Mujadara Rice and Lentils Recipe: Earthy Spiced Lentils With Caramelized Onions - November 1, 2026
- Naija Fried Rice Recipe: Street-Style Spice With Veggie Crunch - November 1, 2026
- Mushy Rice Recipe: Fluffy Grains Transformed in Minutes - November 1, 2026