
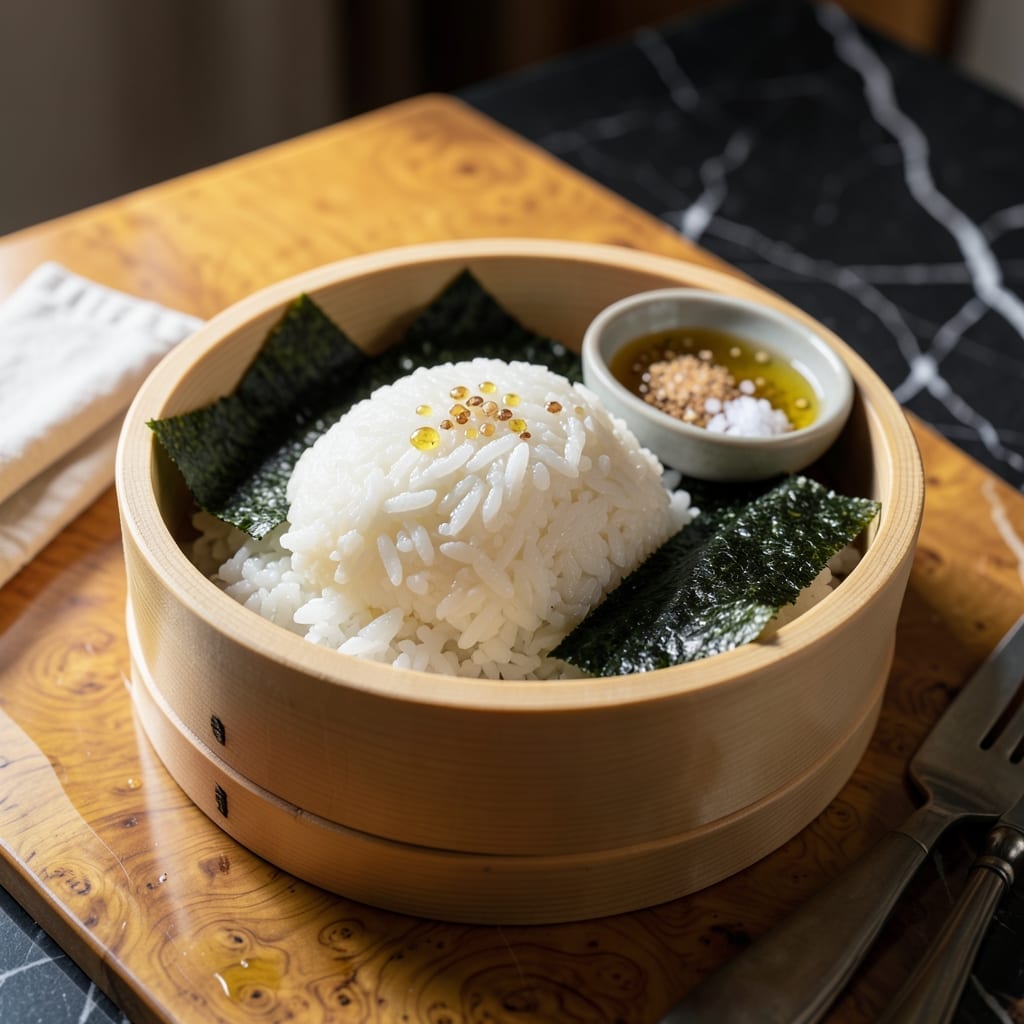
Achieving perfect sushi rice at home is a game of precision and patience. The foundation of great sushi lies in properly rinsed short-grain rice cooked to just the right texture before seasoning with the classic vinegar-sugar-salt blend.
I’ve refined this method over years of trial, focusing on the exact water ratio and cooking time to ensure each grain stays distinct yet sticky enough to hold together. The vinegar mixture, added while the rice is still warm, gives it that signature glossy finish.
This rice becomes the ideal base for rolls, nigiri, or hand-pressed sushi, pairing beautifully with fresh seafood or crisp vegetables. Its balance of sweetness and acidity complements without overpowering any filling you choose.
Master this step, and you’re already halfway to restaurant-quality sushi in your own kitchen.
Ingredients for Japanese Sushi Rice
Short-grain rice plus a few pantry staples transform into that glossy, vinegared perfection.
| Ingredient | Amount | Notes |
|---|---|---|
| Japanese Short-Grain Rice 🍚 | 2 cups | Sushi-grade, rinsed thoroughly |
| Water 💧 | 2 ½ cups | Filtered or spring water preferred |
| Rice Vinegar 🍶 | ½ cup | Seasoned sushi vinegar ideal |
| Granulated Sugar 🍚 | 2 tbsp | Dissolved in vinegar mixture |
| Kosher Salt 🧂 | 1 tsp | Diamond Crystal preferred |
| Nori Sheets 🌿 | 4 sheets | For rolls or garnish |
| Mirin 🍶 | 2 tbsp | Optional for extra sweetness |
| Fresh Sake 🍶 | 1 tbsp | Optional, for depth of flavor |
| Sesame Seeds 🌰 | 1 tsp | Toasted, for garnish |
| White Sesame Seeds 🌰 | 1 tsp | Untasted, for texture contrast |
The rice is non-negotiable—Japanese short-grain (like Koshihikari or Nishiki) is what you need. Asian markets or Whole Foods carry it, but check the label for sushi-grade. Rinsing removes excess starch (do it until the water runs clear). For the vinegar, Mitsukan seasoned sushi vinegar saves time, but plain rice vinegar works with added sugar and salt. Don’t skip the rinsing—this is where the magic starts.
Out of rice vinegar? Apple cider vinegar in a pinch (but expect a milder taste). Mirin can be swapped with 1 tbsp sugar + 1 tbsp water. No sake? Skip it—won’t make or break. For extra shine, add a splash of lemon juice to the vinegar mix. The nori sheets? Any brand works, but Nori Komi is a solid pick for consistent quality.
Cooked rice stays fresh at room temp for 2 hours (perfect for sushi night). Store leftovers in an airtight container for up to 3 days, but it’s best used fresh. Freeze portions for up to 1 month—thaw at room temp before using. Warm rice soaks up the vinegar mix better, so don’t let it cool completely before seasoning.
Why You’ll Love This Recipe
- One-Pot Wonder: I just rinse, cook, and mix—no fancy gadgets, just my rice cooker and a bowl.
- Sticky, Sweet Magic: The rice vinegar and sugar hit that perfect balance of tangy and sweet every time.
- Rolls or Bowls: Honestly, I use it for sushi rolls one night and grain bowls the next.
- Stretches Far: A big batch costs pennies and keeps well for days in the fridge.
Step-by-Step Instructions for Japanese Sushi Rice
This method delivers perfectly seasoned, sticky rice every time for your rolls.
Step 1: Rinse and Cook the Rice
Place the 2 cups Japanese Short-Grain Rice in a fine-mesh strainer and rinse under cold running water. I scrub the grains gently between my fingers until the water runs clear—this removes excess starch that would make the rice gummy rather than perfectly sticky.
Combine the rinsed rice with the 2.5 cups Water in a rice cooker or heavy pot. Cook according to your rice cooker’s instructions or bring to a boil, then reduce to a simmer, cover, and cook for 15-20 minutes until all water is absorbed and the rice is tender.
The rice should be glossy and just tender with no crunch in the center. Let it sit covered for 10 minutes off heat to steam and finish cooking.
Step 2: Prepare the Vinegar Seasoning
While the rice cooks, combine the 0.5 cup Rice Vinegar, 2 tbsp Granulated Sugar, and 1 tsp Kosher Salt in a small saucepan. I add the 2 tbsp Mirin and 1 tbsp Fresh Sake here too for extra depth—they’re optional but highly recommended.
Heat over medium-low just until the sugar and salt dissolve completely, about 2-3 minutes. Don’t let it boil—you want to preserve the delicate flavors. The mixture should be clear with no visible grains of sugar or salt.
Remove from heat and let cool to room temperature. This seasoning is what gives sushi rice its signature tangy-sweet flavor that balances perfectly with fish and other fillings.
Step 3: Season the Cooked Rice
Transfer the warm rice to a large wooden or glass bowl. Using a rice paddle or silicone spatula, gently fold in the cooled vinegar mixture. I pour it over the rice in a thin stream while folding with a cutting motion—this prevents crushing the grains.
The rice should become glossy and slightly sticky, with each grain distinct yet clinging together. Be gentle but thorough, ensuring every grain gets coated. You’ll notice the rice takes on a beautiful sheen as the seasoning absorbs.
A wooden hangiri (sushi rice tub) is traditional, but any wide, shallow bowl works. Fan the rice with a piece of cardboard or a handheld fan as you fold to cool it quickly and give it that signature gloss.
Step 4: Rest and Prepare for Use
Once seasoned and cooled to body temperature, cover the rice with a damp towel to prevent drying. Let it rest for 10-15 minutes before using. This resting period allows the flavors to meld and the rice to achieve the perfect sticky consistency.
Moisten your hands with water before handling to prevent sticking. The rice should hold its shape when pressed but separate easily when needed. I always keep a bowl of water nearby to rewet my hands as I work.
For presentation, sprinkle with the 1 tsp Sesame Seeds and 1 tsp White Sesame Seeds just before serving or rolling. The contrast of toasted and untoasted seeds adds visual appeal and a subtle texture variation.
Pro Tips For Making Japanese Sushi Rice
- Rinse Thoroughly: Wash the rice in 3-4 changes of cold water until it runs clear—I learned this the hard way after my first batch turned out gummy from leftover starch.
- Use Exact Water Ratio: Measure 1:1 rice to water by volume, but reduce by 1 tablespoon per cup for perfect stickiness. My grandmother swore by this, and she was right.
- Cool Before Seasoning: Spread the cooked rice on a wooden tray and fan it while folding in the vinegar mix—sounds weird, but it works to get that glossy finish.
- Skip The Metal Bowl: Mix the seasoning in a glass or wooden bowl to avoid reactions with the vinegar that can alter the flavor. I was skeptical until I tried it.
Health Benefits of This Recipe
Low-Calorie Base
A 1-cup serving of this dish contains only about 240 calories, making it a light foundation for your sushi creations. The vinegar seasoning adds minimal calories while delivering maximum flavor. I love that it lets the fresh ingredients shine without weighing them down. 💪
Complex Carbs Energy
The short-grain rice provides 45g of complex carbohydrates per serving, offering steady energy release. This makes it perfect for fueling active days. The sticky texture comes from amylose and amylopectin, which also contribute to that satisfying chew.
Low in Fat
With virtually 0g of fat, this is a heart-healthy choice for anyone watching their fat intake. The seasoning relies on vinegar, sugar, and salt rather than oils. I appreciate how it keeps meals light yet filling when paired with vegetables or lean proteins.
Essential Minerals
Each serving delivers 2% of your daily iron and 3% of magnesium needs. While not a major source, every bit counts toward your daily requirements. The rice also provides small amounts of potassium and zinc for overall wellness. ✨
Gluten-Free Goodness
Naturally gluten-free and safe for most dietary restrictions, this becomes a versatile base for various dishes. I’ve served it to friends with celiac disease without any concerns. Just ensure your vinegar and other ingredients are certified gluten-free.
Probiotic Potential
The rice vinegar may contain trace amounts of beneficial bacteria from fermentation. While not a probiotic powerhouse, every little bit supports gut health. I notice my digestion feels smoother when I include vinegar-seasoned dishes regularly.
Nutrition Facts
Frequently Asked Questions
Why do I need to rinse the rice so thoroughly?
Rinsing removes excess starch that would make the rice gummy instead of perfectly sticky. Stop when the water runs completely clear for best texture.
Can I use a different type of rice?
Only Japanese short-grain works for authentic sushi rice. Long-grain or jasmine rice won’t achieve the right stickiness or texture.
How long can I keep prepared sushi rice?
Use within 2 hours at room temperature or store in an airtight container for up to 3 days. Freeze portions for up to 1 month.
What’s the best way to cool the rice quickly?
Transfer to a wide bowl and fan while folding with a cutting motion. This gives it that signature gloss and prevents clumping.

- Mujadara Rice and Lentils Recipe: Earthy Spiced Lentils With Caramelized Onions - November 1, 2026
- Naija Fried Rice Recipe: Street-Style Spice With Veggie Crunch - November 1, 2026
- Mushy Rice Recipe: Fluffy Grains Transformed in Minutes - November 1, 2026