
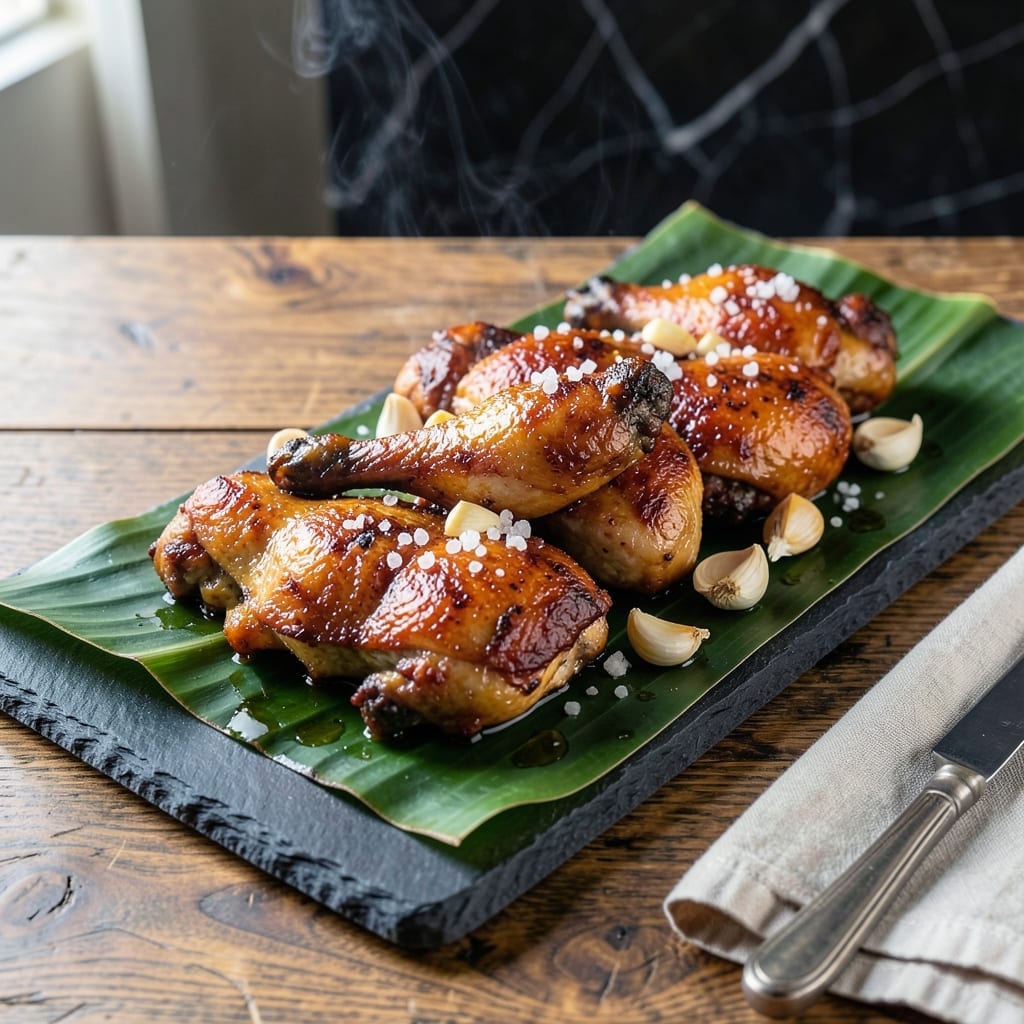
This recipe brings authentic Hawaiian kalua flavor to your kitchen without the need for a traditional imu oven. Slow-cooked to perfection, it delivers the same smoky tenderness that defines this island classic.
The secret lies in a simple yet effective method: using a slow cooker to mimic the long, gentle cooking process. With just a few ingredients and minimal prep, you can achieve rich, fall-off-the-bone results that taste like they came straight from Hawaii.
What you’ll get is juicy, flavorful chicken infused with the deep, smoky notes characteristic of kalua cooking. The meat becomes so tender it practically shreds itself, making it perfect for tacos, bowls, or serving over rice.
No special equipment required—just time and a willingness to let the slow cooker do the work. The result is a dish that captures the spirit of Hawaii in every bite.
Ingredients for Kalua Chicken
Simple ingredients deliver authentic island flavor with minimal prep and maximum tenderness.
| Ingredient | Amount | Notes |
|---|---|---|
| Chicken Thighs 🍗 | 2 ½ lb | Boneless, skinless preferred |
| Hawaiian Sea Salt 🧂 | 1 tbsp | Coarse grain, or kosher salt |
| Liquid Smoke 💨 | 1 tbsp | Hickory flavor preferred |
| Water 💧 | ½ cup | For slow cooker moisture |
| Banana Leaves 🍌 | 2 pieces | Optional, for authenticity |
| Garlic Cloves 🧄 | 4 cloves | Peeled and smashed |
| Ginger Root 🌿 | 1 whole | Peeled, sliced into coins |
| Green Onions 🧅 | 4 whole | Chopped for garnish |
| Soy Sauce 🫒 | 2 tbsp | Low-sodium for balance |
| Brown Sugar 🍚 | 1 tbsp | Light or dark variety |
| Black Pepper 🌶️ | ½ tsp | Freshly ground |
The chicken is everything here—thighs stay juicier than breasts through the long cook. I grab mine from Costco for consistent quality and size. Hawaiian sea salt (or Diamond Crystal kosher) gives that true island taste. Liquid smoke is non-negotiable for the smoky depth—Wright’s is the brand I see most often at regular grocery stores.
No banana leaves? Skip them—this works fine without. Out of liquid smoke? A teaspoon of smoked paprika in the water adds a hint of smoke, but it’s not the same. Soy sauce can be swapped for tamari (gluten-free) or coconut aminos. The brown sugar balances the saltiness, but honey or maple syrup works if that’s what you’ve got.
This tastes even better the next day. Store in the fridge for up to 4 days or freeze for 3 months. Shred the chicken before storing—makes reheating and using in other dishes a breeze.
Why You’ll Love This Recipe
- I’ll be real: it tastes even better the next day, and the thighs stay juicy for meal prep.
- Five Ingredient Magic: I love how this comes together with just chicken thighs, Hawaiian sea salt, liquid smoke, water, and banana leaves—no fancy prep or hard-to-find ingredients.
- Smoky Island Flavor: The liquid smoke and Hawaiian sea salt give it that authentic kalua taste, like a slow-roasted luau without the imu pit.
- Weeknight to Potluck: Honestly, it’s my go-to for busy evenings, but it also steals the show at gatherings.
Step-by-Step Instructions for Kalua Chicken
This method delivers authentic island flavor using simple techniques and a slow cooker.
Step 1: Prepare and Season the Chicken
Pat the 2.5 lb Chicken Thighs dry with paper towels to ensure even seasoning and better browning. Trim any excess fat if desired, though the skin-on variety adds richness. This step prevents steaming and helps the flavors penetrate deeply.
Rub the chicken thighs thoroughly with the 1 tbsp Hawaiian Sea Salt, 1 tbsp Liquid Smoke, 2 tbsp Soy Sauce, 1 tbsp Brown Sugar, and 0.5 tsp Black Pepper. Massage the mixture into every surface, ensuring full coverage for maximum flavor infusion.
Step 2: Add Aromatics and Moisture
Peel and smash the 4 cloves Garlic Cloves, then peel and slice the 1 whole Ginger Root into thin coins. Place these aromatics at the bottom of your slow cooker. These ingredients create a fragrant base that infuses the chicken as it cooks.
Pour in the 0.5 cup Water to provide the necessary moisture for slow cooking. The liquid helps distribute the flavors and prevents the chicken from drying out during the long cooking process.
Step 3: Layer with Banana Leaves and Cook
If using, line the slow cooker with the 2 pieces Banana Leaves for an authentic touch. Place the seasoned chicken thighs on top of the aromatics and banana leaves. The leaves add a subtle earthy note and help keep the chicken moist.
Cover and cook on low heat for 6-8 hours or on high heat for 3-4 hours. The chicken is done when it reaches an internal temperature of 165°F and the meat easily pulls away from the bone with a fork.
Step 4: Garnish and Serve
Chop the 4 whole Green Onions and sprinkle them over the finished chicken just before serving. The fresh, crisp green onions add a bright contrast to the rich, smoky flavors of the dish.
Remove the chicken from the slow cooker and serve it with some of the cooking liquid spooned over the top. The liquid can also be reduced on the stovetop for a thicker sauce if desired. This dish pairs perfectly with steamed rice and a side of tropical fruit.
Pro Tips For Making Kalua Chicken
- Use Thighs, Not Breasts: Chicken thighs stay juicy through the long, slow cook—breasts turn dry. I learned this the hard way after serving a batch that tasted like sawdust.
- Soak Banana Leaves: Run them under warm water for 2 minutes to soften before wrapping. Sounds weird, but it prevents tearing when you fold them around the chicken.
- Go Easy on Liquid Smoke: A teaspoon is plenty for 2 pounds of chicken—more than that and it tastes like a campfire swallowed your dinner. My grandmother swore by this, and she was right.
- Low and Slow Wins: Keep the heat at 300°F or lower and give it 3-4 hours. I was skeptical until I tried it, but rushing just gives you tough meat with a bitter edge.
Storing and Reheating Leftovers
Refrigerator Storage
Let your kalua chicken cool for no more than 2 hours before transferring to airtight containers. Store in the fridge at 40°F or below for up to 4 days. The flavors deepen as it rests, making leftovers taste even better. ❄️
Freezer Storage
For longer storage, freeze shredded chicken in flat freezer bags for up to 3 months. Portion into 1-2 cup servings for easy meal prep. Squeeze out excess air to prevent freezer burn, and label with the date for tracking.
Stovetop Reheating
My preferred method: warm in a skillet over medium-low heat with 2-3 tablespoons of the cooking liquid or water. Stir occasionally for 5-7 minutes until heated through. This keeps the meat moist and tender.
Microwave Reheating
Place desired portions in a microwave-safe dish, cover with a damp paper towel, and heat on 70% power for 2-3 minutes. Stir halfway through and check for 165°F internal temperature. Add a splash of water if needed.
Oven Reheating
Preheat oven to 300°F, place chicken in an oven-safe dish with a bit of liquid, and cover with foil. Heat for 15-20 minutes, stirring once, until warmed through. Ideal for larger batches.
Reheating Tip
Shredding before storing makes reheating faster and more even. I often prep a big batch for tacos, rice bowls, or sandwiches throughout the week. 💡
Nutrition Facts
Frequently Asked Questions
Can I use chicken breasts instead of thighs?
Thighs are ideal because they stay juicy during the long cook. If using breasts, reduce cooking time to 4-5 hours on low to prevent dryness. Adding extra liquid can help maintain moisture.
Is liquid smoke necessary?
It provides the signature smoky flavor, but you can substitute 1 teaspoon of smoked paprika in the cooking liquid. The taste won’t be identical, but it adds a similar depth.
Can I make this in an Instant Pot?
Yes! Cook on high pressure for 15 minutes with a 10-minute natural release. Use the same ingredients, but add 1 cup water to meet pressure requirements.
How do I know when it’s done?
The chicken should reach 165°F internally and pull apart easily with a fork. If it shreds without resistance, it’s ready to serve.

- Jollof Rice Sauce Recipe: West African Tomato and Spice Infusion - September 25, 2026
- Japanese Rice Soup Recipe: Umami-Rich Comfort in a Bowl - September 25, 2026
- Homemade Cream Of Rice Recipe: Silk-Smooth Breakfast in Minutes - September 25, 2026