
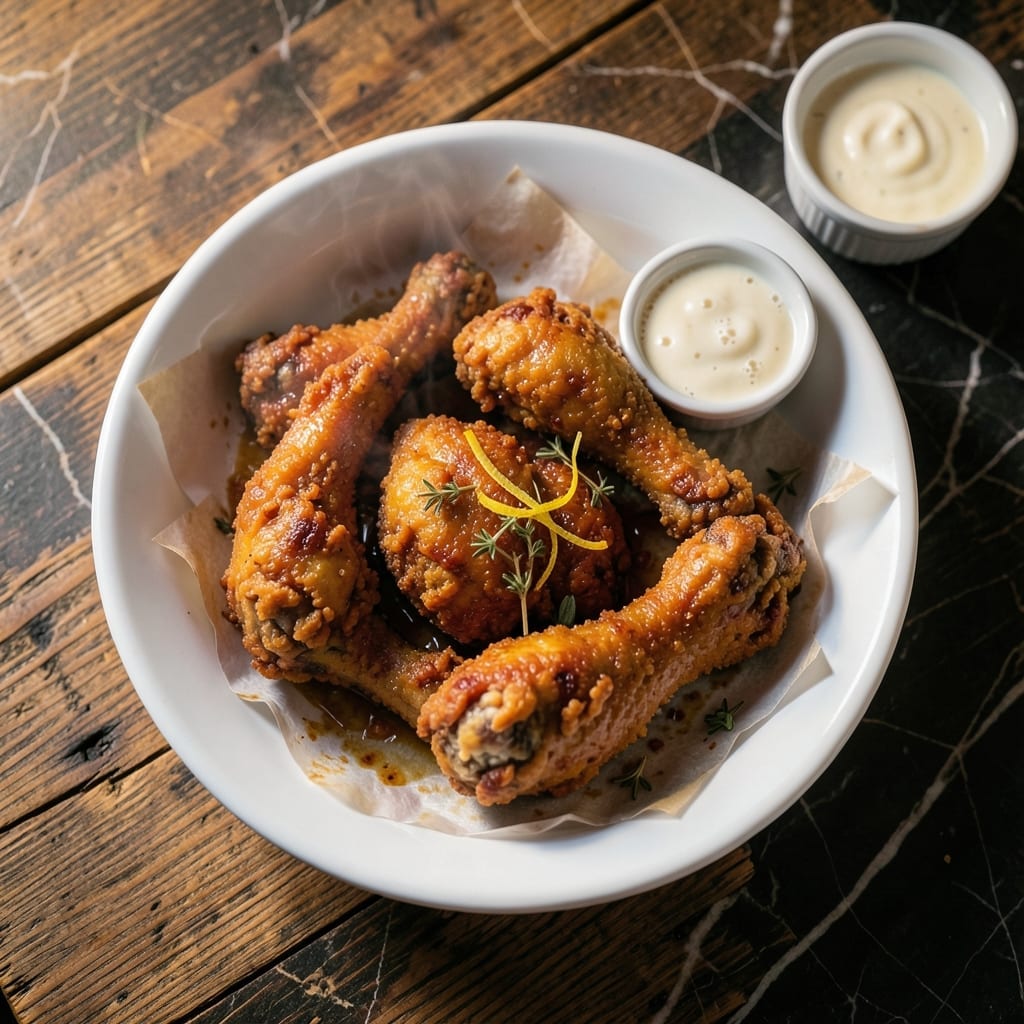
Achieving that signature crispy coating and juicy interior requires precision and the right spice blend. This method has been tested to deliver consistent, restaurant-quality results every time.
The 11-spice mix is the foundation, but the double-dredging technique ensures maximum crunch. Each piece gets a golden-brown crust that seals in moisture while creating that iconic texture.
Frying at the correct temperature is crucial—too low and the chicken absorbs oil, too high and the outside burns before the inside cooks. Maintain 350°F for perfect results.
What you’ll get is tender chicken with a shatteringly crisp exterior, seasoned just like the original. Serve hot for the best experience.
Ingredients for Kentucky Fried Chicken Original
Eleven spices, buttermilk wash, and double dredging create that iconic crispy coating and juicy interior.
| Ingredient | Amount | Notes |
|---|---|---|
| Chicken Thighs and Drumsticks 🍗 | 3 lb | Bone-in, skin-on for maximum flavor |
| All-Purpose Flour 🌾 | 2 cups | For initial dredging layer |
| Large Eggs 🥚 | 2 whole | Beaten for binding coating |
| Buttermilk 🥛 | 1 ½ cups | Full-fat for tenderizing chicken |
| White Pepper 🧂 | 1 tbsp | Fine ground for even distribution |
| Dried Thyme 🌿 | 1 tbsp | Rubbed between fingers to release oils |
| Dried Basil 🍃 | 1 tbsp | Crushed lightly before adding |
| Dried Oregano 🍃 | 1 tbsp | Mediterranean variety preferred |
| Celery Salt 🧂 | 1 tbsp | Fine grain for uniform seasoning |
| Garlic Salt 🧄 | 1 tbsp | Balanced with the spice blend |
| Paprika 🌶️ | 1 tbsp | Sweet or smoked variety |
| Ground Ginger 🌿 | 1 tbsp | Freshly ground for potency |
| Black Pepper 🌶️ | 1 tbsp | Freshly cracked for best flavor |
| Salt 🧂 | 2 tbsp | Fine sea salt or kosher salt |
| MSG 🧂 | 1 tbsp | Optional but traditional for umami |
| Vegetable Shortening 🫒 | 2 cups | For deep frying at high temperature |
The chicken must be bone-in, skin-on for authentic texture and flavor. Thighs and drumsticks are traditional, though breasts work in a pinch (adjust cooking time). Look for pieces that are similar in size for even cooking. Costco and Sam’s Club offer excellent bulk options. The buttermilk is non-negotiable—full-fat ensures proper tenderizing and coating adhesion.
No buttermilk? Whole milk with 1 tbsp vinegar per cup works in an emergency. Missing a spice or two? The white pepper and celery salt are most critical—don’t skip those. For the MSG, Accent is the classic brand. The flour for dredging should be all-purpose; cake flour is too light. If avoiding MSG, increase the salt slightly, but know the flavor won’t be identical.
The spice blend keeps in an airtight container for 6-12 months, but the chicken is best fried fresh. Leftovers? They’ll keep in the fridge for 3-4 days, though the coating loses some crispness. Reheat in a 375°F oven on a wire rack to revive the crunch (skip the microwave).
Why You’ll Love This Recipe
- One Bowl Wonder: I mix the buttermilk, eggs, and flour right in the same dish—no extra bowls, no extra cleanup.
- That White Pepper Zing: The white pepper gives it that subtle, old-school kick you can’t quite place but can’t get enough of.
- Feeds the Gang: I’ve served this at birthdays, potlucks, and lazy Sundays—always disappears first.
- Dollar-Stretching Dinner: Thighs and drumsticks stay cheap, and one batch gives me leftovers for sandwiches the next day.
Step-by-Step Instructions for Kentucky Style Fried Chicken
Master the technique behind this iconic dish with my tested method for crispy, flavorful results.
Step 1: Prepare the Signature Spice Blend and Dredge
In a large bowl, whisk together the 2 cups All-Purpose Flour with 1 tbsp White Pepper, 1 tbsp Dried Thyme, 1 tbsp Dried Basil, 1 tbsp Dried Oregano, 1 tbsp Celery Salt, 1 tbsp Garlic Salt, 1 tbsp Paprika, 1 tbsp Ground Ginger, 1 tbsp Black Pepper, 2 tbsp Salt, and 1 tbsp MSG. The spices should be evenly distributed throughout the flour.
Pat the 3 lb Chicken Thighs and Drumsticks dry with paper towels. Dredge each piece thoroughly in the spiced flour, pressing gently to ensure full coverage. Shake off any excess—you want a thin, even coating that will crisp up beautifully during frying.
Step 2: Create the Wet Coating for Extra Crispiness
In a separate bowl, whisk the 2 whole Large Eggs with the 1.5 cups Buttermilk until fully combined. The mixture should be smooth with no streaks of egg white remaining. This buttermilk wash is the secret to tender, juicy meat beneath the crispy coating.
Dip each flour-dredged piece of chicken into the buttermilk mixture, allowing any excess to drip off. Return the chicken to the spiced flour and coat a second time. This double-dredging process creates the characteristic extra-crispy crust. Place the coated pieces on a wire rack to rest for 10 minutes.
Step 3: Heat the Frying Oil to Optimal Temperature
In a deep, heavy-bottomed pot or Dutch oven, melt the 2 cups Vegetable Shortening over medium heat until it reaches 350°F on a deep-fry thermometer. It’s crucial to use a thermometer—vegetable shortening has a high smoke point, but temperature accuracy ensures even cooking without burning.
Maintain the oil temperature between 340°F and 350°F throughout the frying process. If the oil smokes, it’s too hot; if it doesn’t bubble actively when chicken is added, it’s not hot enough. Regulate the heat as needed to keep it in this range.
Step 4: Fry the Chicken to Golden Perfection
Carefully lower 3-4 pieces of chicken into the hot oil at a time, being careful not to overcrowd the pot. Overcrowding reduces the oil temperature too much, resulting in greasy rather than crispy chicken. Fry the chicken for 12-15 minutes, turning occasionally, until all sides are deep golden brown.
The chicken is done when the internal temperature reaches 165°F and the coating is crisp and uniformly browned. Dark meat like thighs and drumsticks can safely reach 175°F for extra tenderness. Transfer the fried chicken to a wire rack set over a baking sheet to drain excess oil.
Step 5: Rest and Serve for Maximum Flavor
Allow the chicken to rest for 5-10 minutes before serving. This brief resting period lets the juices redistribute throughout the meat, ensuring each bite is moist and flavorful. The coating will also crisp up further as it cools slightly.
Serve hot with your favorite sides. The exterior should have an audible crunch when bitten into, while the interior remains succulent and seasoned throughout. The spices should be well-balanced, with no single flavor overpowering the others.
Pro Tips For Making Kentucky Fried Chicken Original
- Double Dip the Chicken: Soak the chicken in buttermilk for at least 4 hours, then dip in egg wash and flour twice for that extra crunchy crust.
- Heat the Oil Right: Use a deep fry thermometer to keep the oil at 350°F—too low and the chicken soaks up grease, too high and the outside burns before the inside cooks.
- Dry the Chicken First: Pat the chicken pieces completely dry before dredging in flour, or the coating won’t stick properly and you’ll end up with sad, patchy spots.
- Rest Before Frying: Let the floured chicken rest for 10-15 minutes before frying so the coating sets—this keeps it from sliding off into the oil.
Best Sauces and Condiments for This Dish
Classic Dipping Sauces
For that authentic experience, start with Hidden Valley Ranch—its creamy tang cuts through the richness perfectly. I also love Kraft Honey Mustard for a sweet-spicy contrast that complements the spice blend. These are non-negotiable for traditionalists. 💛
Spicy Kick Options
Add heat with Crystal Hot Sauce (the Colonel’s original choice) or Tabasco for a vinegary punch. Mix 2 tbsp hot sauce with ¼ cup mayonnaise for a quick spicy mayo. The acidity balances the fried coating beautifully.
Southern Style Gravies
For a heartier meal, serve with country gravy made from pan drippings. I whisk 2 tbsp flour into 2 cups milk and simmer until thickened. Pour it over mashed potatoes with your chicken for a true Southern feast.
Sweet and Tangy
Try Sweet Baby Ray’s BBQ Sauce for dipping—its smoky sweetness pairs surprisingly well. Or mix ½ cup ketchup with 2 tbsp apple cider vinegar and 1 tbsp brown sugar for a quick homemade version. 🔥
Fresh and Bright
A simple coleslaw with a vinegar-based dressing adds crunch and acidity. I use 1 cup shredded cabbage with 2 tbsp cider vinegar and 1 tsp sugar. The coolness contrasts the hot, crispy chicken perfectly.
Nutrition Facts
Frequently Asked Questions
Can I use chicken breasts instead of thighs and drumsticks?
Yes, but adjust cooking time to 10-12 minutes since breasts cook faster. They may be less juicy, so brine them first in saltwater for 30 minutes to help retain moisture.
What if I don’t have buttermilk?
Mix 1.5 cups whole milk with 1.5 tbsp vinegar or lemon juice. Let it sit for 5 minutes to curdle. This creates a perfect substitute with the same tang and tenderizing effect.
How do I keep the coating crispy after frying?
Drain on a wire rack, not paper towels, to prevent steam buildup. Keep finished pieces warm in a 200°F oven on the rack while frying the rest. This ensures maximum crunch.
Can I bake instead of fry?
Bake at 400°F on a wire rack for 35-40 minutes, flipping halfway. The texture won’t be identical, but you’ll still get great flavor. Spray with oil first for extra crispiness.

- Jollof Rice Sauce Recipe: West African Tomato and Spice Infusion - September 25, 2026
- Japanese Rice Soup Recipe: Umami-Rich Comfort in a Bowl - September 25, 2026
- Homemade Cream Of Rice Recipe: Silk-Smooth Breakfast in Minutes - September 25, 2026