
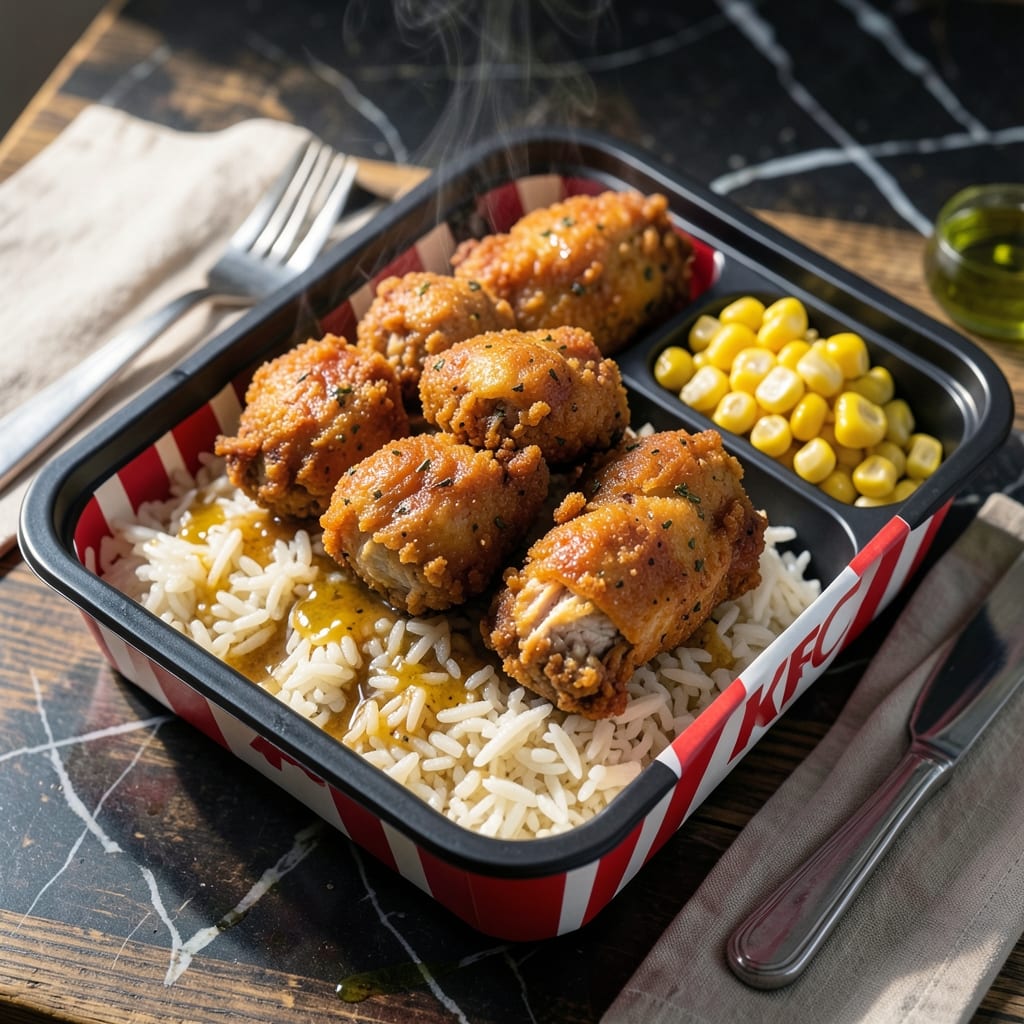
I recreated this fast-food favorite at home after too many drive-thru runs with Lily. Between you and me, my version tastes even better than the original.
This dish brings together tender chicken, fluffy rice, and all the classic sides in one convenient box. The secret is in the seasoning blend that mimics KFC’s famous recipe without the mystery ingredients.
You’ll get that same satisfying crunch and flavor combination that made the rice box a fast-food staple. Plus, you control the quality of every ingredient that goes into it.
No deep fryer needed—just a skillet and about 30 minutes to recreate this takeout classic in your own kitchen.
Ingredients for Kfc Original Recipe Rice Box
Pantry staples plus a few fresh picks. Everything you need for that signature crunch and flavor.
| Ingredient | Amount | Notes |
|---|---|---|
| Boneless Skinless Chicken Thighs 🍗 | 1 ½ lb | Cut into bite-sized pieces |
| Long-Grain White Rice 🍚 | 2 cups | Uncooked, rinsed before use |
| Chicken Broth 🍲 | 3 cups | Low-sodium preferred |
| All-Purpose Flour 🌾 | 1 cup | For dredging chicken |
| Large Eggs 🥚 | 2 whole | Beaten for egg wash |
| Buttermilk 🥛 | ½ cup | Full-fat for richness |
| Vegetable Oil 🫒 | ½ cup | For pan-frying chicken |
| KFC-Style Seasoning Blend 🌶️ | 2 tbsp | Homemade or store-bought |
| Cornstarch 🌾 | 2 tbsp | For extra crispiness |
| Green Beans 🥬 | 1 lb | Fresh or frozen, trimmed |
| Carrots 🥕 | 2 whole | Peeled and diced |
| Butter 🧈 | 2 tbsp | Unsalted for seasoning rice |
| Salt 🧂 | 1 tsp | Adjust to taste |
| Black Pepper 🌶️ | ½ tsp | Freshly ground preferred |
| Garlic Powder 🧄 | 1 tsp | For seasoning rice |
The chicken is the star here. Thighs stay juicier than breasts—look for skinless, boneless at any major grocery store. I grab mine from Costco in bulk and freeze portions. The rice should be long-grain white for that fluffy texture (jasmine works too, but it’s slightly stickier). For the seasoning blend, Penzeys has a solid KFC-style mix, but making your own is worth it (and cheaper).
No buttermilk? Whole milk plus a tablespoon of vinegar gets you close. Fresh chicken out of the question? Chicken tenders work in a pinch—just adjust cooking time. The green beans can be swapped for broccoli or peas (frozen is fine). If you’re skipping the cornstarch, the chicken won’t be as crispy, but it’ll still taste great. For the rice, basmati works too—just check the cooking time.
Leftovers keep 3-4 days in the fridge—reheat the chicken in the oven to keep it crispy. The rice and sides can go in the microwave. Freezing isn’t ideal for the chicken (it’ll lose that crunch), but you can freeze the cooked rice for up to 3 months.
Why You’ll Love This Recipe
- One Pan Wonder: I love that everything cooks together—chicken thighs crisping up while the rice soaks up all that savory broth.
- That KFC Crunch: The flour and egg coating gives the chicken that signature crispy bite, and it pairs so well with the fluffy rice.
- Weeknight Lifesaver: Honestly, it’s my go-to for busy evenings when I need something hearty without a ton of cleanup.
- Budget Stretcher: Between us, this feeds my family for two meals, and the ingredients are all pantry staples.
Step-by-Step Instructions for KFC-Style Chicken and Rice Box
Here’s how I recreate that signature fast-food magic in my own kitchen, faster than you think.
Step 1: Prep and Season the Chicken
Cut the 1.5 lb boneless skinless chicken thighs into bite-sized pieces. I like to trim any excess fat first for even cooking. This size ensures quick cooking and maximum crispy surface area.
In a large bowl, whisk together the 1 cup all-purpose flour, 2 tbsp KFC-style seasoning blend, 2 tbsp cornstarch, 1 tsp salt, and 0.5 tsp black pepper. The cornstarch is the secret to that extra-crispy coating. Toss the chicken pieces in this mixture until fully coated, pressing gently so the flour adheres well.
In a separate bowl, beat the 2 whole large eggs with the 0.5 cup buttermilk until smooth. Dip each floured chicken piece into this egg wash, letting any excess drip off. This double-dredging method creates that thick, craggy crust that’s impossible to resist.
Step 2: Pan-Fry the Chicken to Golden Perfection
Heat the 0.5 cup vegetable oil in a large skillet over medium-high heat until it shimmers—this is critical for proper frying. The oil should be about ½-inch deep to partially submerge the chicken pieces.
Working in batches to avoid crowding, carefully add the chicken to the hot oil. Fry for 4-5 minutes per side until deep golden brown and crispy. You’ll know it’s ready to flip when the coating turns opaque and starts to pull away from the edges.
Transfer the cooked chicken to a paper towel-lined plate to drain. The coating should be so crispy that it audibly crunches when you bite into it. Keep the chicken warm while you finish the rest.
Step 3: Cook the Rice and Vegetables
Rinse the 2 cups long-grain white rice under cold water until the water runs clear. This removes excess starch and prevents gummy rice. In a medium pot, combine the rinsed rice, 3 cups chicken broth, 2 tbsp butter, and 1 tsp garlic powder.
Bring to a boil over high heat, then reduce to low, cover, and simmer for 15-18 minutes until the liquid is absorbed and the rice is tender. Don’t peek during cooking—steam is what makes the rice fluffy. Once done, fluff with a fork and let it sit covered for 5 minutes.
While the rice cooks, steam the 1 lb green beans and diced carrots for 5-7 minutes until tender-crisp. I use a microwave steamer bag for speed, but a stovetop steamer works too. They should retain some bite—nobody likes mushy vegetables.
Step 4: Assemble and Serve
To serve, divide the fluffy rice among four plates. Arrange the crispy chicken pieces on one side and the steamed vegetables on the other. The contrast of textures is what makes this dish so satisfying—the crunch of the chicken against the soft rice and tender vegetables.
I like to drizzle any leftover pan drippings over the chicken for extra flavor. The rice should be fragrant with garlic, and the vegetables should still have a vibrant color. Serve immediately while everything is hot—the chicken loses its crispness as it sits.
Pro Tips For Making Kfc Original Recipe Rice Box
- Double fry the chicken: After the first fry at 325°F, rest the chicken 5 minutes then fry again at 375°F for that signature KFC crunch—I learned this the hard way when my first batch was soggy.
- Rinse the rice: Wash the long-grain white rice until the water runs clear to remove excess starch, which guarantees fluffy grains that don’t clump together in the box.
- Skip cold chicken: Let the boneless thighs sit at room temperature for 15 minutes before frying, or the coating will burn before the meat cooks through—after ruining two batches, I finally got this right.
- Use starchy broth: Stir 2 tablespoons of the rice’s cooking liquid into the chicken broth for the rice; it adds body and binds the flavors like the real deal.
Essential Equipment for Great kfc original recipe rice box
Skillet Selection
I always use my 12-inch cast iron skillet for the chicken—it retains heat beautifully and gives that even golden-brown crust. A Lodge skillet is my go-to brand, but any heavy-bottomed pan works. Avoid nonstick for this; you need the high heat tolerance. 🔥
Frying Thermometer
A candy thermometer clipped to the pan ensures your oil stays at the perfect 350-375°F for crispy, not greasy, chicken. I use a Taylor Precision model that’s easy to read and clean. Guessing the temp always leads to uneven cooking.
Rice Cooker Hack
While not essential, my Zojirushi rice cooker takes the guesswork out of perfect rice every time. If you’re cooking rice often, it’s worth the investment. For this recipe, a heavy pot with a tight lid works just as well if you monitor the heat.
Steamer Basket
A collapsible stainless steel steamer basket fits perfectly in my saucepan for the veggies. I love the OXO Good Grips version—it’s durable and has foldable handles. A microwave steamer bag works in a pinch, but stovetop gives better texture control.
Tongs for Turning
Use 12-inch locking tongs to flip the chicken safely. I swear by OXO’s spring-loaded design—it gives a firm grip without squishing the coating. Avoid forks, which can pierce the crust and let juices escape.
Paper Towel Setup
Have a wire rack set over a paper towel-lined tray ready for draining. This keeps the chicken crispy on all sides instead of soggy on the bottom. I repurpose my cooling racks from baking for this step.
Nutrition Facts
Frequently Asked Questions
Can I use chicken breasts instead of thighs?
Yes, but thighs stay juicier. If using breasts, reduce frying time to 3-4 minutes per side to prevent dryness. The coating will still get crispy.
What if I don’t have buttermilk?
Mix ½ cup whole milk with 1 tbsp vinegar or lemon juice. Let it sit for 5 minutes to curdle. This works just as well for dredging.
Can I bake the chicken instead?
Bake at 400°F for 15-20 minutes on a wire rack. It won’t be as crispy as pan-frying, but it’s a healthier option. Flip halfway for even browning.
How do I keep the chicken crispy for leftovers?
Reheat in a 375°F oven for 10 minutes on a wire rack. Microwaving makes it soggy. Store chicken separately from the rice to maintain texture.

- Jollof Rice Sauce Recipe: West African Tomato and Spice Infusion - September 25, 2026
- Japanese Rice Soup Recipe: Umami-Rich Comfort in a Bowl - September 25, 2026
- Homemade Cream Of Rice Recipe: Silk-Smooth Breakfast in Minutes - September 25, 2026