
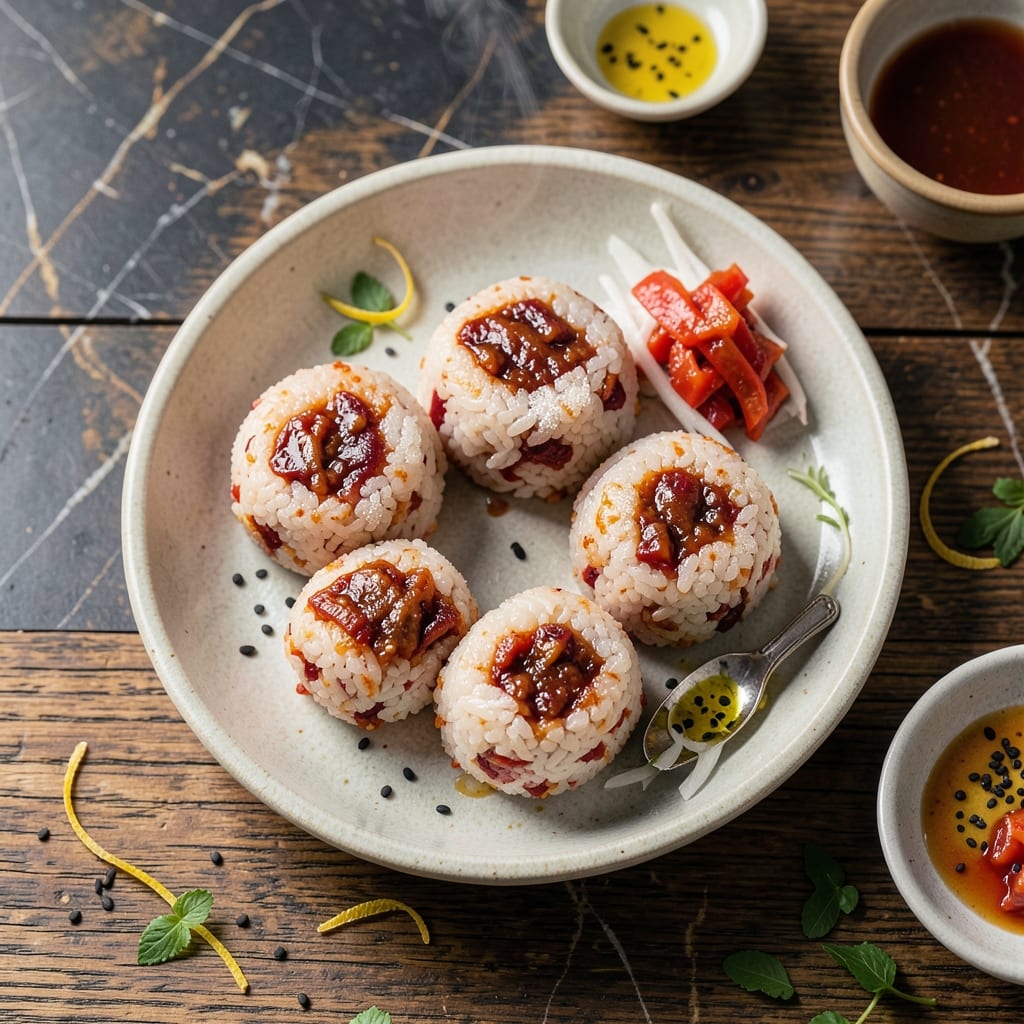
These spicy fermented rice balls deliver a satisfying crunch with every bite. The combination of tangy kimchi and sticky rice creates a flavor explosion that works as a snack or side dish.
The secret is using well-fermented kimchi for maximum flavor and baking at high heat to achieve that crispy exterior. A light coating of oil ensures even browning without making them greasy.
You’ll end up with golden, crispy balls that stay together perfectly, revealing pockets of spicy kimchi inside. They’re ideal for parties or meal prep, holding their texture even when served at room temperature.
Pair with dipping sauces or enjoy them plain for a simple yet impressive dish. Here’s how to make these addictive bites.
Ingredients for Kimchi Rice Balls
Simple ingredients for crispy, flavor-packed kimchi rice balls everyone will love.
| Ingredient | Amount | Notes |
|---|---|---|
| Sushi Rice 🍚 | 2 cups | Uncooked, short-grain preferred |
| Kimchi 🥬 | 1 cup | Well-fermented, chopped finely |
| Neutral Oil 🫒 | 2 tbsp | For brushing rice balls |
| Sesame Oil 🫒 | 1 tsp | For extra flavor in rice |
| Rice Vinegar 💧 | 1 tbsp | Adds tang to rice mix |
| Sugar 🍚 | ½ tsp | Balances kimchi acidity |
| Salt 🧂 | ½ tsp | Kosher or sea salt |
| Green Onions 🧅 | 3 whole | Thinly sliced for garnish |
| Sesame Seeds 🌾 | 1 tbsp | Toasted, for topping |
| Garlic Cloves 🧄 | 2 cloves | Minced, optional for rice |
| Gochujang 🌶️ | 1 tsp | Korean chili paste, optional |
| Cornstarch 🌾 | 2 tbsp | Helps bind rice mixture |
The kimchi is non-negotiable here—look for well-fermented, tangy napa cabbage kimchi (the kind in the refrigerated section, not shelf-stable). H Mart or Korean markets have the best selection, but most Whole Foods carry solid options too. Sushi rice (short-grain) is key for that sticky texture that holds together. Skip the jasmine or basmati—they’ll fall apart. If your kimchi isn’t sour enough, let it sit out for an hour to develop more funk.
No sushi rice? Arborio or calrose work in a pinch (just a tad less sticky). Out of kimchi? Sauerkraut plus a dash of sriracha mimics the tang and heat. Want extra crunch? Add panko breadcrumbs to the rice mix. The gochujang is optional but adds depth—find it at Trader Joe’s or Asian grocery stores. For gluten-free, swap the cornstarch for tapioca starch.
Rice balls keep well in the fridge for 3-4 days in an airtight container. Reheat in a toaster oven or air fryer to restore crispiness—microwaving makes them soggy. They’re also freezer-friendly for up to 2 months (thaw before reheating). Perfect for meal prep or party trays.
Why You’ll Love This Recipe
- Minimal Effort: I just mix cooked sushi rice with kimchi, shape, and pan-fry—no fancy techniques.
- Flavor Bomb: The tangy kimchi and nutty sesame oil make every bite ridiculously good.
- Lunchbox Hero: These stay fresh for days, so I pack them for work or picnics.
- Budget Friendly: Honestly, sushi rice and kimchi stretch further than you’d think for pennies per serving.
Step-by-Step Instructions for Kimchi Rice Balls
Here’s how to make these crispy, flavorful bites with the perfect texture every time.
Step 1: Cook and Season the Sushi Rice
Cook the 2 cups Sushi Rice according to package instructions, then let it cool slightly. While still warm, transfer it to a large bowl and add the 1 cup Kimchi, 1 tbsp Rice Vinegar, 1 tsp Sesame Oil, 0.5 tsp Sugar, and 0.5 tsp Salt.
Gently fold everything together until the kimchi is evenly distributed and the rice is well-coated. If using, stir in the 1 tsp Gochujang and minced 2 cloves Garlic Cloves for extra depth of flavor. The rice should be sticky but not mushy—this consistency is key for shaping the balls.
Step 2: Bind and Shape the Rice Balls
Sprinkle the 2 tbsp Cornstarch over the rice mixture and fold it in. The cornstarch helps absorb excess moisture and gives the balls a firmer texture. Let the mixture sit for 5 minutes to allow the starch to work its magic.
Using your hands (lightly dampened to prevent sticking), shape the mixture into 12-16 evenly sized balls, about the size of a golf ball. Press firmly but gently—you want them to hold together without being too dense. If the mixture feels too wet, add a little more cornstarch, 1 tsp at a time.
Step 3: Chill for Firmness
Place the shaped rice balls on a parchment-lined tray and refrigerate for 20-30 minutes. This step is crucial—it firms up the balls so they hold their shape during frying. Without chilling, they might fall apart in the hot oil.
While they chill, thinly slice the 3 whole Green Onions and set them aside for garnish. If you haven’t already, toast the 1 tbsp Sesame Seeds in a dry pan over low heat for 1-2 minutes until golden and fragrant, then set aside.
Step 4: Fry to Crispy Perfection
Heat the 2 tbsp Neutral Oil in a large skillet over medium-high heat until shimmering. Add the rice balls in a single layer, working in batches if needed to avoid crowding. Fry for 3-4 minutes per side until golden brown and crispy.
Turn them gently with a spatula—don’t flip too soon, or they might break apart. You’ll know they’re ready to turn when the bottoms are a deep golden color and lift easily from the pan. Transfer the fried balls to a paper towel-lined plate to drain excess oil.
Step 5: Garnish and Serve Warm
Arrange the crispy rice balls on a serving platter and sprinkle with the toasted 1 tbsp Sesame Seeds and sliced 3 whole Green Onions. The contrast of the crunchy exterior, tender rice, and tangy kimchi flavor is what makes these so addictive.
Serve immediately while still warm. For extra flair, drizzle with a little extra Sesame Oil or serve with a side of soy sauce for dipping. These are best enjoyed fresh, so gather everyone around and dig in!
Pro Tips For Making Kimchi Rice Balls
- Chill the Rice: Use cold, day-old sushi rice—it’s stickier and easier to shape without falling apart. I learned this the hard way after my first few attempts turned into a mushy mess.
- Drain the Kimchi: Squeeze out excess liquid from the kimchi before mixing to prevent soggy rice balls. Sounds tedious, but it keeps the texture just right.
- Oil Your Hands: Rub a little neutral oil on your palms before shaping to stop the rice from sticking. I skip this when I’m lazy, but the balls hold together way better when I don’t.
- Toast the Kimchi: Sauté the kimchi in a pan for 2-3 minutes before mixing—it deepens the flavor and removes the raw bite. My grandmother swore by this, and she was right.
Regional Styles of kimchi rice balls
Korean Tradition
In Korea, these are called kimchi jeon or kimchi bokkeumbap when pan-fried. The classic version uses short-grain rice and well-fermented napa kimchi for that signature tangy-spicy kick. I remember my grandmother making them with leftover rice from the night before. 💛
Japanese Adaptation
Japanese onigiri meet Korean flavors in this fusion. They wrap kimchi in nori sheets before shaping the rice balls, adding a seaweed umami layer. Some versions mix in tuna mayo for extra richness, but I prefer keeping it simple with just kimchi.
Chinese Twist
In Northern China, you’ll find similar rice balls called jiaozi (though usually steamed). They often add ground pork or dried shrimp to the kimchi filling for extra protein. The trick is using glutinous rice for a chewier texture.
Western Fusion
Modern interpretations often bake instead of fry for a lighter version. Some add cheddar cheese in the center for a gooey surprise. I’ve seen food trucks in LA serve them with sriracha aioli for dipping. The crispy exterior works perfectly with the creamy sauce.
Vegan Variation
Skip the cornstarch and use mashed sweet potato as a binder instead. This adds natural sweetness that balances the kimchi’s acidity. Coconut aminos make a great vegan dipping sauce alternative to soy sauce. 🌱
Nutrition Facts
Frequently Asked Questions
Can I use fresh kimchi or does it need to be fermented?
Always use well-fermented kimchi for best flavor. Fresh kimchi lacks the tangy depth that makes these rice balls special.
How do I keep them from falling apart while frying?
Chill the shaped balls for 20-30 minutes before frying and use 2 tbsp cornstarch in the mix. This creates a firm texture that holds together.
Can I bake instead of fry?
Yes! Bake at 400°F for 20-25 minutes, flipping halfway. Brush with oil first for crispiness. They’ll be slightly less crunchy but still delicious.
What’s the best way to reheat leftovers?
Use a toaster oven or air fryer at 375°F for 5-7 minutes. This restores the crispy texture better than a microwave.

- Mujadara Rice and Lentils Recipe: Earthy Spiced Lentils With Caramelized Onions - November 1, 2026
- Naija Fried Rice Recipe: Street-Style Spice With Veggie Crunch - November 1, 2026
- Mushy Rice Recipe: Fluffy Grains Transformed in Minutes - November 1, 2026