
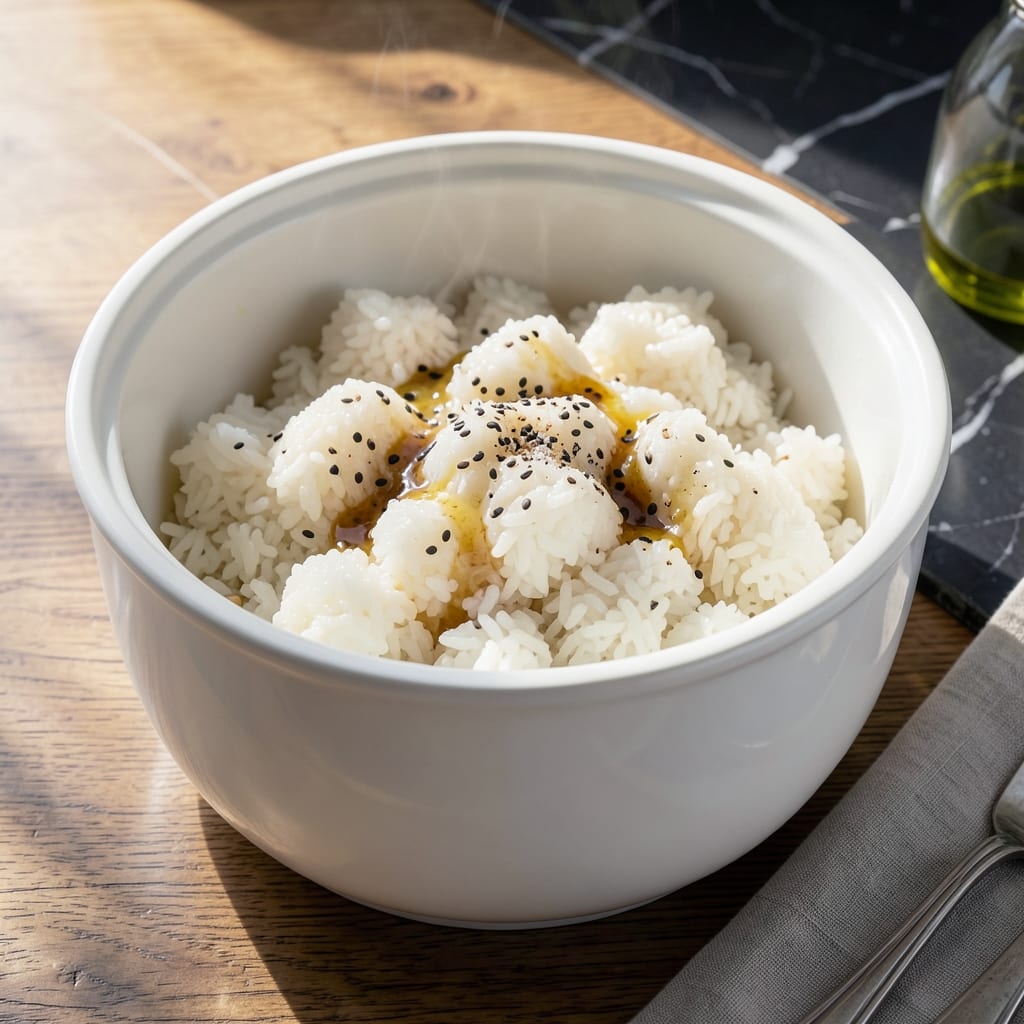
Achieving perfectly sticky and fragrant Korean rice in a rice cooker is simpler than you think. This method delivers consistent results every time with minimal effort.
The key lies in the right rice-to-water ratio and a short soaking period before cooking. Korean short-grain rice requires slightly less water than standard white rice to achieve that signature tender yet slightly chewy texture.
What you get is fluffy, glossy grains with a subtle sweetness that cling together just enough for easy chopstick handling. The rice cooker does all the work while you prepare the rest of your meal.
Use this as a base for bibimbap, serve alongside kimchi, or enjoy plain with a sprinkle of sesame seeds. Here’s how to make it.
Ingredients for Korean Rice Recipe Rice Cooker
Simple pantry staples create that signature sticky, fragrant Korean rice you love.
| Ingredient | Amount | Notes |
|---|---|---|
| Korean Short-Grain Rice 🍚 | 2 cups | Rinsed until water runs clear |
| Water 💧 | 2 ¼ cups | Filtered or spring recommended |
| Sesame Oil 🫒 | 1 tsp | Toasted for best flavor |
| Salt 🧂 | ½ tsp | Fine sea salt preferred |
| Sesame Seeds 🌰 | 1 tbsp | Toasted for garnish |
| Rice Vinegar 🍯 | 1 tsp | Optional for brightness |
| Sugar 🍚 | ½ tsp | Optional for subtle sweetness |
| Garlic Cloves 🧄 | 2 cloves | Minced, optional add-in |
| Scallions 🧅 | 2 whole | Thinly sliced for garnish |
The rice is everything here. Look for Korean short-grain rice—brands like Sushi Rice by Nishiki or CJ Hatban are easy to find at H Mart or Asian grocery stores. Regular sushi rice works too (it’s the same thing). The water ratio is key—2.25 cups for every 2 cups of rice, not the 1:1 you might use for other varieties. Skip the instant stuff; it won’t give you that chewy texture.
No sesame oil? Avocado oil works in a pinch, but you’ll lose that nutty aroma. Out of sesame seeds? Crushed peanuts add a nice crunch. The rice vinegar is optional but brightens things up—apple cider vinegar can sub in. If you’re adding garlic, toss it in with the water before cooking. Sugar’s traditional but not mandatory (I usually skip it).
Uncooked rice keeps indefinitely in a sealed container, but check for bugs if it’s been a while. Cooked rice stays fresh for 3-4 days in the fridge or freezes for 3 months. Reheat with a splash of water in the microwave (it gets stiff otherwise).
Why You’ll Love This Recipe
- Set and Forget: I just rinse the rice, add water, and let the rice cooker do the rest—no stirring, no watching.
- Nutty Crunch: The sesame oil and toasted seeds give every bite this warm, toasty depth that’s impossible to resist.
- Meal Prep Hero: It pairs with everything from bulgogi to fried eggs, so I make a big batch for the week.
- Pennywise Staple: A two-pound bag of short-grain rice costs me less than a fancy coffee and feeds us for days.
Step-by-Step Instructions for Korean Rice in a Rice Cooker
Here’s how I make perfectly sticky and fragrant rice every time.
Step 1: Rinse the Rice Thoroughly
Place the 2 cups Korean Short-Grain Rice in a fine-mesh strainer and rinse under cold water. I swirl the rice with my hand and let the water run through until it becomes completely clear—this usually takes 3-4 rinses.
Rinsing removes excess starch, which prevents the rice from becoming gluey. Drain well and give the strainer a gentle shake to remove as much water as possible before proceeding. This step ensures each grain stays distinct while still achieving that signature stickiness.
Step 2: Combine Rice, Water, and Seasonings
Transfer the rinsed rice to the rice cooker pot. Add the 2.25 cups Water, 1 tsp Sesame Oil, and 0.5 tsp Salt. If you prefer a slightly sweeter and tangier flavor, stir in the 1 tsp Rice Vinegar and 0.5 tsp Sugar now.
For extra aroma, I sometimes add the 2 cloves minced Garlic Cloves at this stage. Gently stir everything together just enough to distribute the seasonings evenly. Avoid over-stirring, as it can break the rice grains.
Step 3: Cook and Let It Rest
Close the rice cooker lid and select the standard white rice setting. Most cookers will take about 20-25 minutes to finish. I resist the urge to open the lid during cooking—steam is key to even, fluffy results.
Once the cooker switches to “keep warm,” let the rice sit for 10-15 minutes. This resting period allows the grains to absorb any remaining moisture and finish steaming gently. The rice should look plump and slightly glossy when done.
Step 4: Fluff and Garnish
After resting, open the lid and use a rice paddle or fork to fluff the rice gently from the bottom up. This separates the grains without crushing them. Taste and adjust seasoning if needed—I sometimes add an extra pinch of salt or a drizzle of sesame oil here.
To serve, transfer the rice to a bowl and garnish with the 1 tbsp Sesame Seeds and 2 whole thinly sliced Scallions. The sesame seeds add a nutty crunch, while the scallions bring a fresh, oniony brightness that complements the rich, sticky rice beautifully.
Pro Tips For Making Korean Rice Recipe Rice Cooker
- Rinse the Rice: Wash the short-grain rice 3-4 times until the water runs clear—this removes excess starch and prevents gummy rice.
- Use the Right Ratio: Stick to a 1:1.1 rice-to-water ratio for Korean short-grain; any more and you’ll end up with mushy, underflavored rice.
- Let It Steam: After the rice cooker switches to “keep warm,” leave it closed for 10-15 minutes—this lets the grains fully absorb moisture and firm up.
- Add Oil Last: Drizzle sesame oil and sprinkle sesame seeds just before serving, not during cooking, to preserve their fresh aroma and nutty crunch.
Troubleshooting Perfect Results
Rice Not Cooking
If your rice cooker switch doesn’t flip to “keep warm” after 30 minutes, first check that the pot is properly seated. I’ve had this happen when the inner pot wasn’t fully clicked into place. Also verify your outlet is working—try plugging in another appliance to test.
Undercooked Rice
When the rice is still crunchy, add ¼ cup hot water, close the lid, and cook for another 5-10 minutes. This often happens if you used too little water or didn’t rinse enough. I always measure water with the rice cooker’s included cup for accuracy. 🌡️
Mushy Texture
Overly soft rice usually means too much water or over-rinsing. Next time, reduce water by 2-3 tbsp and rinse just until water runs clear, not until it’s completely starch-free. Also, avoid stirring the rice after cooking—fluff gently instead.
Burnt Bottom
This occurs when the rice cooker’s heating element is too hot or the rice was left on “keep warm” too long. Next batch, add 1 tsp oil to the water and stir before cooking. If it happens, soak the pot in warm water immediately—don’t scrub while hot.
Dry or Hard Rice
If your rice is dry, it likely needs more water or resting time. For the next batch, increase water by 2-3 tbsp. After cooking, let it rest 15 minutes with the lid closed. I find this resting period is crucial for even moisture distribution.
Uneven Cooking
Hot spots in the cooker can cause uneven results. Always spread the rice evenly in the pot before cooking and avoid opening the lid during the process. If your cooker has a non-stick coating, make sure it’s not scratched—that can create hot spots. 💡
Nutrition Facts
Frequently Asked Questions
Why do I need to rinse the rice so thoroughly?
Rinsing removes excess starch that would otherwise make the rice gluey. Stop when the water runs completely clear—usually after 3-4 rinses.
Can I use regular sushi rice instead?
Yes! Korean short-grain and sushi rice are essentially the same. Use the same 1:1.125 rice-to-water ratio for perfect results. Brands like Nishiki work well.
How do I fix undercooked rice?
Add ¼ cup hot water, close the lid, and cook for another 5-10 minutes. This usually solves the issue of crunchy grains.
Can I make this ahead of time?
Cooked rice keeps for 3-4 days in the fridge or 3 months in the freezer. Reheat with a splash of water to restore moisture.

- Mujadara Rice and Lentils Recipe: Earthy Spiced Lentils With Caramelized Onions - November 1, 2026
- Naija Fried Rice Recipe: Street-Style Spice With Veggie Crunch - November 1, 2026
- Mushy Rice Recipe: Fluffy Grains Transformed in Minutes - November 1, 2026