
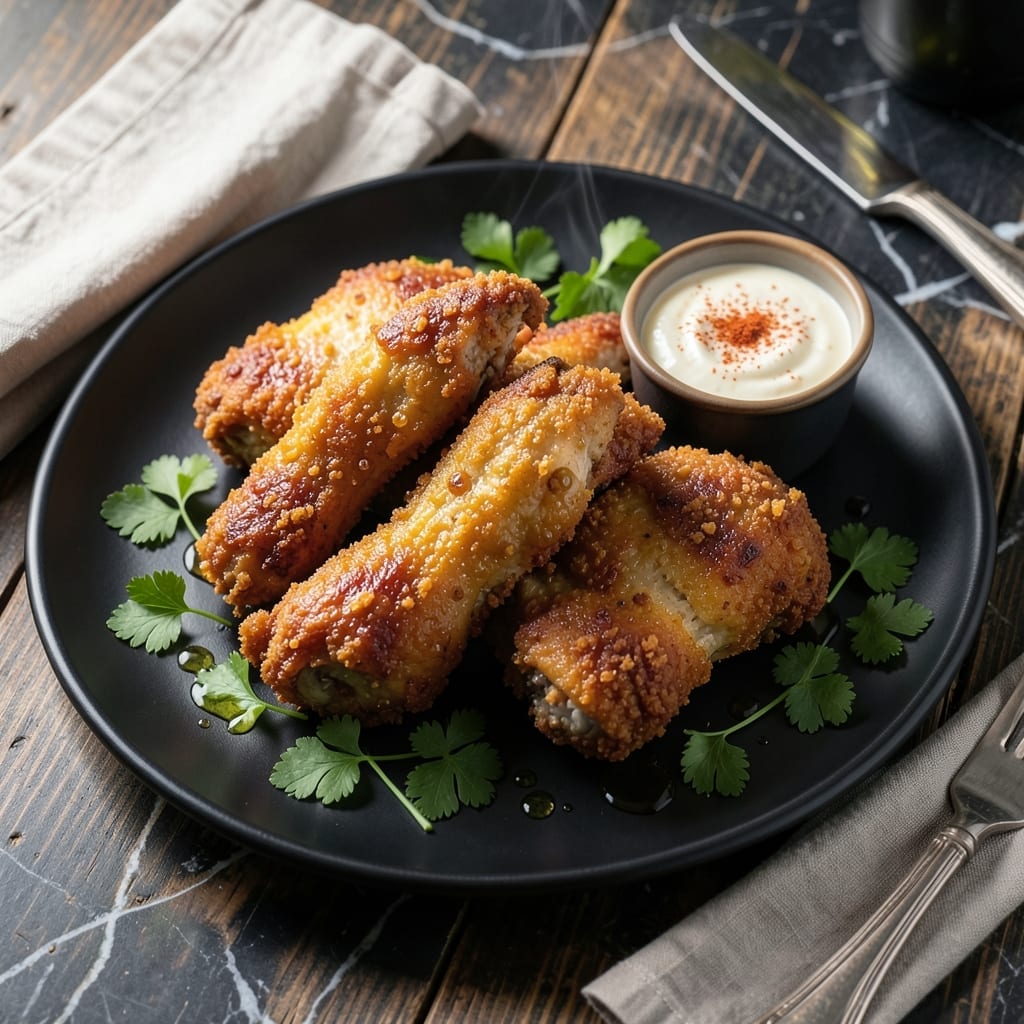
This recipe delivers on its promise of shatteringly crisp coating with tender, juicy chicken inside. The secret lies in a double-breading technique that creates an ultra-crunchy exterior while locking in moisture.
I developed this method after testing countless variations, focusing on achieving that perfect balance between texture and flavor. The chicken stays juicy even with the extended cooking time needed for maximum crispiness.
What sets this apart is the precise temperature control and resting period that ensures the coating stays crisp long after frying. The result is restaurant-quality chicken that’s impossible to resist.
Serve with your favorite dipping sauce or as part of a hearty meal. The technique works for both bone-in and boneless pieces.
Ingredients for Krunchy Chicken
Double-breaded chicken with a secret crisp trick that locks in all the juices.
| Ingredient | Amount | Notes |
|---|---|---|
| Chicken Thighs 🍗 | 2 lb | Boneless, skinless, pounded even |
| All-Purpose Flour 🌾 | 2 cups | Divided for double-dredging |
| Cornstarch 🌽 | ½ cup | For extra crispiness |
| Large Eggs 🥚 | 2 whole | Beaten for binding |
| Buttermilk 🥛 | 1 cup | Full-fat for richness |
| Kosher Salt 🧂 | 1 tbsp | Diamond Crystal preferred |
| Freshly Ground Black Pepper 🌶️ | 1 tsp | Coarse grind ideal |
| Garlic Powder 🧄 | 1 tsp | Not garlic salt |
| Onion Powder 🧅 | 1 tsp | Fresh ground preferred |
| Paprika 🌶️ | 1 tbsp | Sweet or smoked variety |
| Cayenne Pepper 🔥 | ½ tsp | Adjust for heat preference |
| Vegetable Oil 🫒 | 4 cups | High smoke point for frying |
| Baking Powder 🧂 | 1 tsp | For crispier coating |
The chicken thighs are non-negotiable for juiciness—bone-in, skin-on would work too but takes longer to cook through. For the flour, King Arthur or Gold Medal give consistent results. The cornstarch is the crisp secret—Bob’s Red Mill is my go-to for its fine texture (don’t substitute cornmeal, it’s too gritty). Buttermilk from a local dairy tastes better than store-brand.
Swapping thighs for breasts? Pound them to even thickness so they cook through without drying out. No buttermilk? Whole milk with a tablespoon of vinegar works in a pinch. Out of cornstarch? Arrowroot powder at the same ratio. The seasoning blend can be adjusted—add celery salt for depth or swap paprika for Cajun seasoning if you like heat.
The raw chicken keeps 2 days refrigerated, but bread it right before frying. Leftovers stay crisp in the oven at 400°F for 10 minutes. Coating mixture can be prepped 1 day ahead—store airtight at room temperature.
Why You’ll Love This Recipe
- One Pan Magic: I love that I only need a bowl and a skillet—no fancy equipment, just mix the flour and cornstarch, dip the thighs in buttermilk and egg, and fry.
- That Crunch Though: The cornstarch in the coating makes it so ridicuously crispy, it’s like the chicken is wearing a golden, shattery armor.
- Feeds the Crew: I’ve served this for Sunday dinner, packed leftovers for lunch, and even made sliders with the extras—always disappears.
- Budget Hero: Chicken thighs stay juicy and cost half what breasts do, and the simple pantry staples mean I’m not buying special ingredients.
Step-by-Step Instructions for Krunchy Chicken
This method delivers an audibly crisp coating with remarkably tender meat inside.
Step 1: Prepare and Season the Chicken
Begin by patting the 2 lb Chicken Thighs completely dry with paper towels. This critical step removes moisture that would otherwise prevent the coating from adhering properly. Pound each thigh to an even ½-inch thickness using a meat mallet—this ensures uniform cooking throughout.
Season both sides generously with 1 tbsp Kosher Salt, 1 tsp Freshly Ground Black Pepper, 1 tsp Garlic Powder, 1 tsp Onion Powder, 1 tbsp Paprika, and 0.5 tsp Cayenne Pepper. The spices should create a visible, even layer that will infuse the coating with bold, balanced flavor.
Step 2: Create the Breading Station
Set up three shallow dishes for breading. In the first, whisk together the 2 whole Large Eggs and 1 cup Buttermilk until fully combined. This wet mixture provides the binding foundation for the dry coating. In the second dish, combine 1½ cups All-Purpose Flour, 0.5 cup Cornstarch, and 1 tsp Baking Powder—this blend creates the ultra-crisp texture.
Place the remaining ½ cup All-Purpose Flour in the third dish for the final dredge. The double-dredging technique, with flour both before and after the wet mixture, builds layers that crisp beautifully during frying. Ensure each dish is wide enough to accommodate the chicken pieces without crowding.
Step 3: Double-Dredge for Maximum Crispiness
Working with one piece at a time, dredge each thigh in the flour-cornstarch-baking powder mixture, pressing gently to adhere. Shake off excess, then submerge in the egg-buttermilk mixture, allowing any excess to drip off for 5 seconds. Immediately transfer to the second flour dish and coat thoroughly, pressing the mixture into the chicken to create an even, thick layer.
Place breaded thighs on a wire rack set over a baking sheet. This setup allows air circulation underneath, preventing the coating from becoming soggy as it rests. Let the chicken rest for 10 minutes to allow the coating to set—this prevents it from falling off during frying.
Step 4: Fry to Golden Perfection
Heat 4 cups Vegetable Oil in a large, heavy pot or Dutch oven over medium-high heat until it reaches 350°F. Use a deep-fry thermometer for accuracy. The oil is ready when a pinch of flour sizzles vigorously when dropped in. Carefully lower 2-3 pieces of chicken into the oil, being careful not to overcrowd the pot.
Fry for 6-8 minutes per side until the coating is deep golden brown and the internal temperature reaches 165°F. The coating should audibly crackle when removed from the oil. Transfer to a wire rack or paper towel-lined plate to drain excess oil, maintaining the crispy texture.
Fry the remaining chicken in batches, allowing the oil to return to 350°F between each batch. This temperature consistency ensures each piece cooks evenly without absorbing excess oil. Serve immediately while the coating is at its peak crispness.
Pro Tips For Making Krunchy Chicken
- Double Dredge: Dip the thighs in flour, then buttermilk, then back in flour—this double coat is what gives that extra krunchy texture that makes the dish.
- Rest the Chicken: After breading, let the chicken rest for 10 minutes on a wire rack so the coating sets and doesn’t slide off when it hits the oil.
- Hot Oil Test: Drop a pinch of flour into the oil first—if it sizzles and floats immediately, it’s at the right 350-375°F for frying; anything less and the coating will absorb oil instead of crisp.
- Use Thighs, Not Breasts: Chicken thighs stay juicy even when fully cooked through, while breasts tend to dry out before the crust gets that deep golden color.
Common Mistakes When Making Great krunchy chicken
Skipping the Drying Step
Never skip patting the chicken completely dry before breading. Any moisture left on the surface will create a barrier between the meat and coating, causing it to slide right off during frying. I use paper towels and press firmly to absorb all liquid.
Overcrowding the Pot
Frying too many pieces at once lowers the oil temperature, resulting in greasy, soggy chicken. I never fry more than 2-3 pieces at a time in my 5-quart Dutch oven. Maintain 350°F between batches for consistent results. 🔥
Rushing the Resting
The 10-minute rest after breading is crucial for the coating to set properly. If you skip this, the breading will fall off in the oil. I set a timer to ensure I don’t rush this step.
Inconsistent Thickness
Pounding the thighs to an even ½-inch thickness ensures uniform cooking. Uneven pieces will have some parts overcooked and dry while others remain undercooked. I use a meat mallet for consistent results.
Wrong Oil Temperature
Oil that’s too cool will absorb into the coating, while oil that’s too hot will burn the exterior before the chicken cooks through. I always use a deep-fry thermometer to maintain 350°F. Test with a pinch of flour—it should sizzle vigorously.
Ignoring Internal Temp
Don’t rely on color alone. Use a meat thermometer to confirm the chicken reaches 165°F internally. The coating’s deep golden brown color can be misleading. I check each piece in the thickest part.
Nutrition Facts
Frequently Asked Questions
Can I use chicken breasts instead of thighs?
Yes, but pound them to ½-inch thickness first. Thighs stay juicier, but breasts work if cooked carefully. Avoid overcooking—check internal temp reaches 165°F.
Why is cornstarch used in the breading?
Cornstarch creates an ultra-crisp texture that flour alone can’t achieve. It also helps the coating brown evenly and stay crunchy longer after frying.
How do I keep the coating crispy after frying?
Drain on a wire rack, not paper towels. Place in a 400°F oven for 5-10 minutes to revive crispiness if serving later. Never cover with foil!
Can I bake this instead of frying?
Yes, but crispiness will be reduced. Bake at 425°F for 25-30 minutes, flipping halfway. Use a wire rack on a baking sheet for best results.

- Jollof Rice Sauce Recipe: West African Tomato and Spice Infusion - September 25, 2026
- Japanese Rice Soup Recipe: Umami-Rich Comfort in a Bowl - September 25, 2026
- Homemade Cream Of Rice Recipe: Silk-Smooth Breakfast in Minutes - September 25, 2026