
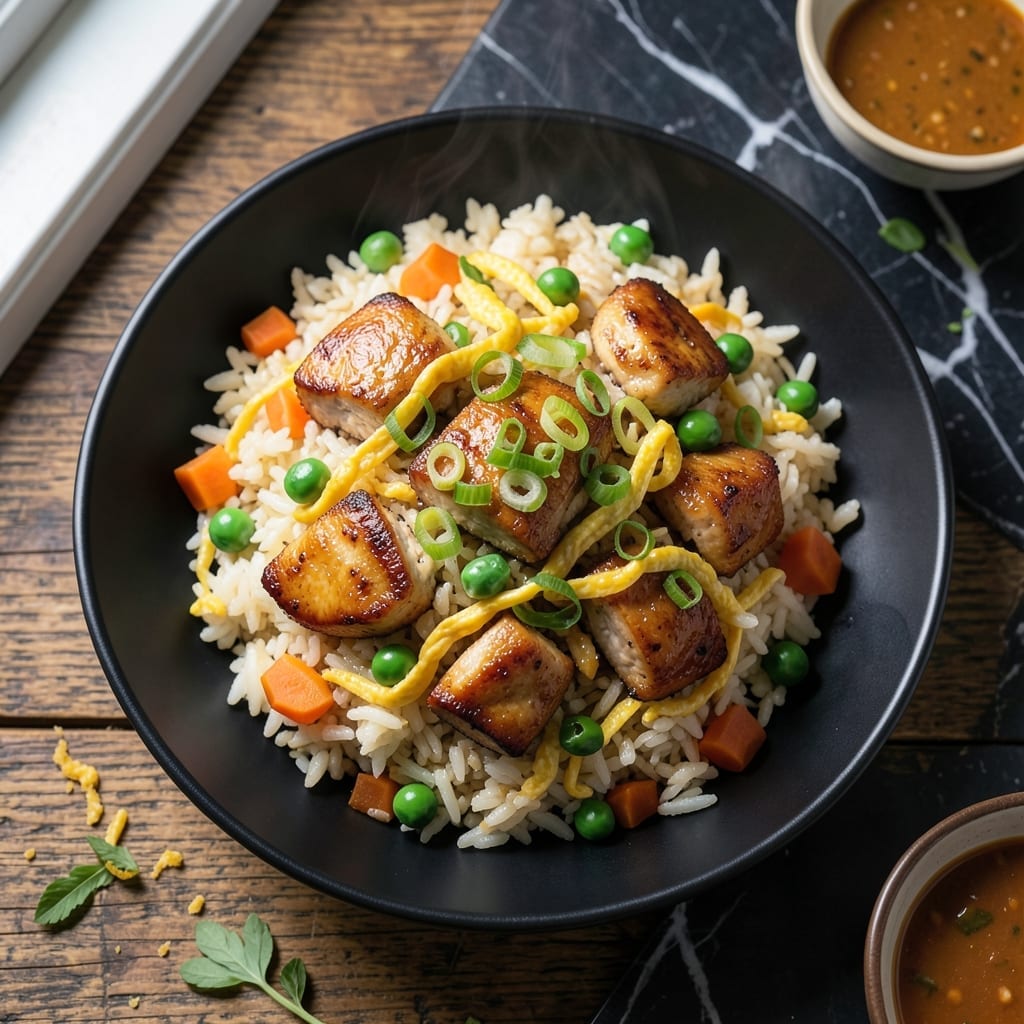
This loaded fried rice delivers the crispy texture and deep umami flavor that takeout can’t match. The secret lies in high heat and a wok that creates those sought-after charred bits. Each bite combines tender rice with layers of savory add-ins.
I’ve refined this method to ensure every grain stays separate while developing maximum flavor. The key is using day-old rice and cooking in small batches. This prevents steaming and guarantees that crispy finish you crave.
What makes this version truly loaded is the mix of proteins, vegetables, and a rich sauce that ties it all together. The result is a dish that’s hearty enough to stand alone but versatile enough to pair with any main.
Perfect for using up leftovers, this recipe transforms simple ingredients into something extraordinary. Here’s how to achieve restaurant-quality results at home.
Ingredients for Loaded Fried Rice
Cold rice, bold flavors, and a hot wok make this dish unforgettable.
| Ingredient | Amount | Notes |
|---|---|---|
| Day-Old Cooked White Rice 🍚 | 4 cups | Cold, preferably overnight |
| Boneless Chicken Thighs 🍗 | 1 lb | Diced into small pieces |
| Large Eggs 🥚 | 2 whole | Lightly beaten |
| Carrots 🥕 | ¾ cup | Diced into small cubes |
| Frozen Peas 🌱 | ¾ cup | Thawed or straight from freezer |
| Green Onions 🧅 | ½ cup | Thinly sliced, whites and greens separated |
| Garlic Cloves 🧄 | 3 cloves | Minced finely |
| Soy Sauce 🫙 | 3 tbsp | Low-sodium for control |
| Oyster Sauce 🫙 | 1 tbsp | For umami depth |
| Sesame Oil 🫒 | 1 tbsp | Toasted for aroma |
| Vegetable Oil 🫒 | 3 tbsp | High smoke point for frying |
| Ginger Root 🌿 | 1 tbsp | Freshly grated |
| Salt 🧂 | ½ tsp | Adjust to taste |
| Black Pepper 🌶️ | ¼ tsp | Freshly ground |
The rice is critical here. Use day-old, cold rice—fresh won’t crisp up the same way. For proteins, boneless thighs stay juicier than breasts, and Costco’s pre-cut stir-fry veggies save time without sacrificing texture. The soy sauce should be low-sodium so you can layer flavors without over-salting. If your wok isn’t well-seasoned, a heavy stainless steel skillet works as a backup.
No chicken? Shrimp or tofu swap in seamlessly—just adjust cook times. Oyster sauce can be subbed with hoisin or more soy sauce (add a pinch of sugar to balance). Fresh ginger is ideal, but ground ginger at half the amount works in a pinch. Frozen peas are fine (trust me, they soften right up), but avoid soggy veggies like zucchini.
Leftovers keep 3-4 days in the fridge—reheat in a skillet to revive crispiness. For freezing, spread on a tray to cool first, then pack into bags. Stays good for 2-3 months (though the rice texture softens slightly).
Why You’ll Love This Recipe
- One Pan Dinner: I toss in the rice, chicken, and veggies—all in the same skillet. No mountain of dishes after.
- Umami Bomb: The chicken thighs and soy sauce create this deep, savory flavor that makes the rice irresistible.
- Weeknight Hero: Honestly, it’s my go-to when I need to feed the family fast on a busy Tuesday.
- Budget Stretcher: Between us, a pound of thighs and day-old rice feeds four for less than a takeout combo.
Step-by-Step Instructions for Loaded Fried Rice
This method ensures maximum wok hei and crispy texture while keeping the process straightforward.
Step 1: Prep Ingredients for High-Heat Cooking
Begin by dicing the 1 lb Boneless Chicken Thighs into small, even pieces. This ensures quick, uniform cooking in the wok. Lightly beat the 2 whole Large Eggs in a separate bowl until just combined—overmixing creates tough scrambled bits.
Dice the 0.75 cup Carrots into small cubes and thinly slice the 0.5 cup Green Onions, keeping whites and greens separate. Mince the 3 cloves Garlic Cloves and grate the 1 tbsp Ginger Root. Having all ingredients prepped and within reach prevents burning during the fast cooking process.
Step 2: Stir-Fry Chicken and Aromatics
Heat 2 tbsp Vegetable Oil in a wok or large skillet over high heat until shimmering. Add the diced chicken thighs in a single layer and let them sear undisturbed for 2-3 minutes until the edges turn golden brown.
Stir in the minced garlic, grated ginger, and the white parts of the green onions. Cook for 30 seconds until fragrant, being careful not to burn the garlic. The chicken should be fully cooked through at this point, with no pink remaining. Remove the chicken from the wok and set aside.
Step 3: Scramble Eggs and Add Vegetables
Add the remaining 1 tbsp Vegetable Oil to the wok and swirl to coat. Pour in the beaten eggs and let them sit for 10 seconds before gently scrambling with a spatula. Cook just until set but still slightly runny—they’ll finish cooking with the rice.
Add the diced carrots and cook for 2 minutes until they begin to soften. Stir in the 0.75 cup Frozen Peas and cook for another 1 minute. The peas will thaw quickly and brighten in color. Return the cooked chicken to the wok and toss to combine.
Step 4: Incorporate Rice and Seasonings
Add the 4 cups Day-Old Cooked White Rice to the wok, breaking up any clumps with your spatula. The rice should be cold and dry—this ensures it fries up with individual, slightly crispy grains rather than turning mushy.
Drizzle the 3 tbsp Soy Sauce, 1 tbsp Oyster Sauce, and 1 tbsp Sesame Oil over the rice. Sprinkle with 0.5 tsp Salt and 0.25 tsp Black Pepper. Stir-fry for 3-4 minutes until the rice is fully coated and begins to develop a lightly charred appearance, which delivers that signature wok-hei flavor.
Step 5: Finish and Garnish
Taste and adjust seasoning if needed—the soy and oyster sauces provide a salty base, but you may want to add a pinch more salt. Stir in the green onion tops and cook for an additional 30 seconds to wilt slightly.
Remove from heat and serve immediately while hot. Each bite should feature crispy rice grains, tender chicken, and the umami-rich depth from the sauces, with the green onions adding a fresh, vibrant finish.
Pro Tips For Making Loaded Fried Rice
- Crank the Heat: Use the highest heat your stove can handle—loaded fried rice needs that searing temperature to get the chicken and rice properly crispy. I learned this the hard way after too many soggy batches.
- Dry the Rice: Spread your day-old rice on a tray and let it air-dry for 10 minutes before frying. Sounds weird, but it works: the drier the rice, the less it steams in the pan.
- Skip the Crowding: Cook the chicken thighs in a single layer and don’t stir too often—give them 2-3 minutes per side to brown properly. After burning three batches, I finally figured out that patience pays off here.
- Prep Peas Last: Toss the frozen peas in at the very end, just long enough to warm through. My grandmother swore by this, and she was right: it keeps them bright green and slightly crisp instead of mushy.
Storing and Reheating This Dish
Fridge Storage
Let your fried rice cool completely before storing—this prevents condensation that makes the rice soggy. Transfer to airtight containers and refrigerate for up to 3-4 days. I use glass containers to keep flavors fresh. ❄️
Freezer Method
For longer storage, spread the rice on a baking sheet to cool quickly, then portion into freezer bags. Squeeze out excess air to prevent freezer burn. This dish freezes well for up to 2-3 months, though the texture may soften slightly.
Stovetop Reheating
This is my preferred method for restoring crispiness. Heat 1 tbsp vegetable oil in a skillet over medium-high heat, add the rice, and stir-fry for 3-4 minutes until hot and slightly charred. Add a splash of water if it seems dry.
Microwave Option
For quick meals, microwave in 30-second intervals, stirring between each. Cover with a damp paper towel to retain moisture. This works best for smaller portions and takes about 2-3 minutes total.
Reviving Leftovers
If your rice loses its crispness, a quick toss in a hot wok with 1 tsp sesame oil brings back that restaurant-quality texture. I always keep a bottle of Kikkoman soy sauce on hand for a final flavor boost. 💡
Nutrition Facts
Frequently Asked Questions
Why use day-old rice?
Day-old rice is drier and firmer, which prevents mushiness when stir-fried. Fresh rice contains too much moisture and will steam rather than crisp in the wok.
Can I use a different protein?
Swap chicken for shrimp, tofu, or pork. Adjust cooking times—shrimp takes 2-3 minutes, while tofu should be pressed first for best texture.
How do I get that signature crispy texture?
Use high heat and cook in small batches to avoid overcrowding. Spread the rice thinly in the wok and let it sit undisturbed for 30 seconds between stirrings.
What if my rice turns out soggy?
This usually happens with fresh rice or overcrowding the pan. Pat the rice dry before cooking and ensure your wok is very hot before adding ingredients.

- Lump Rice Recipe Sri Lanka: Traditional Island-Style Texture - November 4, 2026
- Laos Sticky Rice Recipe: Traditional Steamed Perfection - November 4, 2026
- Magic Rice Recipe: One-Pot Aromatic Wonder - November 4, 2026