
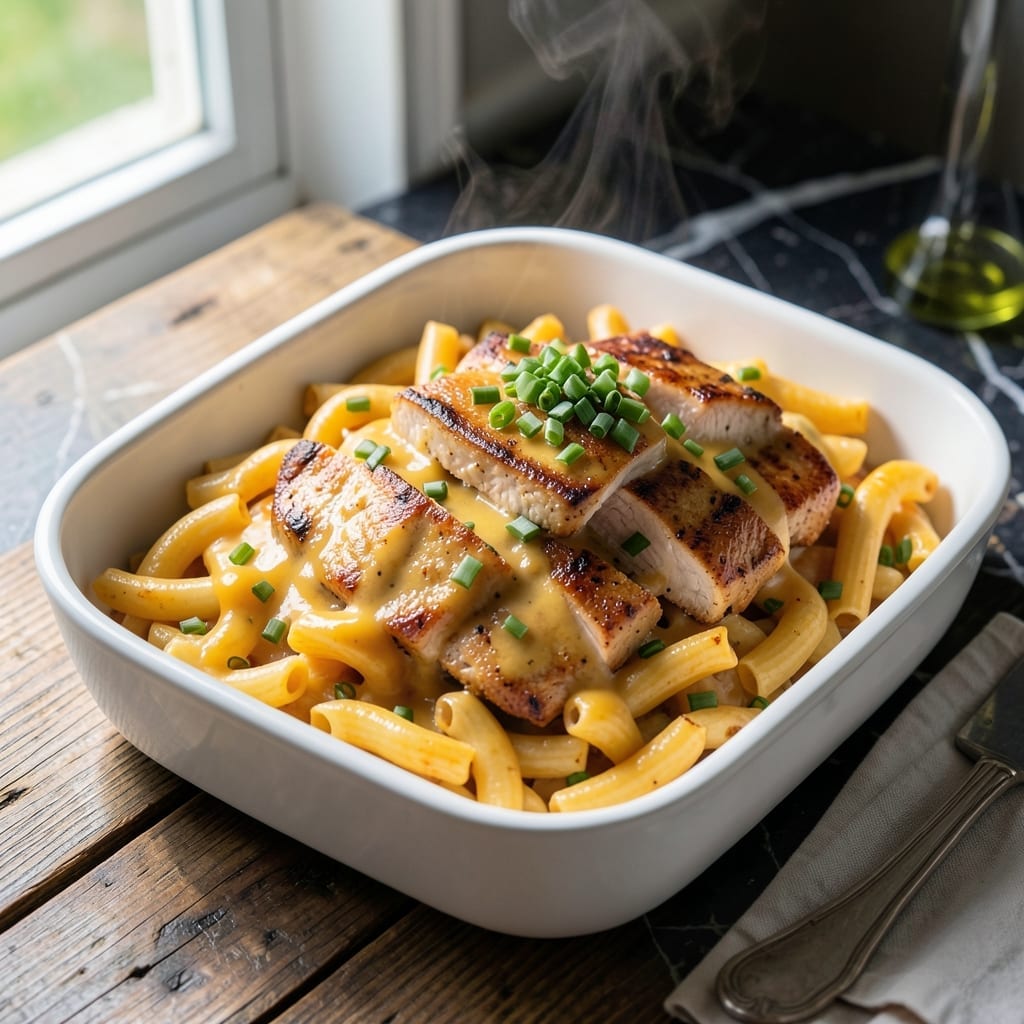
There’s a reason this baked mac and chicken has become my go-to comfort dish. It combines tender pasta, juicy chicken, and a crispy golden topping that seals the deal.
The secret lies in the layering—cooking the pasta just shy of al dente ensures it finishes perfectly in the oven. The chicken stays moist while the cheese melts into a velvety sauce beneath that irresistible crust.
Every bite delivers creamy macaroni, hearty chicken, and a satisfying crunch. It’s the kind of meal that turns weeknight dinner into something special.
Simple ingredients, one baking dish, and results that taste like you spent hours in the kitchen. This is comfort food at its best.
Ingredients for Mac and Chicken
Pantry staples and a few fresh picks make this dish sing.
| Ingredient | Amount | Notes |
|---|---|---|
| Elbow Macaroni 🍝 | 12 oz | Cooked al dente |
| Boneless Skinless Chicken Breasts 🍗 | 1 ½ lb | Cut into bite-sized pieces |
| Unsalted Butter 🧈 | 4 tbsp | For roux and topping |
| All-Purpose Flour 🌾 | ¼ cup | For thickening sauce |
| Whole Milk 🥛 | 2 cups | For creamy sauce base |
| Sharp Cheddar Cheese 🧀 | 2 cups | Shredded from block |
| Parmesan Cheese 🧀 | ½ cup | Freshly grated preferred |
| Panko Breadcrumbs 🍞 | 1 cup | For crispy topping |
| Garlic Powder 🧄 | 1 tsp | For seasoning sauce |
| Onion Powder 🧅 | 1 tsp | For depth of flavor |
| Dijon Mustard 🟡 | 1 tbsp | Adds tang to sauce |
| Salt 🧂 | 1 tsp | To taste, adjust as needed |
| Black Pepper 🌶️ | ½ tsp | Freshly ground preferred |
| Paprika 🌶️ | ½ tsp | For color in topping |
The chicken is key here. Boneless, skinless breasts stay juicy when cooked right—don’t overdo it. I grab mine from Costco for bulk savings, but any supermarket works. The cheddar should be block cheese you shred yourself (pre-shredded has anti-caking stuff that makes the sauce grainy). For the pasta, any short shape works, but elbow macaroni holds the sauce best (and it’s classic).
No whole milk? Half-and-half or 2% in a pinch. Swap cheddar for Monterey Jack if you want milder flavor. No Dijon? Regular mustard at half the amount works. The panko is non-negotiable for that crispy topping though—regular breadcrumbs won’t give you the same crunch. If you’re feeling fancy, add crushed Ritz crackers to the topping mix.
This keeps covered in the fridge for 3-4 days—reheat in the oven to keep the topping crispy. Freezes beautifully for up to 2 months. I double the recipe and freeze half for those nights when cooking feels impossible.
Why You’ll Love This Recipe
- One Pot Wonder: I love that everything—macaroni, chicken, and creamy sauce—cooks together in a single pan.
- Creamy Dream: The butter and milk create this rich, velvety sauce that coats every bite.
- Family Approved: My picky nephew even cleans his plate with this one.
- Budget Stretcher: Chicken breasts and pantry staples make this a wallet-friendly meal that still feels special.
Step-by-Step Instructions for Mac and Chicken
Here’s the method that delivers creamy comfort with a perfect crunch on top.
Step 1: Cook the Macaroni and Chicken
Bring a large pot of salted water to a boil and cook the 12 oz Elbow Macaroni for 1 minute less than package instructions. You want it just shy of al dente since it’ll finish cooking in the oven.
While the pasta cooks, heat a skillet over medium-high heat and cook the 1.5 lb Boneless Skinless Chicken Breasts (cut into bite-sized pieces) until no longer pink inside. Season with 1 tsp Salt and 0.5 tsp Black Pepper as it cooks. Drain the pasta when done and set aside.
Step 2: Make the Cheese Sauce
In the same skillet (no need to clean it), melt 4 tbsp Unsalted Butter over medium heat. Whisk in the 0.25 cup All-Purpose Flour and cook for 1-2 minutes until it forms a smooth paste—this is your roux and it should smell nutty, not burnt.
Slowly whisk in the 2 cups Whole Milk and bring to a gentle simmer. Stir in the 1 tsp Garlic Powder, 1 tsp Onion Powder, and 1 tbsp Dijon Mustard. Cook for 3-4 minutes until the sauce thickens enough to coat the back of a spoon. Remove from heat.
Step 3: Combine Everything
Add the cooked macaroni, cooked chicken, 2 cups Sharp Cheddar Cheese, and 0.5 cup Parmesan Cheese to the sauce. Stir until the cheeses are fully melted and everything is evenly coated. The sauce should be creamy but not runny—if it’s too thick, add a splash of milk.
Transfer the mixture to a greased 9×13-inch baking dish and spread it out evenly. This is where the magic starts to come together, so make sure the chicken and pasta are well distributed.
Step 4: Add the Crispy Topping and Bake
In a small bowl, melt 2 tbsp Unsalted Butter and mix it with the 1 cup Panko Breadcrumbs, 0.5 tsp Paprika, and a pinch of Salt. Sprinkle this mixture evenly over the top of the mac and chicken. The paprika gives it that perfect golden color.
Bake at 375°F for 20-25 minutes until the top is golden brown and the edges are bubbling. For extra crispiness, broil for the last 1-2 minutes—just watch it closely to avoid burning. Let it rest for 5 minutes before serving to allow the sauce to set.
Pro Tips For Making Mac And Chicken
- Poach the Chicken: Simmer the chicken breasts in the milk for 10-12 minutes—it adds flavor to the sauce and keeps the meat juicy. I learned this the hard way after dry, overcooked chicken ruined my first few batches.
- Undercook the Pasta: Boil the elbow macaroni for 1 minute less than the package says, since it’ll finish cooking in the sauce. After burning three batches, I finally figured out this timing trick.
- Warm Your Milk: Heat the whole milk before adding it to the flour-butter roux to prevent lumps. Sounds weird, but it works—my grandmother swore by this, and she was right.
- Shred While Hot: Tear the poached chicken into pieces right away—it absorbs more sauce and saves time. I was skeptical until I tried it, but now I do it every time.
Essential Equipment for This Recipe
Essential Baking Dish
A 9×13-inch baking dish is non-negotiable for this recipe. I use my stoneware dish from Le Creuset—it distributes heat evenly and gives that perfect golden crust. Glass works too, but avoid metal pans as they can cause uneven cooking.
Cheese Grater
Skip the pre-shredded cheese and use a box grater for the sharp cheddar. The anti-caking agents in bagged cheese make your sauce grainy. I like the OXO Good Grips grater—it has four sides for different textures and a comfortable handle.
Whisk for Sauce
A balloon whisk is key for making the roux and sauce smooth. I swear by my 10-inch stainless steel whisk from RSVP International. It reaches the corners of the pan and prevents lumps in your cheese sauce.
Skillet Choice
Use a 12-inch nonstick skillet for cooking the chicken and making the sauce. I recommend All-Clad for even heat distribution. The large surface area lets you brown the chicken properly without crowding.
Mixing Bowls
A large stainless steel mixing bowl makes combining everything easier. I use 3-quart bowls from Cuisinox—they nest for storage and have measurement markings inside. This is where the magic happens before it goes into the baking dish.
Panko Press
For that extra crispy topping, press the panko mixture lightly into the mac and chicken with a spatula before baking. I use a silicone spatula from Spatulart—it’s heat-resistant and won’t scratch your dish. 💡
Nutrition Facts
Frequently Asked Questions
Can I use rotisserie chicken instead?
Shred 3 cups of rotisserie chicken for a quick shortcut. It adds great flavor and saves cooking time. Just skip the chicken cooking step and mix it in with the sauce.
Why pre-cook the pasta al dente?
It finishes cooking in the oven, preventing mushy noodles. The 1 minute less than package instructions ensures perfect texture when baked at 375°F.
Can I make this ahead of time?
Yes! Assemble everything, cover, and refrigerate for up to 24 hours before baking. Add 5-10 minutes to the baking time if chilled.
What if my sauce is too thick?
Stir in 1-2 tablespoons of milk until it reaches your desired consistency. The sauce thickens as it bakes, so keep it slightly loose before adding the topping.

- Jollof Rice Sauce Recipe: West African Tomato and Spice Infusion - September 25, 2026
- Japanese Rice Soup Recipe: Umami-Rich Comfort in a Bowl - September 25, 2026
- Homemade Cream Of Rice Recipe: Silk-Smooth Breakfast in Minutes - September 25, 2026