
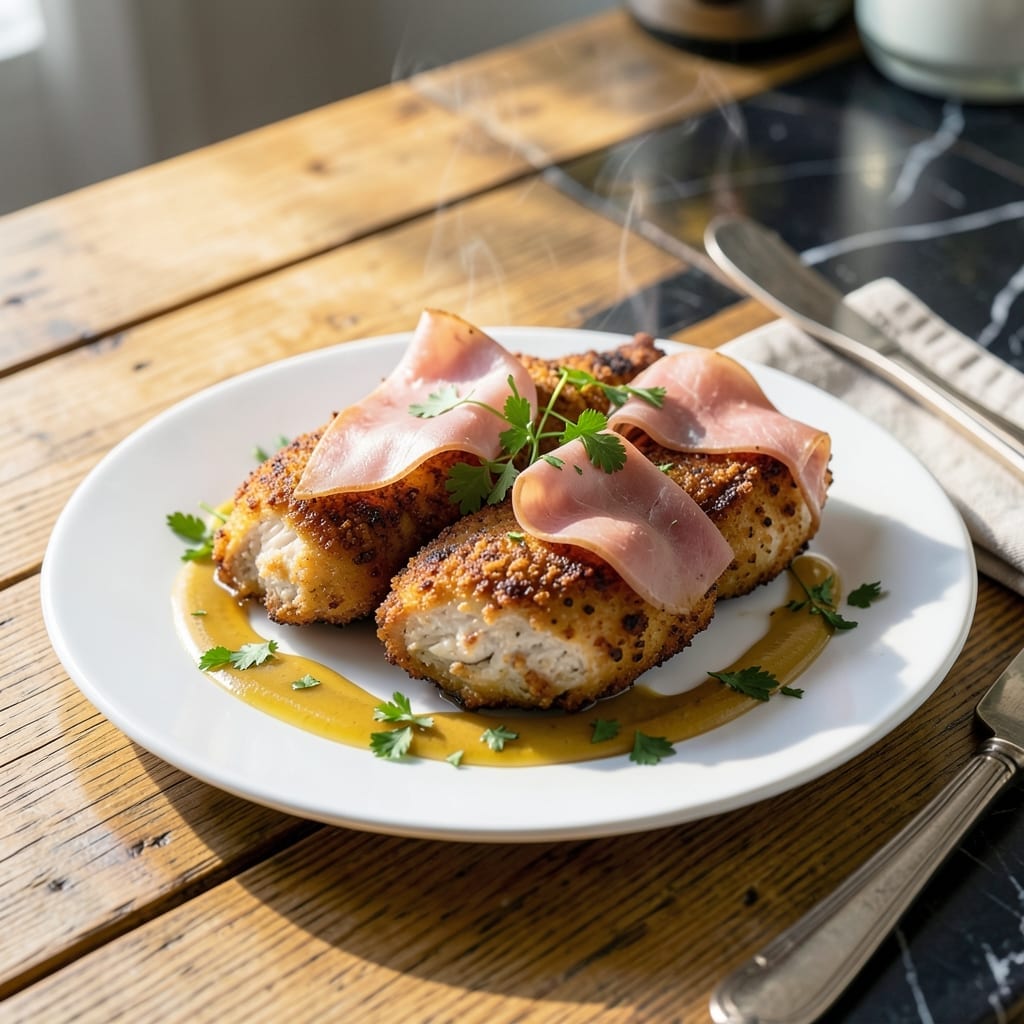
This Malibu chicken delivers crispy breaded cutlets with a gooey ham and Swiss topping that never fails to impress. The secret lies in the two-step breading process, creating a golden crust that stays shatteringly crispy even after baking.
I developed this method after years of trial and error, perfecting the balance between tender chicken and that signature melty ham and Swiss layer. The dish bakes in the oven, ensuring even cooking without the mess of frying.
What you get is a restaurant-quality main course with juicy chicken, savory ham, and melted Swiss cheese all in one bite. The contrast between the crispy coating and the creamy filling makes every forkful satisfying.
Serve with rice or a simple salad for a complete meal. Here’s how to make it at home.
Ingredients for Malibu Chicken
Pantry staples meet deli counter finds for this crowd-pleasing dish.
| Ingredient | Amount | Notes |
|---|---|---|
| Chicken Breasts 🍗 | 1 ½ lb | Boneless, skinless, pounded to 1/2-inch thickness |
| All-Purpose Flour 🌾 | ½ cup | For first breading layer |
| Large Eggs 🥚 | 2 whole | Beaten for egg wash |
| Panko Breadcrumbs 🍞 | 1 ½ cups | For crispy outer coating |
| Dijon Mustard 🟡 | 2 tbsp | For tangy flavor boost |
| Deli Ham 🥓 | 8 slices | Thinly sliced, high-quality |
| Swiss Cheese 🧀 | 8 slices | Meltable, deli-cut preferred |
| Butter 🧈 | 3 tbsp | Unsalted, for richness |
| Garlic Powder 🧄 | 1 tsp | For seasoning breading |
| Onion Powder 🧅 | 1 tsp | For depth of flavor |
| Paprika 🌶️ | ½ tsp | Sweet or smoked variety |
| Salt 🧂 | 1 tsp | Kosher or sea salt |
| Black Pepper 🌶️ | ½ tsp | Freshly ground preferred |
| Olive Oil 🫒 | ¼ cup | For baking sheet prep |
The chicken needs to be even thickness—pound it yourself or ask the butcher to do it. For the ham and Swiss, hit the deli counter at Whole Foods or your local grocery (they’ll slice it thin for you). Boar’s Head is my go-to brand for both—consistent quality and melts perfectly. Don’t skimp on the panko; it’s what gives that shatteringly crispy crust mentioned in the intro.
No panko? Crushed cornflakes or Ritz crackers work in a pinch (same amount). Swap Swiss for Gruyère or provolone—still melty, slightly different vibe. Out of Dijon? Regular yellow mustard at half the amount. The breading spices can be adjusted: add a pinch of cayenne for heat or skip the paprika if you’re not a fan (but it adds that golden color).
Bread the chicken right before baking—keeps the coating crisp. Leftovers? Reheat in a toaster oven to revive the crunch. Stores 3-4 days in the fridge. Doesn’t freeze well (the breading gets soggy).
Why You’ll Love This Recipe
- One Pan Meal: I love that this comes together in a single skillet—dredge, sear, bake, done.
- Crispy, Tangy Bite: The panko crust stays crunchy while the Dijon mustard adds that sharp, creamy kick I crave.
- Crowd Pleaser: Honestly, it’s my go-to for picky eaters and dinner parties alike.
- Leftovers? No Problem: Reheats surprisingly well—still crispy the next day if you use the toaster oven.
Step-by-Step Instructions for Malibu Chicken
Here’s how to nail that perfect crispy coating every single time.
Step 1: Prep and Breadcrumb the Chicken
Pound the 1.5 lb chicken breasts to an even ½-inch thickness between plastic wrap. This ensures even cooking and prevents dry spots. Season both sides with 1 tsp salt, ½ tsp black pepper, 1 tsp garlic powder, and 1 tsp onion powder.
Set up three shallow bowls. Place the ½ cup all-purpose flour in the first, beat the 2 large eggs in the second, and mix the 1.5 cups panko breadcrumbs with ½ tsp paprika in the third. Dredge each breast in flour, then egg, then panko, pressing firmly to adhere.
Step 2: Pan-Fry to Golden Perfection
Heat ¼ cup olive oil in a large skillet over medium heat. When it shimmers, add the breaded chicken. Cook for 4-5 minutes per side until deep golden brown and crispy. Don’t crowd the pan—work in batches if needed to maintain oil temperature.
You’ll know it’s ready to flip when the edges look set and the breading releases easily. Transfer to a paper towel-lined plate to drain excess oil. The breading should be crisp enough to hear a slight crunch when pressed.
Step 3: Layer with Ham and Swiss
Preheat your oven to 375°F. Place the fried chicken on a baking sheet. Spread 2 tbsp Dijon mustard evenly over each piece. Top with 8 slices deli ham, folding to fit, then 8 slices Swiss cheese.
Dot the top with 3 tbsp butter for extra richness. The mustard adds a tangy kick that cuts through the richness of the ham and cheese. This layering order ensures every bite has all three flavors.
Step 4: Bake Until Melted and Bubbly
Bake for 8-10 minutes until the Swiss cheese is fully melted and bubbling at the edges. Watch closely—you want the cheese to melt completely but not turn rubbery.
The residual heat from the chicken will continue melting the cheese even after you remove it from the oven. For extra crispiness, broil for 1-2 minutes at the end, but keep a close eye to prevent burning.
Step 5: Rest and Serve Immediately
Let the chicken rest for 2-3 minutes before serving. This allows the cheese to set slightly so it doesn’t all slide off when you cut into it. The breading should remain crispy even under the melted cheese.
Serve hot while the cheese is still gooey. Each piece should have a crispy exterior, tender chicken inside, and that perfect ham-and-cheese combo in every bite. The mustard will have mellowed slightly but still provides a nice contrast.
Pro Tips For Making Malibu Chicken
- Pound the Breasts: I learned this the hard way—uneven chicken breasts cook unevenly. Pound them to an even ½-inch thickness so the crunchy panko crust doesn’t burn before the meat finishes.
- Press the Crumbs: After dredging in egg and panko, press the breadcrumbs hard into the chicken with your palm. Sounds weird, but it works: they’ll stick better and give you that craggy, golden crust.
- Skip the Cold Chicken: Let the pounded breasts sit at room temperature for 15-20 minutes before cooking. My grandmother swore by this, and she was right: cold chicken lowers the oil temp and makes the coating greasy.
- Toast the Panko: For extra crunch without extra frying, toast the panko in a dry pan for 2-3 minutes until golden. I was skeptical until I tried it—now every batch has that perfect texture.
Essential Equipment for Perfect Results
Breading Station Essentials
For that shatteringly crispy coating, I recommend 3 shallow glass pie plates—one for flour, one for beaten eggs, and one for panko. The wide surface makes dredging easy and even. I use Pyrex 9-inch pie plates because they’re sturdy and easy to clean. 💡
Perfect Pan-Frying Setup
A 12-inch cast iron skillet is my go-to for even heat distribution. Lodge makes a great budget-friendly option. Use medium heat to prevent burning the panko before the chicken cooks through. A splatter screen helps contain oil splatters.
Baking Sheet Choice
After pan-frying, transfer your chicken to a half-sheet pan lined with parchment paper. I prefer Nordic Ware sheets for their durability. The parchment prevents sticking and makes cleanup effortless, while the pan’s size accommodates all pieces without crowding.
Cheese Melting Tools
For that perfect cheese melt, a standard oven works best at 375°F. If you want to broil for extra browning, use the oven’s middle rack position. A pizza steel or stone on the rack below can help distribute heat more evenly for consistent results.
An infrared thermometer helps verify your oven temperature is accurate. I check mine regularly with a ThermoWorks IR gun. 🌡️
Serving and Resting
A wire cooling rack set on your baking sheet allows air circulation beneath the chicken during the brief rest period. This prevents the bottom from getting soggy. I use a stainless steel rack that fits perfectly over my half-sheet pan.
Nutrition Facts
Frequently Asked Questions
Can I bake the chicken instead of pan-frying?
Yes! Bake at 375°F for 20-25 minutes until golden. Skip the stovetop and go straight to layering. The texture will be slightly less crispy but still delicious.
What can I use instead of Swiss cheese?
Try Gruyère or provolone for similar meltiness. Cheddar works too but has a stronger flavor. Avoid pre-shredded cheese as it doesn’t melt as smoothly.
Why is my breading falling off?
Press the panko firmly into the chicken and let the egg wash sit for 1 minute before breading. Also, ensure the oil is hot enough before adding the chicken.
Can I make this ahead of time?
Bread the chicken and refrigerate up to 4 hours before cooking. Don’t layer the ham and cheese until ready to bake to prevent sogginess.

- Jollof Rice Sauce Recipe: West African Tomato and Spice Infusion - September 25, 2026
- Japanese Rice Soup Recipe: Umami-Rich Comfort in a Bowl - September 25, 2026
- Homemade Cream Of Rice Recipe: Silk-Smooth Breakfast in Minutes - September 25, 2026