
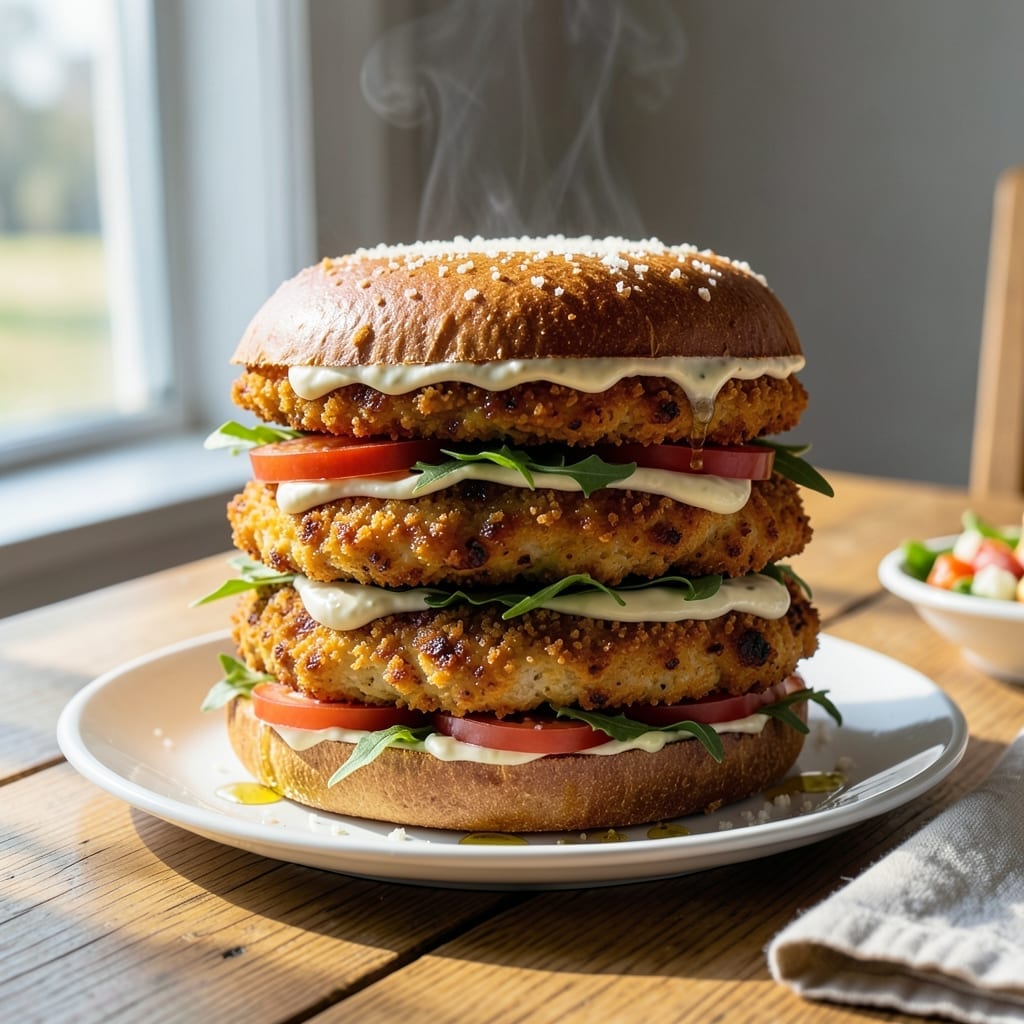
I’ve made my share of chicken sandwiches, but this one takes the crown. The secret is double-breading the chicken for that crispy, golden crust that stays shatteringly perfect even after assembly.
What sets this apart is the garlic butter sauce that gets drizzled over the chicken before it hits the bun. It’s rich, aromatic, and soaks into every bite without making the bread soggy.
You’ll get layers of texture and flavor in each mouthful—crunchy coating, juicy chicken, and that buttery garlic goodness tying it all together. It’s the kind of sandwich that earns its name.
Build it with your favorite toppings and prepare for requests to make it again.
Ingredients for Marry Me Chicken Sandwich
Build this showstopper with crispy chicken, buttery sauce, and fresh toppings. Pantry staples shine here.
| Ingredient | Amount | Notes |
|---|---|---|
| Chicken Breasts 🍗 | 1 ½ lb | Boneless, skinless, pounded to 1/2-inch thickness |
| All-Purpose Flour 🌾 | 1 ½ cups | For initial coating |
| Large Eggs 🥚 | 2 whole | Beaten for egg wash |
| Panko Breadcrumbs 🍞 | 2 cups | For crispy outer layer |
| Parmesan Cheese 🧀 | ½ cup | Freshly grated for breading |
| Garlic Cloves 🧄 | 6 cloves | Minced for sauce and breading |
| Unsalted Butter 🧈 | ¾ cup | For garlic butter sauce |
| Mayonnaise 🥄 | ½ cup | For spreading on buns |
| Brioche Buns 🍔 | 4 whole | Toasted before assembly |
| Romaine Lettuce Leaves 🥬 | 8 leaves | For crunch and freshness |
| Tomato Slices 🍅 | 8 slices | Thinly sliced for topping |
| Salt 🧂 | 1 ½ tsp | Divided for seasoning |
| Black Pepper 🌶️ | 1 tsp | Freshly ground preferred |
| Paprika 🌶️ | 1 tsp | For added color and flavor |
| Olive Oil 🫒 | 1 cup | For frying chicken |
The chicken is the star, so use boneless, skinless breasts—thighs get too greasy for sandwiches. Pound them to an even thickness so they cook through without burning the crust. For the breading, Panko breadcrumbs are non-negotiable for that shatteringly crisp texture. Grab them from any grocery store—no need for specialty brands. The Parmesan should be freshly grated (the good stuff, not the pre-shredded kind).
No Panko? Regular breadcrumbs in a pinch, but the texture won’t be as crispy. Out of fresh garlic? Garlic powder at half the amount works, but fresh is better. For the sauce, European-style butter has a higher fat content and richer flavor. If you’re avoiding dairy, olive oil with extra garlic gets you close. The buns? Brioche is ideal, but potato rolls are a great backup.
Fry the chicken right before serving—it stays crispy for 10-15 minutes. Store leftover sauce in the fridge for up to 5 days (reheat gently). Assemble sandwiches fresh; they don’t keep well. Extra breaded chicken freezes for 1 month (reheat in oven to crisp).
Why You’ll Love This Recipe
- One Pan Magic: The chicken, eggs, and breadcrumbs come together in one bowl—minimal mess, maximum flavor.
- Crispy Parmesan Bite: The Panko and Parmesan crust gives it that irresistible crunch with every bite.
- Crowd Pleaser: Perfect for lunchboxes, picnics, or a quick weeknight dinner when I need to feed a hungry family.
- Leftovers? Yes Please: Honestly, they taste even better the next day—if they last that long.
Step-by-Step Instructions for Crispy Breaded Chicken With Garlic Butter Sauce
Here’s the method that guarantees golden perfection and flavor that’ll have everyone asking for seconds.
Step 1: Bread the Chicken for Maximum Crunch
Pat the 1.5 lb Chicken Breasts dry with paper towels, then season both sides with 1 tsp Salt, 1 tsp Black Pepper, and 1 tsp Paprika. This seasoning layer ensures every bite is packed with flavor.
Set up a breading station: place the 1.5 cups All-Purpose Flour in one shallow dish, beat the 2 whole Large Eggs in another, and mix the 2 cups Panko Breadcrumbs with 0.5 cup Parmesan Cheese in a third. Dredge each breast in flour, then egg, then panko mixture, pressing firmly to adhere. The panko creates that irresistible crispy texture.
Step 2: Fry Until Golden and Crispy
Heat the 1 cup Olive Oil in a large skillet over medium-high heat until shimmering. You’ll know it’s ready when a pinch of panko sizzles immediately when dropped in.
Fry the breaded chicken for 4-5 minutes per side until deep golden brown and the internal temperature reaches 165°F. Don’t crowd the pan—cook in batches if needed. The oil temperature will drop if you add too many pieces at once, leading to greasy rather than crispy results. Transfer to a paper towel-lined plate to drain.
Step 3: Make the Garlic Butter Sauce
While the chicken cooks, melt the 0.75 cup Unsalted Butter in a small saucepan over medium heat. Add the 6 cloves Garlic Cloves (minced) and cook for 1-2 minutes until fragrant but not browned. You want the garlic to infuse the butter without burning—burnt garlic turns bitter.
Remove from heat and let it sit while you finish the chicken. The residual heat will keep it warm and allow the flavors to meld. This sauce is the secret to that “marry me” flavor everyone raves about.
Step 4: Toast the Buns and Assemble
Lightly toast the 4 whole Brioche Buns until golden. Spread each with 0.5 cup Mayonnaise divided evenly—this adds moisture and richness. Place a crispy chicken breast on the bottom bun, then drizzle generously with the garlic butter sauce.
Top with 8 leaves Romaine Lettuce Leaves and 8 slices Tomato Slices (2 leaves and 2 slices per sandwich). The lettuce adds a refreshing crunch that cuts through the richness, while the tomato provides a juicy contrast. Cap with the top bun and serve immediately while the chicken is still hot and crispy.
Pro Tips For Making Marry Me Chicken Sandwich
- Pound the Chicken: Butterfly and pound the chicken breasts to 1/2-inch thickness—this guarantees even cooking and prevents dry, chewy edges. I learned this the hard way after pulling apart overcooked ends while the middle stayed raw.
- Mix Parmesan Early: Grate the Parmesan directly into the Panko breadcrumbs before dredging. Sounds weird, but it works: the cheese melts into the crust, creating that addictive crispy-cheesy bite.
- Skip Cold Eggs: Use room-temperature eggs for the wash—cold eggs cause the breading to clump and slide right off. After ruining two batches, I finally started setting them out 30 minutes before cooking.
- Rest Before Serving: Give the cooked chicken a solid 5 minutes on a rack before assembling—this keeps the crust crisp instead of soggy from trapped steam. Yes, even if you’re impatient like me.
Essential Equipment for Perfect Results
Deep Fry Thermometer
A candy/deep fry thermometer is non-negotiable for perfect oil temperature control. I use the Taylor Precision model—clip it to your pan and maintain 350-375°F for that golden crisp. Without it, you’re guessing and risking greasy or undercooked chicken. 🌡️
Cast Iron Skillet
My go-to is a 12-inch Lodge cast iron skillet—it distributes heat evenly and holds temperature when frying multiple pieces. The high sides prevent oil splatter while giving you plenty of room. A heavy-bottomed stainless steel skillet works too, but cast iron gives better browning.
Breading Station Setup
Use 3 shallow dishes (I love Pyrex glass bowls) for flour, egg wash, and panko mixture. They’re sturdy, easy to clean, and the wide rims make dredging simple. Place them in order with a paper towel-lined tray at the end for your breaded chicken before frying.
Tongs for Frying
12-inch locking tongs give you control when flipping hot chicken without getting too close to the oil. I prefer the OXO Good Grips version—the silicone heads won’t scratch your pan and the locking mechanism keeps them compact in storage.
Wire Rack for Draining
After frying, transfer chicken to a wire rack set over a baking sheet instead of paper towels. This keeps the bottom crispy by allowing air circulation. The rack elevates the chicken so it doesn’t steam in its own juices while you finish the batch.
Saucepan for Butter
A small heavy saucepan (like All-Clad 1.5 quart) prevents the garlic butter from burning. The heavy base distributes heat gently, and the small size means less surface area for the butter to overheat. I always have one dedicated just for sauces.
Nutrition Facts
Frequently Asked Questions
Can I bake the chicken instead of frying?
Yes! Bake at 400°F for 20-25 minutes on a wire rack for crispiness. Brush with oil first for extra browning. The texture won’t be identical, but it’s a great alternative.
How do I keep the buns from getting soggy?
Toast the buns well and spread a thin layer of mayo on both sides to create a barrier. Assemble right before serving for the best texture.
Can I use chicken thighs instead of breasts?
You can, but they’re oilier and may not hold the breading as well. If using, pound to even thickness and fry at 350°F to avoid burning.
How long can I store the garlic butter sauce?
Keep it in an airtight container in the fridge for up to 5 days. Reheat gently on the stove before using.

- Jollof Rice Sauce Recipe: West African Tomato and Spice Infusion - September 25, 2026
- Japanese Rice Soup Recipe: Umami-Rich Comfort in a Bowl - September 25, 2026
- Homemade Cream Of Rice Recipe: Silk-Smooth Breakfast in Minutes - September 25, 2026