
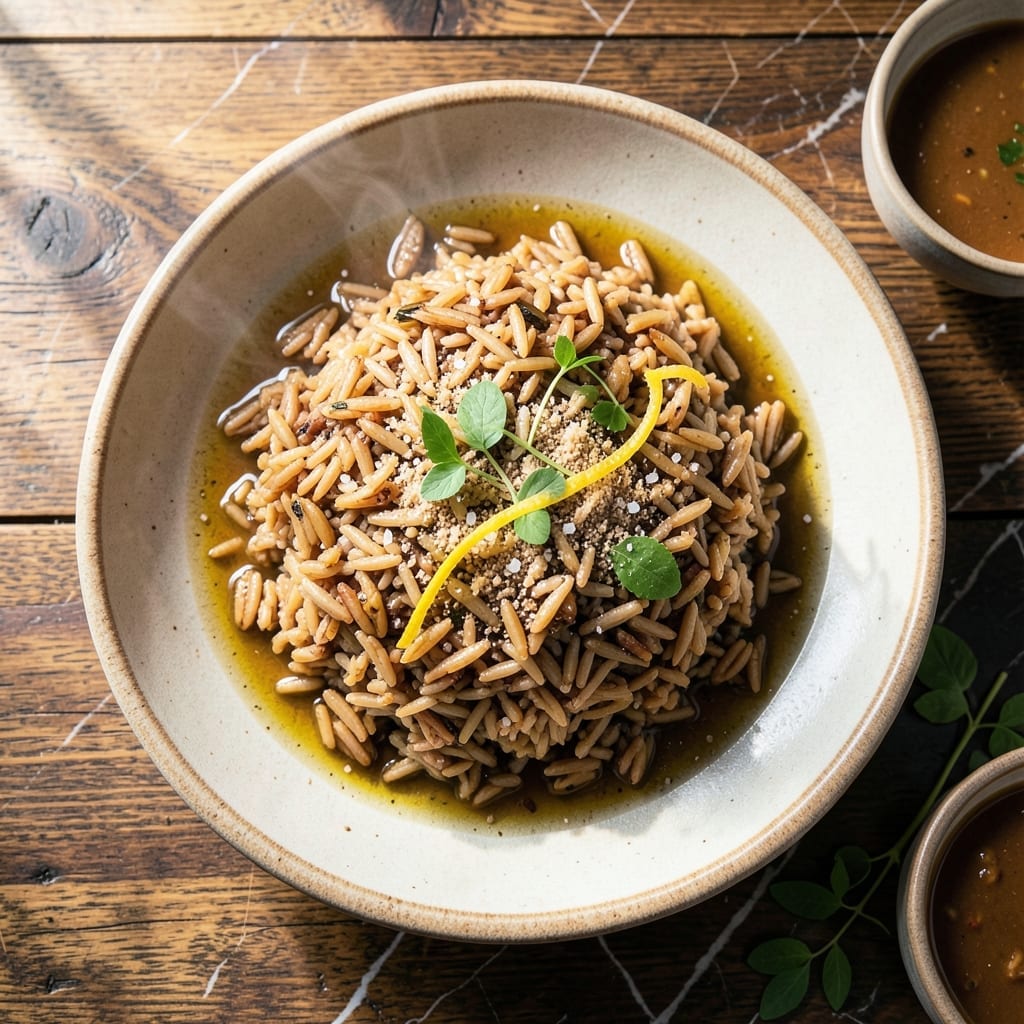
This method delivers perfectly fluffy brown rice without a pot or stove. The key is the right water ratio and proper resting time.
You’ll achieve tender, separate grains every time with just a microwave and 15 minutes of active cooking. No more mushy or undercooked results.
Ingredients for Microwave Brown Rice
Minimal ingredients, maximum texture. Brown rice transformed via microwave precision.
| Ingredient | Amount | Notes |
|---|---|---|
| Long-Grain Brown Rice 🌾 | 2 cups | Rinsed until water runs clear |
| Water 💧 | 4 ½ cups | Filtered or distilled preferred |
| Sea Salt 🧂 | ½ tsp | Fine grain for even distribution |
| Olive Oil 🫒 | 1 tsp | Extra-virgin for subtle richness |
| Vegetable Broth 🥕 | ½ cup | Low-sodium for controlled seasoning |
| Garlic Powder 🧄 | ¼ tsp | Optional for aromatic depth |
| Bay Leaf 🍃 | 1 whole | Removed before serving |
| Lemon Juice 🍋 | 1 tsp | Freshly squeezed for brightness |
The rice quality matters most here. Short-grain brown rice will yield a stickier result, so stick with long-grain for that coveted fluffy texture. Lundberg Family Farms or Tasty Bite are reliable brands at most Whole Foods or Sprouts. Rinse thoroughly—this removes excess starch that causes gummy grains. The water-to-rice ratio is critical: use 2.25 cups liquid per 1 cup rice for perfect doneness.
No vegetable broth? Water with a pinch of salt works fine, though the broth adds depth. Skip the bay leaf if unavailable—it’s subtle. For extra flavor, add a splash of soy sauce or nutritional yeast (vegan umami boost). The olive oil prevents sticking and adds richness, but avocado oil or coconut oil can substitute. Avoid butter or ghee to maintain vegan integrity.
Cooked rice keeps 4-5 days refrigerated in an airtight container. Reheat with a splash of water and a microwave cover to restore moisture. Freeze for up to 3 months in portions for quick meals. Never skip the resting time—it’s what transforms the texture from wet to fluffy.
Why You’ll Love This Recipe
- Ready in Minutes: I can start this in my microwave and forget about it—no babysitting, no stirring, just perfectly cooked rice in 30 minutes flat.
- Rich, Deep Flavor: The vegetable broth and olive oil infuse every grain with a savory depth that plain water just can’t touch.
- Meal Prep Hero: I make a big batch on Sunday and it fuels my lunches all week—salads, bowls, you name it.
- Budget Stretcher: A pound of brown rice costs pennies and feeds us for days, plus leftovers reheat like a dream.
Step-by-Step Instructions for Microwave Brown Rice
This method delivers consistently fluffy grains with minimal effort and maximum flavor.
Step 1: Rinse and Prepare the Rice
Place the 2 cups Long-Grain Brown Rice in a fine-mesh strainer and rinse under cold running water until the water runs completely clear. This removes excess starch that could make your rice gummy rather than fluffy.
While the rice drains, select a microwave-safe bowl with at least a 3-quart capacity—this dish will expand as it cooks. I use a deep glass casserole dish which provides even heat distribution and enough room for the grains to plump properly.
Step 2: Combine Liquid and Aromatics
In your chosen bowl, combine the 4.5 cups Water, 0.5 cup Vegetable Broth, 1 tsp Olive Oil, 0.5 tsp Sea Salt, 0.25 tsp Garlic Powder, and the 1 whole Bay Leaf. Stir these together until the salt and garlic powder dissolve completely.
The olive oil adds subtle richness while the bay leaf and garlic powder infuse the cooking liquid with aromatic depth. Make sure these are well-distributed before adding the rice to ensure even seasoning throughout.
Step 3: Add Rice and Initial Microwave Cooking
Stir the drained 2 cups Long-Grain Brown Rice into the liquid mixture until fully submerged. Cover the bowl tightly with microwave-safe plastic wrap or a lid, leaving a small vent for steam to escape.
Microwave on high power for 10 minutes. After this time, carefully remove the bowl (it will be hot) and give it a good stir. This initial high-power burst kickstarts the cooking process and ensures the rice begins absorbing liquid evenly.
Step 4: Complete the Cooking Cycle
Return the covered bowl to the microwave and cook on 50% power for 25-30 minutes. The lower power setting prevents boiling over while allowing the rice to cook through evenly. You’ll know it’s working when you see steam escaping from the vent.
At the 25-minute mark, check for doneness. The rice should be tender with all liquid absorbed. If it’s still firm or watery, continue cooking in 5-minute increments at 50% power until perfect.
Step 5: Rest and Finish with Brightness
Once the rice is tender, remove the bay leaf and let it stand covered for 5 minutes. This resting period allows the grains to absorb any remaining moisture and achieve that ideal fluffy texture.
Finally, drizzle the 1 tsp Lemon Juice over the rice and fluff gently with a fork. The lemon juice adds a bright finish that balances the rich, savory notes from the broth and olive oil. Serve immediately while hot and fragrant.
Pro Tips For Making Microwave Brown Rice
- Use More Water: Brown rice soaks up more liquid than white, so use a 1:2.5 rice-to-water ratio—trust me, I learned this the hard way after ending up with crunchy rice more times than I’d like to admit.
- Cover Tightly: Seal the bowl with a microwave-safe lid or damp paper towel to trap steam, or you’ll be left with unevenly cooked, half-dry grains.
- Stir Mid-Cook: Pause halfway through cooking—around the 10-minute mark—to give it a quick stir and redistribute the heat, which prevents hot spots from burning the bottom.
- Swap Water for Broth: Replace half the water with vegetable broth for richer flavor, but don’t overdo it or the rice will taste overly salty—I was skeptical until I tried it.
Wine and Beer Pairings for This microwave brown rice
Crisp White Wines
A Sauvignon Blanc with its citrus notes complements the nutty flavor of brown rice beautifully. I prefer one from New Zealand—the bright acidity cuts through the richness while enhancing the lemon finish. 🍷
Light Beers
A pilsner like Heineken or Stella Artois offers a clean, refreshing contrast to the earthy grains. The subtle bitterness balances the savory notes from the broth and garlic without overpowering the dish.
Herbal Tea Pairings
For a non-alcoholic option, jasmine green tea adds a floral aroma that pairs wonderfully with the rice’s natural nuttiness. Brew it light to avoid bitterness, and serve it slightly warm to match the dish’s temperature.
Light Red Wines
A chilled Pinot Noir from Oregon works surprisingly well—the earthy undertones mirror the rice’s depth. I find Eyrie Vineyards offers a great balance of fruit and earth for this pairing.
Sparkling Options
Prosecco or a dry sparkling water with a squeeze of lime can cleanse the palate between bites. The effervescence lifts the dish’s subtle flavors, making each mouthful of rice taste fresh and vibrant.
Flavored Waters
Infuse still or sparkling water with cucumber and mint for a refreshing, alcohol-free pairing. The cool, crisp flavors contrast nicely with the warm, hearty texture of the rice.
Nutrition Facts
Frequently Asked Questions
What bowl size works best for this method?
Use a microwave-safe bowl with at least 3-quart capacity. A deep glass casserole dish works perfectly, giving rice room to expand and cook evenly without boiling over.
Why do I need to rinse the rice first?
Rinsing removes excess starch that can make grains gummy. Continue until water runs clear for the best texture. This step ensures fluffy, separate grains every time.
Can I substitute white rice in this recipe?
No, white rice cooks much faster. Brown rice needs the full 35-40 minutes and more liquid to soften its fibrous outer layer. Adjusting time for white rice would likely burn it.
What if my rice is still crunchy after cooking?
Add 2 tablespoons of water, cover, and microwave for 3-5 minutes more at 50% power. Let it rest again to finish cooking through.

- Mujadara Rice and Lentils Recipe: Earthy Spiced Lentils With Caramelized Onions - November 1, 2026
- Naija Fried Rice Recipe: Street-Style Spice With Veggie Crunch - November 1, 2026
- Mushy Rice Recipe: Fluffy Grains Transformed in Minutes - November 1, 2026