
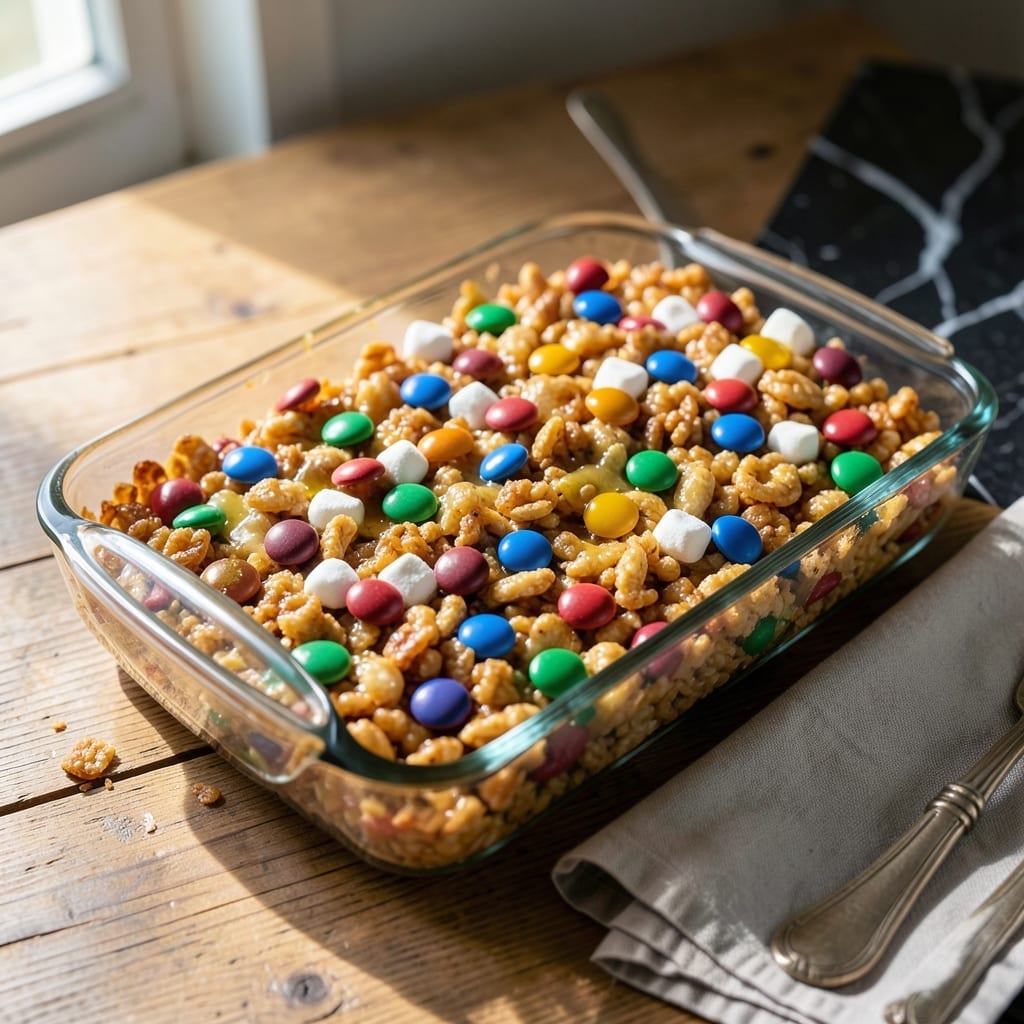
This treat combines the nostalgic appeal of Rice Krispie bars with the vibrant pop of M&Ms for a dessert that’s as fun to make as it is to eat.
The process starts with melting butter and marshmallows together to create a gooey base that binds the cereal. Stirring in Rice Krispies ensures each piece gets coated, while the addition of M&Ms introduces bursts of chocolate and a colorful finish.
Once pressed into a pan and left to set, each square delivers crunchy cereal, chewy marshmallow, and smooth chocolate in every bite. It’s a simple yet satisfying combination that appeals to all ages.
Perfect for parties, bake sales, or a sweet afternoon snack. This recipe stands out with its blend of textures and bright, festive appearance.
Ingredients for M&m Rice Krispie
Butter, marshmallows, cereal, and candy create that nostalgic crunchy-chewy treat everyone loves.
| Ingredient | Amount | Notes |
|---|---|---|
| Unsalted Butter 🧈 | ½ cup | Melted for gooey base |
| Mini Marshmallows 🍬 | 10 cups | Melted with butter |
| Rice Krispies Cereal 🥣 | 6 cups | For crunchy texture |
| M&Ms Candy 🍫 | 1 ½ cups | Plus extra for topping |
| Vanilla Extract 🌿 | 1 tsp | Pure extract preferred |
| Salt 🧂 | ¼ tsp | Fine grain for balance |
| Cooking Spray 🫒 | 1 can | For greasing pan |
The marshmallows matter here—Jet-Puffed or Kraft mini marshmallows melt smoothly without graininess. For butter, Kerrygold adds a nice richness, but any unsalted variety works. The Rice Krispies must be fresh (check the snap when you open the box). I grab both at Target or Walmart—convenient and consistent quality.
No mini marshmallows? Use 16 oz of regular marshmallows (about 40 large ones). Swap Rice Krispies for Generic crisp rice cereal—same texture, lower cost. For a twist, peanut butter can replace some butter (use half the amount). The M&Ms can be any variety—plain, peanut, or even seasonal colors (the fun kind).
These keep 3-4 days at room temperature in an airtight container. For longer storage, freeze for up to 6 weeks—thaw 30 minutes before serving. Press a few extra M&Ms on top right after pressing into the pan for a pretty finish.
Why You’ll Love This Recipe
- One Bowl Wonder: I melt the butter and marshmallows in the same pot I mix the cereal in—no extra dishes, just easy cleanup.
- Sweet & Crunchy: That first bite with the crispy Rice Krispies, gooey marshmallow, and the little pop of chocolate from the M&Ms? Ridiculously good.
- Party or Lunchbox: I’ve packed these for school treats and served them at birthday parties—equally loved by kids and adults.
Step-by-Step Instructions for M&M Rice Krispie Treats
Here’s the method. Straightforward, tested, works every time.
Step 1: Grease the Pan and Measure Ingredients
Lightly coat a 9×13-inch baking dish with the cooking spray, ensuring all surfaces are evenly covered. This prevents sticking when you press the mixture in later. I also spray my silicone spatula—it makes pressing the mixture down much easier.
Measure out the 6 cups Rice Krispies Cereal and 1.5 cups M&Ms Candy into separate bowls. Set these aside. You’ll add them at different stages, so keeping them separate now saves confusion later.
Step 2: Melt Butter and Marshmallows Together
In a large pot, melt the 0.5 cup Unsalted Butter over low heat. Once melted, add the 10 cups Mini Marshmallows and stir continuously with a silicone spatula. The marshmallows will soften and begin to melt within 3-4 minutes.
After the marshmallows are about 80% melted, add the 1 tsp Vanilla Extract and 0.25 tsp Salt. Stir until the mixture is completely smooth and no marshmallow lumps remain. The mixture should be glossy and thick—this is your glue for the treats.
Step 3: Incorporate Cereal and Candy
Remove the pot from heat and immediately add the 6 cups Rice Krispies Cereal. Fold gently with the spatula until every piece is evenly coated in the marshmallow mixture. Be quick but thorough—the cereal will start to crisp up if left too long in the warm mixture.
Add 1 cup of the M&Ms Candy and stir just until evenly distributed. Reserve the remaining 0.5 cup for topping. You want the candy visible but not sinking to the bottom.
Step 4: Press and Set
Transfer the mixture to the prepared baking dish. Using your greased spatula, press it down firmly and evenly into the pan. The mixture will be sticky, but the cooking spray prevents it from clinging to your tools.
Sprinkle the remaining 0.5 cup M&Ms Candy evenly over the top, pressing them in lightly so they adhere. Let the treats cool at room temperature for 30-45 minutes until fully set. You’ll know they’re ready when the top is firm to the touch and the M&Ms no longer shift when you press them.
Step 5: Cut and Serve
Once completely cool, use a sharp knife to cut the treats into 24 even squares. For clean cuts, run the knife under hot water between slices. This prevents dragging the marshmallow mixture and keeps the edges neat.
Serve immediately or store in an airtight container at room temperature for up to 3 days. The treats stay fresh and maintain their signature crunch, with each bite delivering gooey marshmallow, crispy cereal, and colorful candy pieces throughout.
Pro Tips For Making M&M Rice Krispie
- Melt Butter Low: Use medium-low heat when melting the butter and marshmallows—high heat will scorch the sugar and turn your treats bitter. I learned this the hard way after ruining two batches.
- Add Vanilla Early: Stir the vanilla extract into the melted butter before adding marshmallows so it distributes evenly instead of clumping in one spot.
- Cool Slightly First: Let the marshmallow mixture cool for about 2 minutes before mixing in the Rice Krispies—this prevents the cereal from getting soggy and losing its crunch.
- Reserve M&Ms: Fold in half the M&Ms at the end and sprinkle the rest on top after pressing into the pan—this keeps them from bleeding color into the mixture and makes them look prettier.
Storing and Reheating m&m rice krispie
Room Temperature Storage
Let these treats cool completely before storing. I place them in a single layer in an airtight container with parchment paper between layers to prevent sticking. They’ll stay fresh for 3-4 days at room temperature. The M&Ms keep their crunch, and the marshmallow stays soft. ❄️
Freezing for Later
For longer storage, wrap individual squares in plastic wrap, then place in a freezer bag. They’ll keep for up to 6 weeks. Thaw at room temperature for 30 minutes before serving. Freezing locks in freshness, so they taste just as good as the day you made them.
Reheating (Not Needed!)
These treats are best enjoyed at room temperature—no reheating required. If they’ve been refrigerated, let them sit out for 20-30 minutes to soften slightly. The cereal stays crisp, and the marshmallow regains its chewy texture naturally.
Avoid the Fridge
Don’t store them in the refrigerator, as the cold can make the cereal soggy and the marshmallow too firm. Room temperature or freezing are your best options. I learned this the hard way after my first batch turned rock-hard!
Serving After Storage
If the treats lose a little crispness, a quick 10-second microwave can revive them. Just don’t overdo it—the marshmallow can get too gooey. I prefer them straight from the container, though.
Nutrition Facts
Frequently Asked Questions
Can I use regular marshmallows instead of mini?
Yes! Use 16 oz of regular marshmallows (about 40 large). They melt the same way, just take a little longer. Cut them in half for faster melting.
How do I keep the treats from sticking to my hands?
Lightly grease your hands with butter or cooking spray before pressing the mixture. This creates a barrier so the sticky marshmallow doesn’t cling to your skin.
Why did my treats turn out hard?
Overcooking the marshmallow mixture is the usual culprit. Melt over low heat and remove from heat as soon as it’s smooth. Stirring too long after melting can also make them dense.
Can I add other mix-ins besides M&Ms?
Try adding 1/2 cup of chopped nuts, mini chocolate chips, or sprinkles. Just keep the total mix-ins to about 2 cups max so the treats hold together.

- Lump Rice Recipe Sri Lanka: Traditional Island-Style Texture - November 4, 2026
- Laos Sticky Rice Recipe: Traditional Steamed Perfection - November 4, 2026
- Magic Rice Recipe: One-Pot Aromatic Wonder - November 4, 2026