
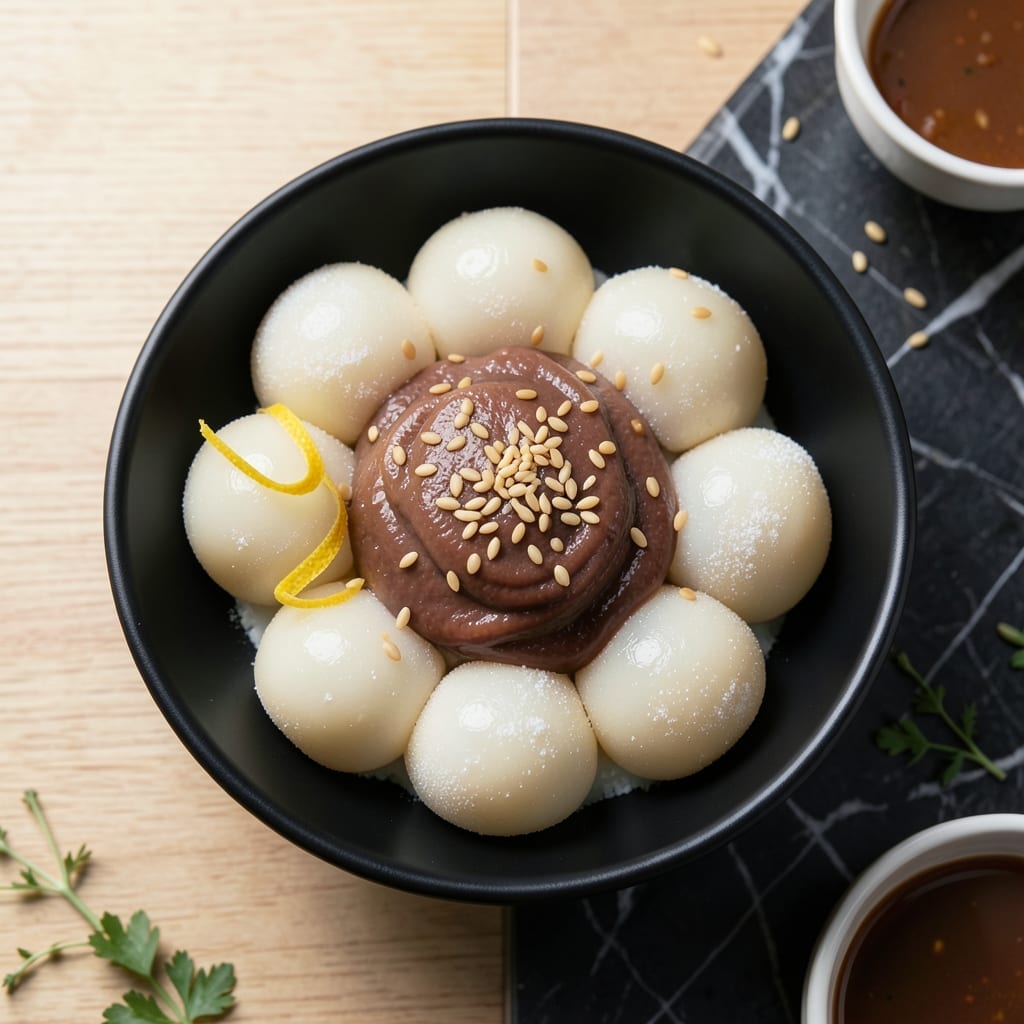
This dish transforms ordinary rice into chewy, pillowy mochi with rich, flavorful centers. The process involves steaming glutinous rice flour until elastic, then shaping it around sweet or savory fillings.
Each bite delivers a satisfying contrast between the soft, stretchy exterior and the burst of filling inside. The technique is precise but accessible, using basic kitchen tools and standard ingredients available at most grocery stores.
Traditional versions often feature red bean paste or sesame, while modern adaptations include chocolate, peanut butter, or spiced pumpkin. The versatility makes this recipe perfect for any occasion.
The result is a visually impressive dish that balances textures and flavors in every mouthful. This method ensures consistent, professional-quality mochi every time.
Ingredients for Mochi Rice Stuffing
Transform simple ingredients into chewy, pillowy mochi with rich, flavorful centers for everyone to enjoy.
| Ingredient | Amount | Notes |
|---|---|---|
| Glutinous Rice Flour 🌾 | 2 cups | Also called sweet rice flour |
| Granulated Sugar 🍚 | ½ cup | Adjust to taste preference |
| Water 💧 | 1 ¼ cups | Warm for better dissolution |
| Cornstarch 🌽 | ¼ cup | For dusting work surface |
| Red Bean Paste 🫘 | 1 cup | Store-bought or homemade |
| Sesame Seeds 🌰 | ¼ cup | Toasted for filling option |
| Peanut Butter 🥜 | ½ cup | Creamy variety preferred |
| Dark Chocolate 🍫 | 4 oz | Chopped into small pieces |
| Coconut Milk 🥥 | ½ cup | Full-fat for richness |
| Vanilla Extract 🌿 | 1 tsp | Pure extract preferred |
| Salt 🧂 | ¼ tsp | Fine sea salt recommended |
The glutinous rice flour is non-negotiable—look for labels specifying “sweet rice flour” at Asian markets or well-stocked grocery stores like Whole Foods. Brands such as Mochiko or Shiratamako are ideal for authentic texture. Avoid regular rice flour; it lacks the elasticity needed. The red bean paste filling can be found in the international aisle or made from scratch with adzuki beans and sugar.
For substitutions, black sesame paste replaces red bean paste beautifully. No peanut butter? Almond butter or Nutella work equally well. The coconut milk can be swapped for heavy cream if dairy is acceptable, though the flavor profile will shift. If avoiding refined sugar, coconut sugar or maple syrup can replace granulated sugar in the dough.
Store glutinous rice flour in an airtight container in a cool, dry place for up to 6 months. Fillings like red bean paste keep 1 week refrigerated or 3 months frozen. The shaped mochi are best eaten within 2-3 days for optimal texture.
Why You’ll Love This Recipe
- One Bowl Wonder: I mix the glutinous rice flour, sugar, and water right in the same bowl I’ll steam it in—no extra dishes to wash.
- Sweet-Savory Magic: The red bean paste tucked inside gives that perfect contrast to the chewy, slightly sweet mochi rice.
- Holiday or Tuesday: Honestly, it’s just as at home on a Lunar New Year table as it is packed in my lunchbox midweek.
- Stretches Easily: A batch costs pennies and keeps well, so I’ll double it and have leftovers for days without breaking the bank.
Step-by-Step Instructions for Mochi Rice Stuffing
Master the technique for perfectly chewy mochi with these precise, tested steps.
Step 1: Prepare the Mochi Dough Base
In a microwave-safe bowl, whisk together the 2 cups Glutinous Rice Flour, 0.5 cup Granulated Sugar, and 0.25 tsp Salt until fully combined. Gradually add the 1.25 cups Water while stirring continuously to prevent lumps from forming.
Cover the bowl with plastic wrap, leaving a small vent. Microwave on high for 2 minutes, then stir thoroughly with a wet spatula to release steam and prevent sticking. The mixture should look translucent and slightly gel-like at this stage.
Return to the microwave for an additional 1-2 minutes until the dough becomes stretchy and pulls away from the sides of the bowl. It should have a glossy, elastic appearance and feel slightly tacky to the touch.
Step 2: Knead and Portion the Dough
Dust a clean work surface lightly with the 0.25 cup Cornstarch. Transfer the hot dough onto the prepared surface—be careful, as it will be extremely sticky. Using cornstarch-dusted hands, knead the dough for 3-5 minutes until smooth and uniform in texture.
The dough should no longer stick to your hands or the work surface when properly kneaded. If it remains sticky, add more cornstarch 1 tablespoon at a time, but avoid over-dusting as this can make the final mochi dry.
Divide the dough into 8 equal portions (about 2-ounce balls) for standard-sized mochi. Keep the portions covered with plastic wrap to prevent drying while you work with each piece.
Step 3: Shape and Fill the Mochi
Working with one portion at a time, flatten a dough ball into a 3-inch circle on your cornstarch-dusted surface. The edges should be slightly thinner than the center to accommodate the filling without tearing.
Place 1 tablespoon of your chosen filling in the center—options include the Red Bean Paste, a combination of Peanut Butter and Dark Chocolate, or Sesame Seeds mixed with 0.5 cup Coconut Milk and 1 tsp Vanilla Extract for a creamy variation. For the peanut butter-chocolate filling, use 1 tablespoon peanut butter and 0.5 oz chopped dark chocolate per mochi.
Gently draw the edges of the dough up and around the filling, pinching at the top to seal completely. Roll the filled mochi between your palms to smooth the surface, ensuring no filling is exposed.
Step 4: Final Touches and Serving
Lightly dust each finished mochi with additional cornstarch to prevent sticking. For the sesame-coconut variation, roll the sealed mochi in toasted sesame seeds before the final dusting to create an even coating.
Arrange the mochi on a parchment-lined plate and let them rest at room temperature for 10 minutes. This brief rest allows the dough to set slightly, making it easier to handle. The ideal texture should be soft and pillowy with a slight give when pressed gently.
Serve immediately for the best texture, as mochi is most enjoyable when fresh. Store any leftovers in an airtight container at room temperature for up to 2 days, though they’re best consumed the same day.
Pro Tips For Making Mochi Rice Stuffing
- Steam First, Bake After: I learned this the hard way—steam the glutinous rice flour mixture for 20 minutes before baking to guarantee that chewy mochi texture. Baking alone leaves it dense and gummy.
- Dust with Cornstarch: After shaping the stuffing, roll each piece in cornstarch before filling with red bean paste. This keeps them from sticking together and makes handling way easier.
- Skip Cold Water: Use warm water for mixing the glutinous rice flour—cold water makes the batter clump and never smooths out, no matter how much you whisk.
- Chill Before Filling: Let the cooked mochi rice cool completely in the fridge for at least 30 minutes. Hot or warm dough tears when you try to stuff it with red bean paste.
Essential Equipment for This Recipe
Microwave-Safe Bowl
A large, deep microwave-safe bowl is essential for mixing and cooking the mochi dough. I recommend a 2-quart glass bowl like Pyrex, which handles the heat well and lets you see the dough’s progress. The size prevents overflow as the mixture expands during cooking. 🔥
Plastic Wrap
Use heavy-duty plastic wrap to cover the bowl during microwaving—it traps steam while allowing a small vent. Glad Press’n Seal works great because it clings tightly to the bowl. Avoid thin wraps that might melt or tear under high heat.
Silicone Spatula
A heat-resistant silicone spatula is crucial for stirring the hot dough. I prefer OXO Good Grips spatulas—they won’t melt and have a flat edge for scraping. Wet it slightly before use to prevent sticking.
Work Surface Tools
Dust your counter with cornstarch and use a rolling pin for even flattening. A kitchen scale helps divide dough into 2-ounce portions precisely. For fillings, small cookie scoops ensure consistent 1-tablespoon portions.
Steaming Setup
For traditional steaming, use a bamboo steamer lined with parchment paper. A stainless steel steamer insert also works if you prefer stovetop methods. Both create the ideal moist environment for perfect mochi texture.
Storage Containers
Keep finished mochi in an airtight container at room temperature. I use glass containers with snap-lock lids to prevent drying. For fillings, small mason jars work well for red bean paste or peanut butter mixtures.
Nutrition Facts
Frequently Asked Questions
Can I use regular rice flour instead?
No, regular rice flour won’t work. You need glutinous rice flour (also called sweet rice flour) for the chewy texture. Brands like Mochiko are ideal for this recipe.
How do I prevent the dough from sticking?
Dust your work surface and hands with plenty of cornstarch. Keep extra nearby to reapply as needed while shaping. The dough is naturally very sticky.
Can I make these ahead of time?
Yes, but they’re best fresh. Store in an airtight container at room temperature for up to 2 days. The texture changes slightly after the first day.
What if my mochi tears while shaping?
Patch small tears with extra dough. For prevention, ensure your circles are thin at the edges and thicker in the center where the filling goes.

- Peri Peri Rice Recipe: Spicy Portuguese One-Pot Harmony - November 6, 2026
- Mexican Flavoured Rice Recipe: Authentic Spice-Infused One-Pot Meal - November 6, 2026
- Lao Gan Ma Fried Rice Recipe: Spicy Wok-Tossed Perfection - November 6, 2026