
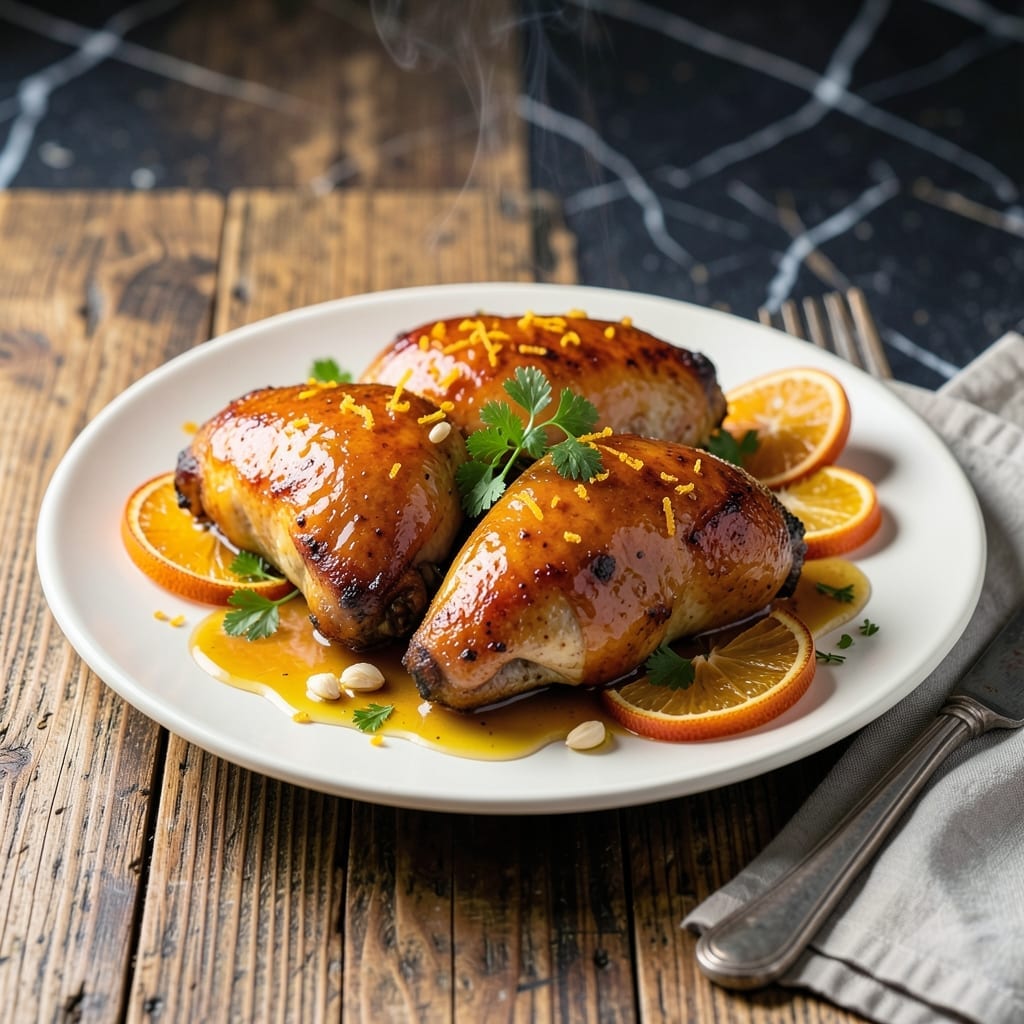
This orange glazed chicken delivers a perfect balance of sweet citrus and savory depth that’s impossible to resist. The glaze reduces to a glossy, sticky coating that clings to every bite of tender, juicy chicken.
The secret lies in a simple yet precise reduction of fresh orange juice, honey, and a touch of soy sauce, creating complexity without overwhelming the dish. Cooking the chicken first ensures it stays moist while the glaze thickens to a perfectly luscious consistency.
What sets this apart is the contrast—crispy, caramelized edges with a tender interior, all coated in that bright, tangy-sweet glaze. It’s a dish that looks impressive but requires minimal effort.
Serve with steamed rice or roasted vegetables to soak up every drop of the vibrant sauce. This is a meal that satisfies every time.
Ingredients for Orange Glazed Chicken
Bright citrus and rich savory notes come together in this vibrant dish with minimal effort.
| Ingredient | Amount | Notes |
|---|---|---|
| Boneless Skinless Chicken Thighs 🍗 | 1 ½ lb | Patted dry for crispiness |
| Fresh Orange Juice 🍊 | 1 ½ cups | Newly squeezed preferred |
| Honey 🍯 | ½ cup | Local or raw variety |
| Soy Sauce 🫙 | 3 tbsp | Low-sodium if preferred |
| Orange Zest 🍊 | 1 tbsp | Finely grated, packed |
| Garlic Cloves 🧄 | 3 cloves | Minced or pressed |
| Fresh Ginger 🌿 | 1 tbsp | Peeled and grated |
| Olive Oil 🫒 | 2 tbsp | Divided for cooking |
| Cornstarch 🌾 | 1 tbsp | For thickening glaze |
| Salt 🧂 | ½ tsp | Kosher or sea salt |
| Black Pepper 🌶️ | ¼ tsp | Freshly ground preferred |
| Red Pepper Flakes 🌶️ | ¼ tsp | Optional for heat |
| Green Onions 🧅 | ¼ cup | Sliced, for garnish |
The chicken is the foundation—thighs stay juicier than breasts when cooked to caramelized perfection. Look for bone-in, skin-on if you prefer extra crispiness, but boneless works great too. Whole Foods or Costco have reliable organic options. For the oranges, navel or Valencia give the best juice-to-pulp ratio. Always zest before juicing (trust me, it’s easier that way).
No fresh oranges? Bottled juice in a pinch, but reduce it by half first to concentrate the flavor. Out of honey? Maple syrup at a 1:1 ratio works, though it changes the taste slightly. For gluten-free, swap soy sauce for tamari. The cornstarch can be replaced with arrowroot powder—same amount. Don’t skip the ginger; it balances the sweetness perfectly.
The glaze thickens as it cools, so let it sit 5 minutes before serving. Leftovers keep 4-5 days in the fridge (the flavors deepen overnight). Reheat gently to avoid breaking the sauce. Freezes well for 3 months—just thaw in the fridge before reheating.
Why You’ll Love This Recipe
- One Pan Wonder: I love that this comes together in a single skillet—just sear the thighs, then let the orange juice, honey, and soy sauce work their magic.
- Sweet-Tangy Perfection: The combo of fresh orange zest and honey gives it that bright, sticky glaze that’s impossible to resist.
- Weeknight Rescue: Honestly, it’s my go-to when I need something fast but still impressive for dinner.
- Leftovers? Even Better: The flavors deepen overnight, so I always make extra for lunch the next day.
Step-by-Step Instructions for Orange Glazed Chicken
Master this technique and you’ll achieve perfectly caramelized, sticky-sweet chicken with bright citrus notes.
Step 1: Prepare and Season the Chicken
Pat the 1.5 lb boneless skinless chicken thighs completely dry with paper towels. This crucial step removes excess moisture so the meat browns properly rather than steaming. Season both sides evenly with the 0.5 tsp salt and 0.25 tsp black pepper.
I always use my fingers to gently press the seasoning into the meat for better adhesion. The chicken should look evenly dusted with seasoning before it hits the pan. This simple step makes a noticeable difference in flavor distribution.
Step 2: Sear the Chicken to Golden Perfection
Heat 1 tbsp olive oil in a large skillet over medium-high heat until it shimmers. Add the chicken thighs in a single layer, working in batches if necessary to avoid crowding the pan. Cook undisturbed for 5-6 minutes until the edges develop a deep golden brown crust.
Resist the urge to move the chicken—letting it sear undisturbed creates that beautiful caramelization. Flip and cook for another 4-5 minutes until the second side is equally browned and the chicken reaches an internal temperature of 165°F. Transfer to a plate and set aside.
Step 3: Create the Orange Glaze Base
In the same skillet, reduce heat to medium and add the remaining 1 tbsp olive oil. Add the 3 cloves minced garlic and 1 tbsp grated fresh ginger, sautéing for 30-45 seconds until fragrant but not browned. Immediately add the 1.5 cups fresh orange juice, 0.5 cup honey, 3 tbsp soy sauce, 1 tbsp orange zest, and 0.25 tsp red pepper flakes.
Bring the mixture to a gentle boil, then reduce heat to medium-low and let it simmer for 8-10 minutes until slightly reduced. The liquid will begin to thicken and develop a glossy sheen as the flavors meld together.
Step 4: Thicken and Finish the Glaze
In a small bowl, whisk the 1 tbsp cornstarch with 1 tbsp of cold water until smooth. Slowly pour this slurry into the simmering orange mixture while stirring constantly. Cook for an additional 1-2 minutes until the glaze thickens enough to coat the back of a spoon.
The glaze should be syrupy and slightly translucent at this point. Return the chicken to the skillet, spooning the glaze over each piece to fully coat. Simmer for 2-3 minutes to allow the flavors to penetrate the meat and the sauce to reach its final consistency.
Step 5: Garnish and Serve Immediately
Transfer the glazed chicken to a serving platter and sprinkle with the 0.25 cup sliced green onions. The contrast of the bright green against the glossy orange glaze makes for a beautiful presentation.
Serve immediately while the glaze is still sticky and warm. Each piece should be thoroughly coated with sauce that clings to the chicken. The sauce will thicken slightly as it cools, so don’t wait too long to enjoy this dish at its best.
Pro Tips For Making Orange Glazed Chicken
- Sear Before Glazing: Get a good brown crust on the chicken thighs first—about 4-5 minutes per side in a hot pan. The caramelized bits will deepen the flavor of your orange glaze.
- Zest First, Juice Later: Always zest your oranges before juicing them. Once you’ve juiced them, the peels are slippery and much harder to grate.
- Reduce the Glaze: After mixing the orange juice, honey, and soy sauce, simmer it for 5-7 minutes until it thickens slightly. This keeps the glaze from being watery and helps it cling to the chicken.
- Rest the Chicken: Let the chicken rest for 5 minutes after cooking—it keeps the juices locked in. I learned this the hard way after serving dry chicken too many times.
Pro Cooking Tips for This Recipe
Perfect Searing Technique
Always pat the chicken completely dry before seasoning—I use paper towels and press firmly to remove all moisture. This ensures a proper sear rather than steaming. Season generously with salt and pepper just before cooking. 🔥
Glaze Reduction Control
Simmer the glaze at medium-low heat to prevent burning the honey. I stir frequently with a wooden spoon, scraping up browned bits from the pan. The glaze should reduce by about one-third before adding the slurry.
Slurry Integration
Mix 1 tbsp cornstarch with 1 tbsp cold water until completely smooth. Pour slowly into the simmering glaze while whisking constantly. The mixture will thicken within 1-2 minutes—watch for a syrupy consistency.
Temperature Precision
Use a meat thermometer to confirm chicken reaches 165°F internally. I check the thickest piece, avoiding bone if using bone-in. Remove from heat immediately to prevent overcooking—carryover heat will finish the job.
Resting for Perfection
Let the glazed chicken rest for 5 minutes before serving. This allows the juices to redistribute and the glaze to set slightly. I tent loosely with foil to keep it warm without steaming the crispy edges.
Pan Selection Matters
A heavy-bottomed skillet like Lodge cast iron or All-Clad stainless steel prevents hot spots. Avoid nonstick for this recipe—you want those browned bits to develop for maximum flavor in your glaze. 💡
Nutrition Facts
Frequently Asked Questions
Can I use chicken breasts instead of thighs?
Yes, but thighs stay juicier. If using breasts, reduce cooking to 4-5 minutes per side to prevent dryness. The glaze works well with either cut.
How do I make the glaze thicker?
Simmer the sauce longer after adding the slurry. For extra thickness, mix 1 tsp cornstarch with 1 tsp water and stir in. Cook for 1-2 minutes more.
Can I make this ahead of time?
Cook and glaze the chicken, then refrigerate for up to 4 days. Reheat gently in a skillet with a splash of water to loosen the sauce.
What if my glaze is too sweet?
Balance it with 1 tsp rice vinegar or 1 tbsp soy sauce. Stir well and taste before adding more. The acidity brightens the flavor.

- Jollof Rice Sauce Recipe: West African Tomato and Spice Infusion - September 25, 2026
- Japanese Rice Soup Recipe: Umami-Rich Comfort in a Bowl - September 25, 2026
- Homemade Cream Of Rice Recipe: Silk-Smooth Breakfast in Minutes - September 25, 2026