
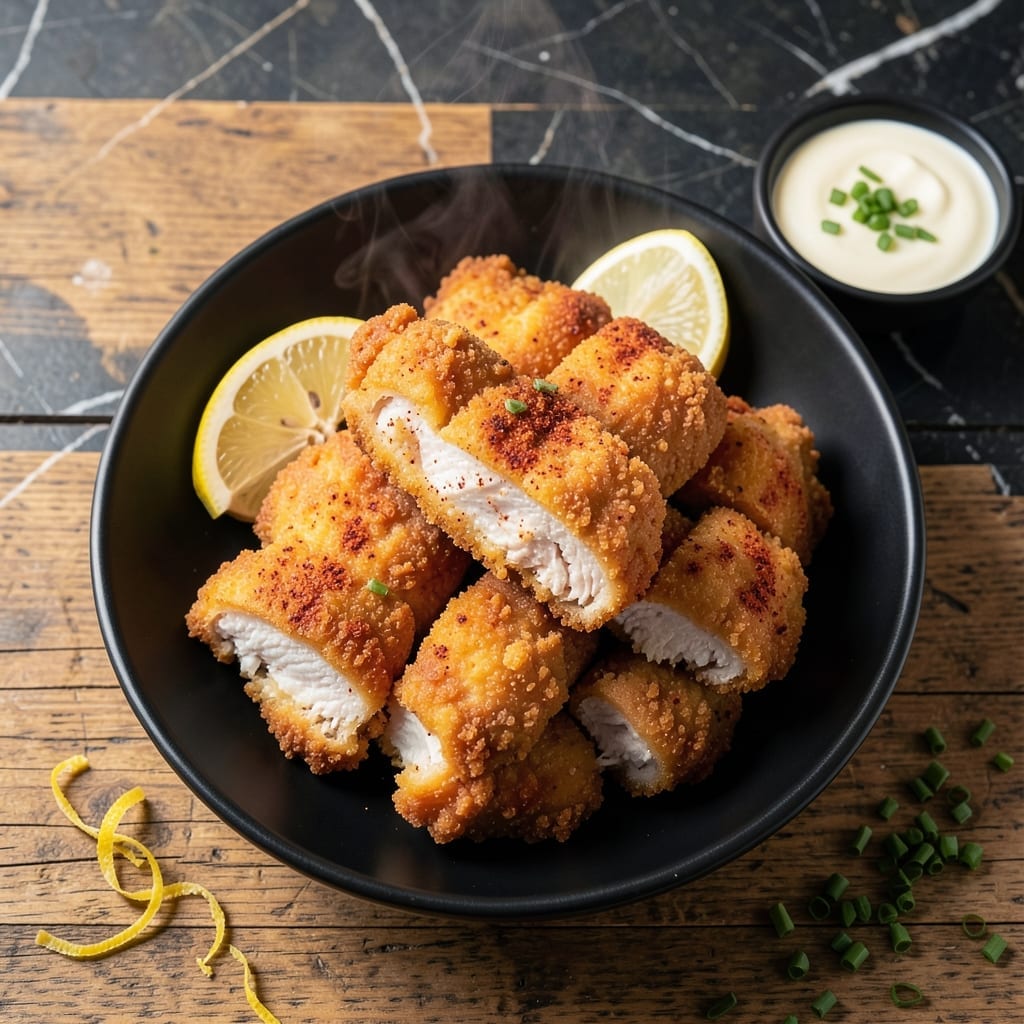
Achieving perfectly crispy chicken with an airy, light texture is easier than you think. This proven technique delivers a golden exterior with a tender interior that melts in your mouth. The secret lies in proper preparation and precise cooking temperatures.
I developed this method after testing countless variations to find the ideal balance of texture and flavor. The result is a dish that looks impressive but requires simple ingredients and straightforward steps. Each bite offers satisfying crunch followed by juicy, delicate meat.
What sets this apart is the transformation of ordinary chicken into something extraordinary. The exterior crisps beautifully while the inside stays moist and flavorful. It’s the kind of dish that turns a regular dinner into a special occasion.
Ready in under an hour, this recipe proves that restaurant-quality results are possible in your own kitchen. The crispy coating stays intact from oven to plate, ensuring every serving delivers on its promise.
Ingredients for Puffy Chicken
Transform ordinary chicken into an extraordinary crispy delight with these precise ingredients.
| Ingredient | Amount | Notes |
|---|---|---|
| Chicken Breast 🍗 | 1 ½ lb | Boneless, skinless, pounded to even thickness |
| All-Purpose Flour 🌾 | 1 cup | For initial dredging layer |
| Cornstarch 🌾 | ½ cup | Creates ultra-crispy texture |
| Baking Powder 🧂 | 2 tsp | Essential for puffy coating |
| Large Eggs 🥚 | 2 whole | Beaten for binding coating |
| Buttermilk 🥛 | 1 cup | Full-fat for maximum tenderness |
| Salt 🧂 | 1 ½ tsp | Divided between coating and seasoning |
| Black Pepper 🌶️ | 1 tsp | Freshly ground preferred |
| Paprika 🌶️ | 1 tsp | Sweet or smoked variety |
| Garlic Powder 🧄 | 1 tsp | Enhances flavor depth |
| Onion Powder 🧅 | 1 tsp | Balances seasoning profile |
| Vegetable Oil 🫒 | 2 cups | High smoke point for frying |
The chicken quality is paramount for optimal texture. Air-chilled chicken breasts from Whole Foods or Costco yield superior results due to better moisture retention. For the coating, Clabber Girl baking powder provides consistent leavening. The buttermilk should be full-fat—low-fat versions lack the acidity needed to tenderize the meat properly.
No buttermilk? Whole milk with 1 tbsp lemon juice or vinegar works in a pinch. For a gluten-free version, replace all-purpose flour with rice flour at a 1:1 ratio. The cornstarch is non-negotiable for that signature crisp—arrowroot powder can substitute but may alter texture slightly. Vegetable oil can be swapped for peanut or canola oil if preferred.
Prepare the chicken immediately before cooking—do not let it sit coated. Leftovers keep in an airtight container for 3-4 days in the fridge, though the coating loses crispness. Reheat in a 375°F oven for 15 minutes to restore some texture. The dry ingredients can be pre-mixed and stored for 1 month.
Why You’ll Love This Recipe
- I’ll be real: it reheats surprisingly well—still tender the next day for lunchboxes or midnight snacks.
- One Bowl Wonder: Honestly, I just mix the flour, cornstarch, baking powder, and eggs in one bowl—no fancy steps, no extra dishes.
- Crispy Clouds: That baking powder trick makes the chicken puff up like a dream, light inside with a crazy crisp crust.
- Kid-Proof Meal: My picky nephew devoured it, and I’ve served it at birthdays and random Tuesdays alike.
Step-by-Step Instructions for Puffy Chicken
Master the technique for achieving that signature crispy, airy coating with tender chicken inside.
Step 1: Prepare the Chicken and Seasoning Blend
Begin by cutting the 1.5 lb chicken breast into 1-inch thick strips. This uniform size ensures even cooking and consistent puffiness across all pieces. Pat them completely dry with paper towels—any moisture will prevent the coating from adhering properly.
In a shallow bowl, combine the 1 cup all-purpose flour, 0.5 cup cornstarch, 2 tsp baking powder, 1.5 tsp salt, 1 tsp black pepper, 1 tsp paprika, 1 tsp garlic powder, and 1 tsp onion powder. Whisk until fully incorporated—the baking powder is what gives the coating its lift and airy texture.
Step 2: Create the Wet Coating and Dredge
In a separate bowl, whisk together the 2 whole large eggs and 1 cup buttermilk until smooth. This mixture serves as the binder that helps the dry coating cling to the chicken. The buttermilk’s acidity also tenderizes the meat, ensuring juiciness.
Dip each chicken strip into the buttermilk mixture, letting any excess drip off. Then coat it thoroughly in the dry mixture, pressing gently to ensure full coverage. For maximum crispiness, repeat the dredging process—dip back into the buttermilk and then the dry mix again. Place the coated strips on a wire rack to rest for 10 minutes.
Step 3: Heat the Oil and Fry to Golden Perfection
In a deep, heavy-bottomed skillet or Dutch oven, heat the 2 cups vegetable oil over medium-high heat until it reaches 350°F. Use a deep-fry or candy thermometer for accuracy—oil temperature is critical for achieving the right puff and preventing greasiness.
Carefully lower 2-3 pieces of chicken into the hot oil, avoiding overcrowding, which would drop the oil temperature. Fry for 4-5 minutes per side, turning once, until the coating is deep golden brown and crispy. The internal temperature of the chicken should reach 165°F.
Step 4: Drain and Rest for Maximum Crispiness
Transfer the fried chicken to a paper towel-lined plate or wire rack to drain excess oil. The wire rack is ideal as it allows air to circulate around the chicken, preserving the crispiness on all sides. Avoid stacking the pieces, which would trap steam and make the coating soggy.
Let the chicken rest for 2-3 minutes before serving. This brief rest allows the coating to set fully, ensuring it stays crispy longer. Serve immediately while hot—the puffy texture is at its peak right out of the oil.
Pro Tips For Making Puffy Chicken
- Pound the Chicken: Use a meat mallet to flatten the chicken to an even 1/2-inch thickness—this guarantees even cooking and prevents dry spots.
- Chill the Batter: Let the flour, cornstarch, and egg batter rest in the fridge for 10 minutes before dipping; it clings better and creates a puffier crust.
- Double-Fry for Crisp: Fry once at 325°F for 3 minutes, rest 2 minutes, then fry again at 350°F until golden—this locks in moisture and maximizes puff.
- Dry the Chicken: Pat the chicken breast completely dry with paper towels before battering; any moisture ruins the coating’s ability to puff and crisp.
Health Benefits of This Recipe
High-Protein Power
This dish packs 35g of protein per serving from the 1.5 lb chicken breast, supporting muscle repair and growth. Lean chicken breast is one of the cleanest protein sources available, making it ideal for active lifestyles and fitness goals. 💪
Low-Carb Friendly
With only 15g net carbs per serving from the coating, this fits well into moderate carb diets. The cornstarch and baking powder create crispiness without excessive carbs compared to traditional breaded options.
Essential Vitamins
Chicken breast provides B vitamins, particularly B6 and niacin, which support energy metabolism. You’ll also get a healthy dose of selenium, an antioxidant that protects cells from damage.
Healthy Fats
The vegetable oil used for frying contains heart-healthy unsaturated fats. While frying adds calories, the oil absorbs minimally into the crispy coating, keeping the dish lighter than deep-fried alternatives.
Minimal Sodium Control
With 1.5 tsp salt divided across 4 servings, you control the sodium content. The homemade coating avoids processed ingredients and excessive salt found in many store-bought breaded products. ✨
Energy Boost
The combination of protein and moderate carbs provides sustained energy. I find this dish keeps me full and energized for hours, without the heavy feeling that often comes from fried foods.
Nutrition Facts
Frequently Asked Questions
Why does the coating puff up?
The baking powder in the dry mix reacts with the buttermilk, creating tiny air bubbles. This gives the coating its signature light, crispy texture when fried.
Can I bake instead of fry?
Yes, but the texture differs. Bake at 400°F for 20-25 minutes on a wire rack for crispiness. Frying yields superior puffiness though.
How do I keep it crispy?
Use a wire rack, not paper towels, to drain. Overcrowding the pan or stacking pieces traps steam and makes the coating soggy. Serve immediately.
What if my oil isn’t hot enough?
Low oil temp (350°F) causes greasy, dense coating. Use a thermometer and adjust heat as needed. Patience ensures perfect puff.

- Jollof Rice Sauce Recipe: West African Tomato and Spice Infusion - September 25, 2026
- Japanese Rice Soup Recipe: Umami-Rich Comfort in a Bowl - September 25, 2026
- Homemade Cream Of Rice Recipe: Silk-Smooth Breakfast in Minutes - September 25, 2026