
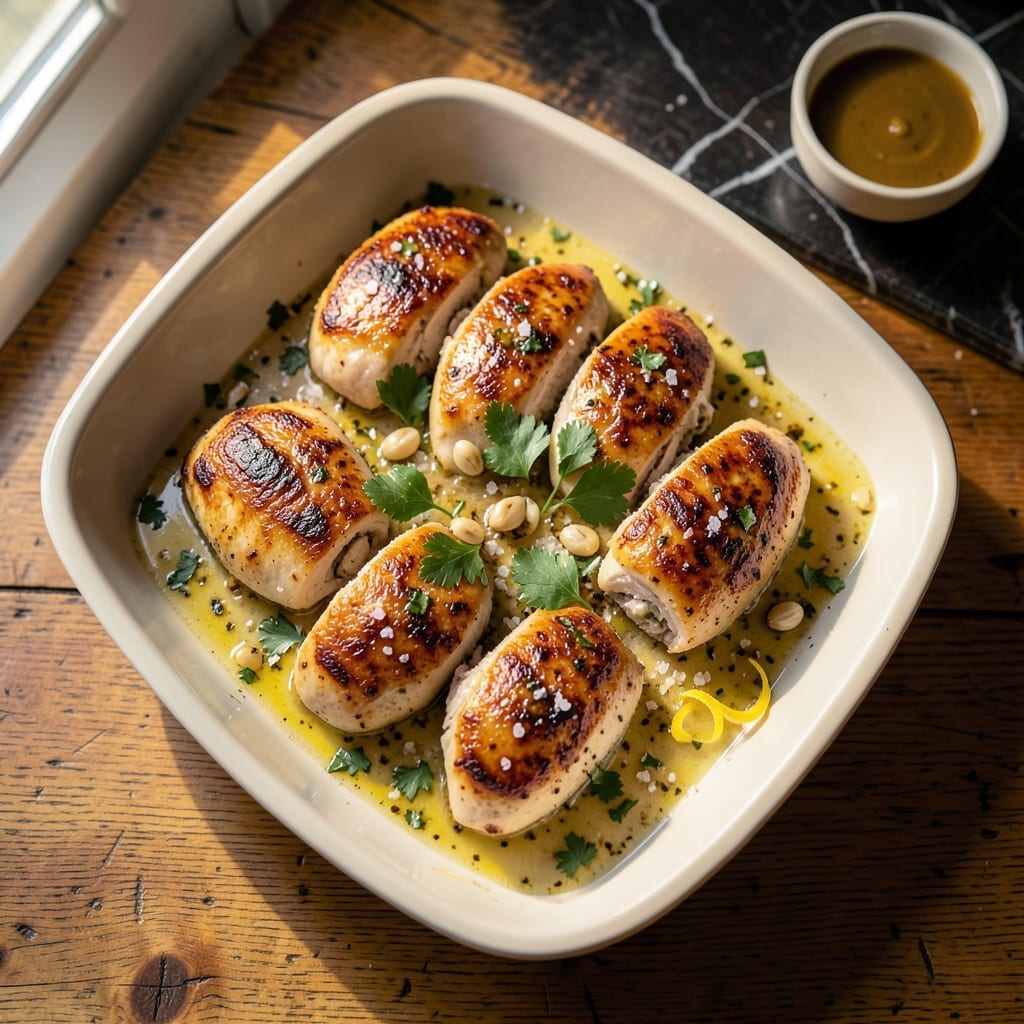
My grandmother never wrote down measurements, but her chicken always came out tender and flavorful. This oven method captures that same reliability with a simple garlic butter approach.
High heat ensures the tenderloins cook through without drying out, while the garlic butter baste keeps them moist and aromatic. It takes less effort than stovetop cooking but delivers superior results.
You’ll get perfectly cooked pieces with golden edges and juicy centers every time. The garlic butter infuses each bite with rich, savory depth that elevates the chicken beyond basic baked dishes.
Ideal for weeknight dinners when you want restaurant-quality flavor without the fuss. This technique works for both quick meals and feeding a crowd.
Ingredients for Recipe for Chicken Tenderloins in Oven
Simple ingredients, but the garlic butter makes these tenderloins unforgettable.
| Ingredient | Amount | Notes |
|---|---|---|
| Chicken Tenderloins 🍗 | 1 ½ lb | Boneless, skinless, patted dry |
| Unsalted Butter 🧈 | ½ cup | Melted for garlic butter |
| Garlic Cloves 🧄 | 6 cloves | Minced for maximum flavor |
| Fresh Parsley 🌿 | ¼ cup | Finely chopped for garnish |
| Olive Oil 🫒 | 1 tbsp | For coating chicken |
| Kosher Salt 🧂 | 1 tsp | Plus more to taste |
| Black Pepper 🌶️ | ½ tsp | Freshly ground preferred |
| Paprika 🌶️ | 1 tsp | Sweet or smoked variety |
| Dijon Mustard 🟡 | 1 tbsp | Optional for extra depth |
| Lemon Juice 🍋 | 1 tbsp | Freshly squeezed for brightness |
| Garlic Powder 🧄 | ½ tsp | For extra garlic punch |
| Onion Powder 🧅 | ½ tsp | Balances the seasoning |
The chicken tenderloins are the star here—look for plump, moist pieces (not the dried-out ones at the bottom of the package). Costco has great bulk packs, but any grocery store will do. The butter should be unsalted so you control the seasoning. I always buy European-style for extra richness (the higher fat content browns better).
No fresh garlic? Garlic powder at half the amount works in a pinch, but fresh is best. Out of parsley? Dried parsley at one-third the amount or skip it entirely. The Dijon mustard adds a nice tang—regular yellow mustard works too. For extra flavor, a pinch of cayenne or red pepper flakes adds heat without overpowering.
Bake and serve immediately for best texture. Leftovers keep 3-4 days in the fridge—reheat gently to avoid drying out. Freezes for up to 3 months (thaw overnight before reheating).
Why You’ll Love This Recipe
- One Pan Wonder: I toss the tenderloins with olive oil, pop them in the oven, and the butter-garlic magic happens hands-free.
- Garlic Butter Bliss: That first bite with the golden crust, juicy center, and the aroma of garlic and parsley? Pure comfort on a plate.
- Weeknight Hero: Between us, this is my go-to when I need dinner on the table faster than the kids can argue about homework.
- Budget Stretcher: A pound of tenderloins feeds my family for two meals, and honestly, it tastes better the next day in a sandwich.
Step-by-Step Instructions for Chicken Tenderloins in Oven
This method guarantees tender, flavorful bites with minimal effort and maximum flavor.
Step 1: Season the Chicken Tenderloins
Pat the 1.5 lb chicken tenderloins dry with paper towels—this ensures the seasoning sticks and the skin (if left on) gets crispy. In a small bowl, mix together the 1 tsp kosher salt, 0.5 tsp black pepper, 1 tsp paprika, 0.5 tsp garlic powder, and 0.5 tsp onion powder.
Drizzle the 1 tbsp olive oil over the chicken and rub it all over to coat evenly. Sprinkle the seasoning blend over the chicken, pressing it in gently so it adheres. For extra flavor, add the 1 tbsp Dijon mustard and 1 tbsp lemon juice, rubbing them into the meat as well.
Step 2: Prepare the Garlic Butter
In a small saucepan, melt the 0.5 cup unsalted butter over low heat. Add the 6 cloves minced garlic cloves and cook for 1-2 minutes, stirring constantly, until the garlic is fragrant but not browned. Browning the garlic will make it bitter, so keep the heat low and watch it closely.
Once the garlic is aromatic, remove the saucepan from heat. Stir in half of the 0.25 cup chopped fresh parsley, saving the rest for garnish. This garlic butter will baste the chicken as it bakes, infusing it with rich, savory flavor.
Step 3: Bake the Chicken to Perfection
Preheat your oven to 400°F. Place the seasoned chicken tenderloins in a single layer on a baking sheet lined with parchment paper or foil. This high heat ensures the chicken cooks quickly while staying juicy.
Pour the garlic butter mixture evenly over the chicken, making sure each piece is well-coated. Bake for 15-18 minutes, or until the internal temperature reaches 165°F and the edges are golden brown. If the chicken starts to darken too much, tent the pan loosely with foil.
Step 4: Rest and Serve
Remove the chicken from the oven and let it rest on the baking sheet for 5 minutes. This allows the juices to redistribute, ensuring the chicken stays tender and moist. Sprinkle the remaining fresh parsley over the top for a pop of color and freshness.
Serve the chicken tenderloins hot, with any pan juices spooned over the top. The combination of the crispy exterior, tender interior, and garlicky butter makes these bites irresistible. Pair with your favorite sides for a complete meal.
Pro Tips For Making Recipe For Chicken Tenderloins In Oven
- Pat Them Dry: Use paper towels to thoroughly dry the tenderloins before seasoning—moisture is the enemy of that golden, crispy crust.
- Hot Pan, Hotter Oven: Sear the tenderloins in a screaming-hot ovenproof skillet first, then transfer to a 400°F oven to finish cooking evenly.
- Butter Last: Add the unsalted butter and garlic only in the last 2-3 minutes of cooking to prevent burning and lock in that rich, garlicky flavor.
- Rest Before Serving: Let the chicken rest 5 minutes under foil after baking—it keeps the juices inside where they belong, not all over your cutting board.
Health Benefits of This recipe for chicken tenderloins in oven
Lean Protein Power
Chicken tenderloins pack a serious protein punch with about 26 grams per 3-ounce serving, making them ideal for muscle maintenance and growth. They’re naturally low in fat, especially when skinless, so you get clean energy without extra calories. I always feel satisfied after eating them. 💪
Rich in B Vitamins
These cuts are loaded with B6 and B12, which help your body convert food into energy and support brain health. A single serving provides nearly 30% of your daily B6 needs, keeping your metabolism humming. My grandmother always said chicken was “brain food,” and she was right.
Selenium Boost
Chicken is one of the best sources of selenium, a mineral that acts as a powerful antioxidant. Just 3 ounces delivers about 40% of your daily requirement, protecting your cells from damage. It’s a simple way to support your immune system.
Heart-Healthy Choice
With minimal saturated fat and no carbs, this dish fits perfectly into heart-healthy diets. The niacin in chicken also helps lower cholesterol levels. I love that it’s a guilt-free indulgence—flavorful and good for you. ✨
Bone Support
Chicken provides phosphorus, which works with calcium to keep your bones strong. A serving offers about 20% of your daily phosphorus, making it a smart choice for long-term skeletal health. It’s a small but meaningful contribution to your diet.
Easy Digestion
As a lean protein, chicken tenderloins are gentle on your digestive system, unlike heavier meats. They’re also rich in zinc, which aids in digestion and metabolism. Perfect for those days when you want a light yet satisfying meal.
Nutrition Facts
Frequently Asked Questions
What temperature should the oven be set to?
Preheat your oven to 400°F for the best results. This high temperature ensures the chicken cooks quickly while staying juicy and developing a golden crust.
How long do I bake the chicken tenderloins?
Bake for 15-18 minutes or until the internal temperature reaches 165°F. Always use a meat thermometer to check for doneness, especially if the pieces vary in size.
Can I use frozen chicken tenderloins?
Yes, but thaw them completely first in the refrigerator overnight. Baking frozen tenderloins directly will result in uneven cooking and dry texture.
Why is resting the chicken important?
Letting the chicken rest for 5 minutes after baking allows the juices to redistribute throughout the meat. Skipping this step can cause the juices to spill out when you cut into it, leaving the meat dry.

- Jollof Rice Sauce Recipe: West African Tomato and Spice Infusion - September 25, 2026
- Japanese Rice Soup Recipe: Umami-Rich Comfort in a Bowl - September 25, 2026
- Homemade Cream Of Rice Recipe: Silk-Smooth Breakfast in Minutes - September 25, 2026