
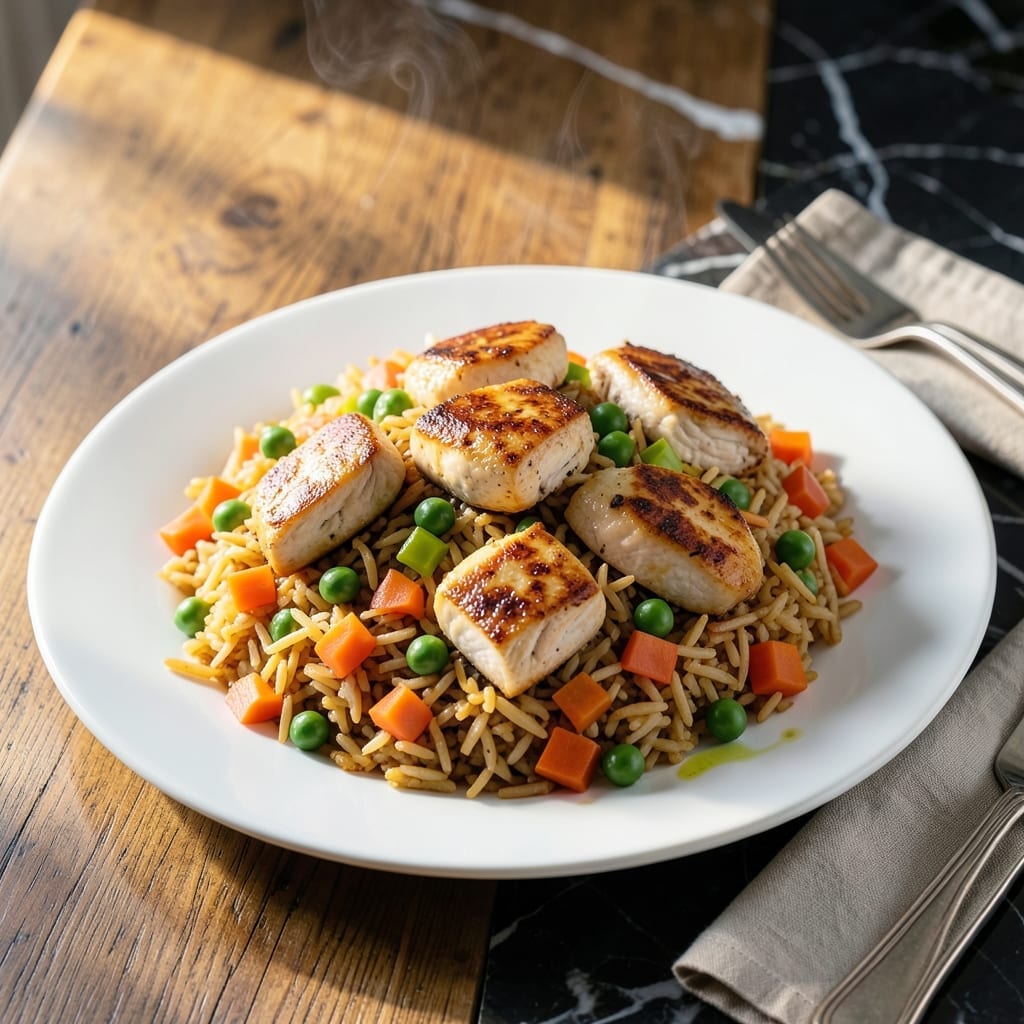
This dish transforms a simple box mix into a weeknight meal worth savoring. I developed this method to elevate Rice-A-Roni beyond its basic preparation.
The secret lies in proper chicken searing and timing. Cooking the rice just until tender, then stir-frying with vegetables and protein creates distinct textures. Each grain stays separate while absorbing rich flavors.
You’ll achieve restaurant-style results with minimal effort. The chicken stays juicy, the rice gains depth, and the vegetables add freshness to every bite.
Perfect for busy evenings when you want quality without complexity. This delivers every time.
Ingredients for Rice a Roni Stir Fried Rice with Chicken
Pantry staples and fresh veggies turn this into a meal worth savoring.
| Ingredient | Amount | Notes |
|---|---|---|
| Rice-A-Roni Rice Mix 🍚 | 1 box | Any flavor variety works |
| Boneless Skinless Chicken Breasts 🍗 | 1 ½ lb | Cut into bite-sized pieces |
| Vegetable Oil 🫒 | 2 tbsp | Divided for cooking |
| Carrots 🥕 | 2 whole | Julienned or diced small |
| Green Bell Pepper 🌶️ | 1 whole | Diced into small pieces |
| Frozen Peas 🌱 | 1 cup | Thawed and drained |
| Large Eggs 🥚 | 2 whole | Lightly beaten for scrambling |
| Garlic Cloves 🧄 | 3 cloves | Minced for best flavor |
| Green Onions 🧅 | 3 whole | Sliced thin, whites and greens separated |
| Soy Sauce 💧 | 2 tbsp | Low-sodium preferred |
| Sesame Oil 🫒 | 1 tsp | Toasted for depth |
| Kosher Salt 🧂 | ½ tsp | Adjust to taste |
| Ground Black Pepper 🌶️ | ¼ tsp | Freshly ground preferred |
The chicken is key here. Boneless, skinless breasts stay juicy when seared hot and fast—thighs work too if you prefer darker meat. I grab mine from Costco for bulk savings, but any supermarket carry will do. For the Rice-A-Roni, any flavor variety works, though the chicken or garlic herb boxes add extra depth without extra effort.
No fresh veggies? Frozen stir-fry mix saves the day (just thaw and drain first). Swap soy sauce for tamari if gluten-free. Missing sesame oil? Skip it, but add an extra dash of soy for compensation. The eggs can be omitted entirely if you’re veggie-adverse, but they add that classic fried rice richness. Pre-minced garlic in jars works in a pinch—no judgment.
Leftover magic happens here. Stores 4-5 days in the fridge, reheats beautifully. The rice actually tastes better the next day once flavors meld. Freezes for 3 months too—portion into containers for easy grab-and-go lunches.
Why You’ll Love This Recipe
- One Pan Meal: I just toss the Rice-A-Roni, chicken, and veggies in and let it do its thing—no extra pots to wash.
- Savory & Satisfying: The chicken soaks up all the herby, buttery flavor from the Rice-A-Roni mix. Honestly, I could eat it straight from the pan.
- Weeknight Lifesaver: Between us, this is my go-to when I need dinner on the table fast after work.
- Stretches Further: Leftovers taste even better the next day, and it feeds my family for two meals without breaking the bank.
Step-by-Step Instructions for Rice-A-Roni Stir Fried Rice With Chicken
Here’s how I transform simple ingredients into a flavorful weeknight dinner in minutes.
Step 1: Cook Chicken and Prepare the Base
Heat 1 tablespoon of the Vegetable Oil in a large skillet over medium-high heat. Add the 1.5 lb Boneless Skinless Chicken Breasts pieces and cook for 5-6 minutes, stirring occasionally, until they’re golden brown and cooked through with no pink remaining.
Season the chicken with 0.5 tsp Kosher Salt and 0.25 tsp Ground Black Pepper as it cooks. Transfer the cooked chicken to a plate and set aside. In the same skillet, add the remaining 1 tablespoon Vegetable Oil and the minced 3 cloves Garlic Cloves, cooking for 30 seconds until fragrant.
Step 2: Sauté Vegetables Until Tender-Crisp
Add the diced 2 whole Carrots and 1 whole Green Bell Pepper to the skillet. Stir-fry for 4-5 minutes until the vegetables soften slightly but still retain some bite. You want them tender-crisp, not mushy.
Stir in the 1 cup Frozen Peas and cook for an additional 1-2 minutes until heated through. The peas should maintain their bright green color and slight snap. Push all the vegetables to one side of the skillet to create space for the next step.
Step 3: Scramble Eggs and Combine All Elements
Pour the 2 whole Large Eggs into the empty side of the skillet. Scramble them gently with a spatula until they’re just set but still soft, about 1-2 minutes. The eggs should be lightly cooked with a soft texture, not dry or rubbery.
Add the cooked chicken back to the skillet along with the 1 box Rice-A-Roni Rice Mix. Stir everything together to combine. Drizzle the 2 tbsp Soy Sauce and 1 tsp Sesame Oil over the mixture and toss well to coat evenly.
Step 4: Finish with Green Onions and Serve
Cook the entire mixture for an additional 2-3 minutes until everything is heated through and the flavors have melded together. The rice should be tender with a slight chew, and all ingredients should be well incorporated.
Remove from heat and stir in the sliced 3 whole Green Onions, reserving some of the green tops for garnish. The whites will cook slightly from the residual heat while the greens add a fresh, oniony crunch. Taste and adjust seasoning if needed, then serve hot with the reserved green onion tops sprinkled over the top.
Pro Tips For Making Rice A Roni Stir Fried Rice With Chicken
- Precook the Rice: Cook the Rice-A-Roni separately first—it needs the full hydration time to avoid that dreaded gummy texture when stir-fried later.
- Cut Chicken Small: Slice the boneless chicken breasts into ½-inch pieces so they cook through fast and stay juicy in the hot wok or pan.
- Hot Pan, Quick Stir: Heat the vegetable oil until it shimmers before adding veggies, then keep everything moving to prevent burning the carrots or peppers.
- Drain Extra Liquid: After cooking the Rice-A-Roni, drain any excess liquid before stir-frying—soggy rice ruins the texture every time.
Pro Cooking Tips for Perfect Results
High Heat Control
Use medium-high heat throughout cooking—this prevents soggy rice while ensuring proper searing. I always use my vintage Lodge cast iron for even heat distribution. The chicken should sizzle when it hits the pan, not steam. 🔥
Chicken Timing
Don’t overcrowd the pan with 1.5 lb Boneless Skinless Chicken Breasts pieces. Cook in batches if needed to achieve that golden brown crust. Remove chicken when it reaches 165°F internal temperature—it’ll finish cooking when added back later.
Rice Preparation
Cook the 1 box Rice-A-Roni Rice Mix separately first, then drain well. This prevents mushy stir-fry. Spread it on a baking sheet to cool slightly before adding to the skillet—this helps maintain those distinct grains you want. 💡
Egg Technique
Push veggies to one side before adding 2 whole Large Eggs. Let them set slightly before gently scrambling. The residual heat from the pan will finish cooking them without turning rubbery. Soft curds are the goal here.
Final Seasoning
Always taste before serving. The 2 tbsp Soy Sauce and 1 tsp Sesame Oil may need adjustment based on your Rice-A-Roni flavor. I often add an extra pinch of Kosher Salt to brighten all the flavors.
Nutrition Facts
Frequently Asked Questions
Can I use chicken thighs instead of breasts?
Use 1.5 lb boneless thighs for juicier results. They cook at the same medium-high heat for 5-6 minutes, but their higher fat content adds richness.
How do I prevent the rice from getting mushy?
Cook the Rice-A-Roni separately first, then drain well. Spread on a baking sheet to cool before adding to the skillet. This keeps grains distinct.
What if I don’t have sesame oil?
Skip it entirely or substitute with an extra 1 tbsp soy sauce. The dish will still taste great, just with slightly less depth.
Can I make this ahead of time?
Yes! Store in an airtight container for 4-5 days in the fridge. Flavors actually improve overnight. Reheat gently to avoid drying.

- Jollof Rice Sauce Recipe: West African Tomato and Spice Infusion - September 25, 2026
- Japanese Rice Soup Recipe: Umami-Rich Comfort in a Bowl - September 25, 2026
- Homemade Cream Of Rice Recipe: Silk-Smooth Breakfast in Minutes - September 25, 2026