
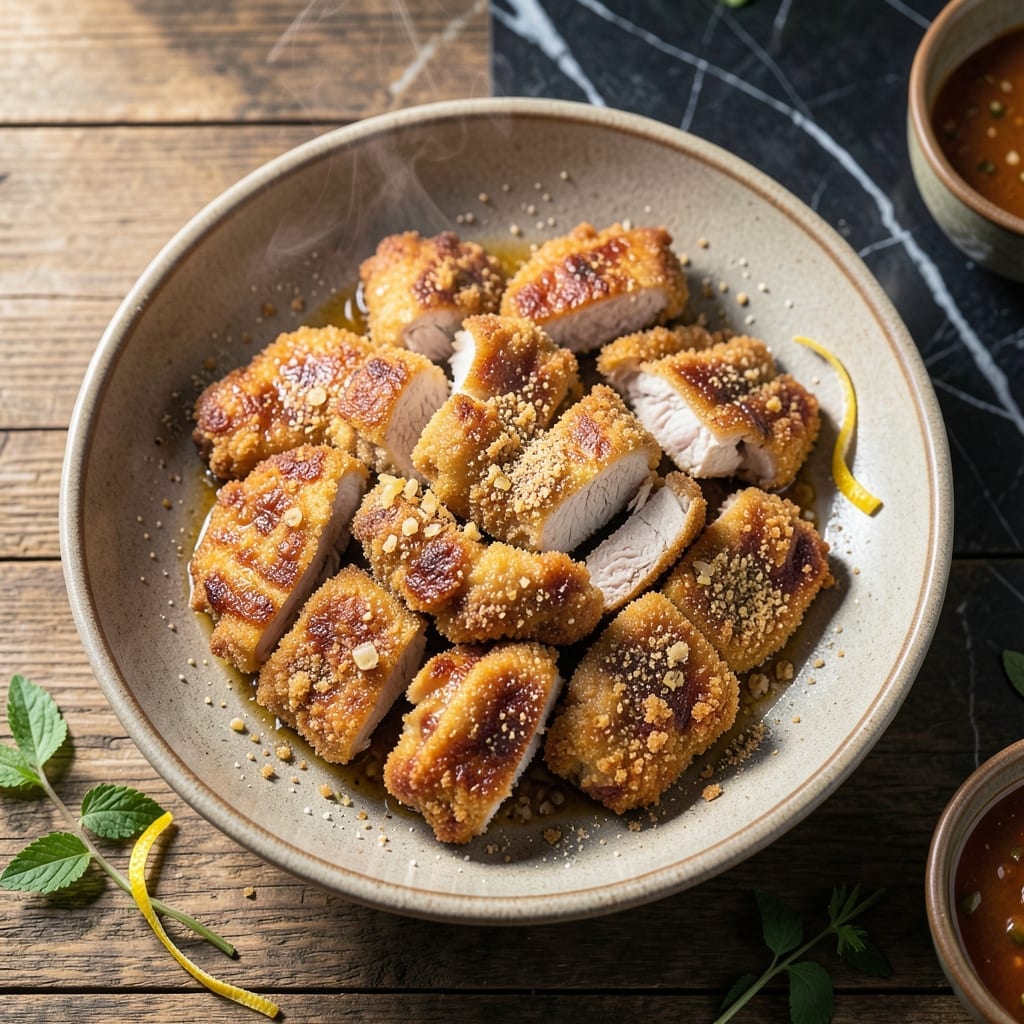
This rice flour coating delivers crispy chicken without the deep fryer mess. I developed this method after years of testing alternatives to achieve that perfect crunch we all crave.
The rice flour creates an incredibly light, shatteringly crispy crust that browns beautifully in the oven or pan. Unlike traditional breading, it stays crunchy even after sitting for a while.
What you get is golden, crispy chicken with a texture that rivals fried versions but with far less oil. The coating adheres perfectly to each piece, creating an even layer of crunch in every bite.
Serve with your favorite dipping sauce or alongside fresh vegetables for a complete meal. Here’s how to make it.
Ingredients for Rice Flour Chicken
Simple ingredients for that shatteringly crispy coating on every piece.
| Ingredient | Amount | Notes |
|---|---|---|
| Chicken Breasts 🍗 | 1 ½ lb | Boneless, skinless, cut into strips |
| Rice Flour 🌾 | 1 cup | White or brown variety |
| Large Eggs 🥚 | 2 whole | Beaten for egg wash |
| Cornstarch 🌾 | ¼ cup | For extra crispiness |
| Garlic Powder 🧄 | 1 tsp | Adds savory depth |
| Onion Powder 🧅 | 1 tsp | Balances the seasoning |
| Paprika 🌶️ | 1 tsp | Sweet or smoked variety |
| Salt 🧂 | 1 tsp | Kosher or sea salt |
| Black Pepper 🌶️ | ½ tsp | Freshly ground preferred |
| Olive Oil 🫒 | ½ cup | For pan frying or baking |
| Buttermilk 🥛 | ½ cup | For soaking chicken |
| Baking Powder 🧂 | ½ tsp | Helps coating puff slightly |
The chicken is the star here. Boneless, skinless breasts work best for even cooking and crispy results. I grab mine from Costco for bulk savings, but any grocery store will do. The rice flour is key—look for it in the Asian aisle or Bob’s Red Mill brand at natural food stores. Freshness matters, so check the expiration date if it’s been sitting a while.
No buttermilk? Whole milk plus a splash of vinegar gets you close. Swap rice flour for cornstarch if you’re in a pinch (but the texture won’t be quite as light). The paprika can be smoked for a deeper flavor. If you’re out of garlic powder, fresh minced garlic in the egg wash works too—just don’t skip the seasoning entirely.
Chicken stays fresh in the fridge for 2-3 days before cooking. Leftovers keep for 4 days in an airtight container. The rice flour? Store it in a cool, dry place for up to 6 months.
Why You’ll Love This Recipe
- No-Fuss Coating: I just toss the chicken in rice flour and cornstarch—no fancy dredging, no mess. Honestly, it’s the easiest breading I’ve ever done.
- Addictive Crunch: That rice flour gives it a lighter, crispier bite than regular flour. The garlic powder in the mix? Pure satisfaction with every bite.
- Freezer Friendly: I double the batch and freeze half for those nights I’m too tired to cook. Between us, it reheats like it’s fresh.
- Budget Stretcher: Chicken breasts on sale plus pantry staples like rice flour and eggs means a solid meal for under $10. I’ll be real—it’s my go-to when money’s tight.
Step-by-Step Instructions for Rice Flour Chicken
Here’s the method. Straightforward, tested, works every time.
Step 1: Prepare the Chicken for Maximum Tenderness
Cut the 1.5 lb chicken breasts into 1-inch thick strips. I like to slice them against the grain for extra tenderness. Pat each piece completely dry with paper towels—this is crucial for the coating to adhere properly.
Place the chicken strips in a bowl and pour over the ½ cup buttermilk. Make sure each piece is fully submerged. Cover and let it soak in the refrigerator for at least 30 minutes, though I prefer 1 hour for maximum tenderness. The buttermilk not only tenderizes but also helps the coating stick better.
Step 2: Create the Crispy Rice Flour Coating
In a large bowl, whisk together the 1 cup rice flour, ¼ cup cornstarch, 1 tsp garlic powder, 1 tsp onion powder, 1 tsp paprika, 1 tsp salt, ½ tsp black pepper, and ½ tsp baking powder. The baking powder is my secret for an extra-light, puffy coating.
Drain the chicken strips from the buttermilk, letting any excess drip off. Then dredge each piece in the rice flour mixture, pressing gently to ensure it’s fully coated on all sides. Shake off any excess flour—you want a thin, even layer that will crisp up beautifully.
Step 3: Pan-Fry to Golden Perfection
Heat the ½ cup olive oil in a large skillet over medium-high heat until shimmering but not smoking. You can test the temperature by dropping a pinch of flour into the oil—if it sizzles immediately, it’s ready.
Working in batches to avoid crowding the pan, carefully place the coated chicken strips in the hot oil. Cook for 4-5 minutes per side until deep golden brown and crispy. The rice flour will create an incredibly crunchy exterior that stays crispy longer than regular flour. Use a slotted spatula to transfer the cooked chicken to a paper towel-lined plate to drain excess oil.
Step 4: Keep Warm and Serve Immediately
Place the cooked chicken in a 200°F oven on a wire rack to keep it warm and crispy while you finish frying the remaining batches. This prevents the earlier batches from getting soggy as they wait.
Serve immediately while still hot and crispy. The coating should have a satisfying crunch with every bite, while the inside remains juicy and tender from the buttermilk soak. This dish is at its best right out of the pan, so gather your sides and dig in while it’s at peak crispiness.
Pro Tips For Making Rice Flour Chicken
- Pound the Breasts: Use a rolling pin to even out the chicken to ½-inch thickness—this guarantees even cooking and prevents dry, overdone edges while the center finishes.
- Double Coat: Dip the chicken in egg, then rice flour, then back in egg and cornstarch for a shatteringly crisp crust that actually clings to the meat.
- Skip Cold Chicken: Let the breasts sit at room temp for 15 minutes before cooking; I learned this the hard way after pulling undercooked centers out of hot oil twice.
- Fry in Batches: Crowding the pan drops the oil temp and gives you soggy chicken—do two pieces at a time in about ½ inch of oil for that golden, crackly finish.
Flavor Customization for This Recipe
Spicy Kick
Add 1 tsp cayenne pepper to the rice flour mixture for a fiery version. For less heat, use ½ tsp and pair with cooling ranch dressing. I love this variation when I’m craving that Southern heat we know so well in Georgia.
Herb Infusion
Mix in 1 tbsp dried Italian seasoning or 1 tbsp fresh rosemary into the coating. The herbs add a fragrant note that pairs beautifully with the crispy texture. This reminds me of the herb-crusted dishes I perfected at The Smoky Pig.
Citrus Zest
Add 1 tsp lemon or lime zest to the rice flour mixture for a bright, zesty flavor. The citrus oils in the zest will release as the chicken cooks, creating an aromatic experience. This works particularly well with a honey mustard dipping sauce.
Sweet Heat
Incorporate 2 tbsp brown sugar into the coating mix for a sweet and spicy glaze effect. The sugar caramelizes during frying, creating a sticky, crispy exterior. It’s a crowd-pleaser at my BBQ championships. 🔥
Umami Boost
Stir in 1 tbsp grated Parmesan cheese or 1 tsp msg into the rice flour mixture. The umami depth elevates the chicken to restaurant-quality. I learned this trick during my apprenticeship in Charleston.
Asian Fusion
Add 1 tbsp soy sauce to the buttermilk soak and 1 tsp five-spice powder to the coating. This creates an Asian-inspired twist that pairs wonderfully with sweet chili sauce. The flavors are complex but balanced.
Nutrition Facts
Frequently Asked Questions
Can I use regular flour instead of rice flour?
Rice flour creates a lighter, crispier coating, but you can substitute all-purpose flour. The texture will be denser, and it may not stay as crispy. For best results, mix in 2 tablespoons cornstarch to mimic the lightness.
How do I keep the coating from falling off?
Pat the chicken completely dry before coating, and let the buttermilk soak for at least 30 minutes. Press the flour mixture firmly onto each piece and avoid moving the chicken too much while cooking.
What’s the best oil for frying?
Use an oil with a high smoke point like peanut, vegetable, or canola. Olive oil works but has a lower smoke point. Heat to 350-375°F for perfect crispiness.
Can I bake this instead of frying?
Yes! Bake at 400°F for 20-25 minutes, flipping halfway. Use a wire rack on a baking sheet for even airflow and maximum crispiness.

- Jollof Rice Sauce Recipe: West African Tomato and Spice Infusion - September 25, 2026
- Japanese Rice Soup Recipe: Umami-Rich Comfort in a Bowl - September 25, 2026
- Homemade Cream Of Rice Recipe: Silk-Smooth Breakfast in Minutes - September 25, 2026