
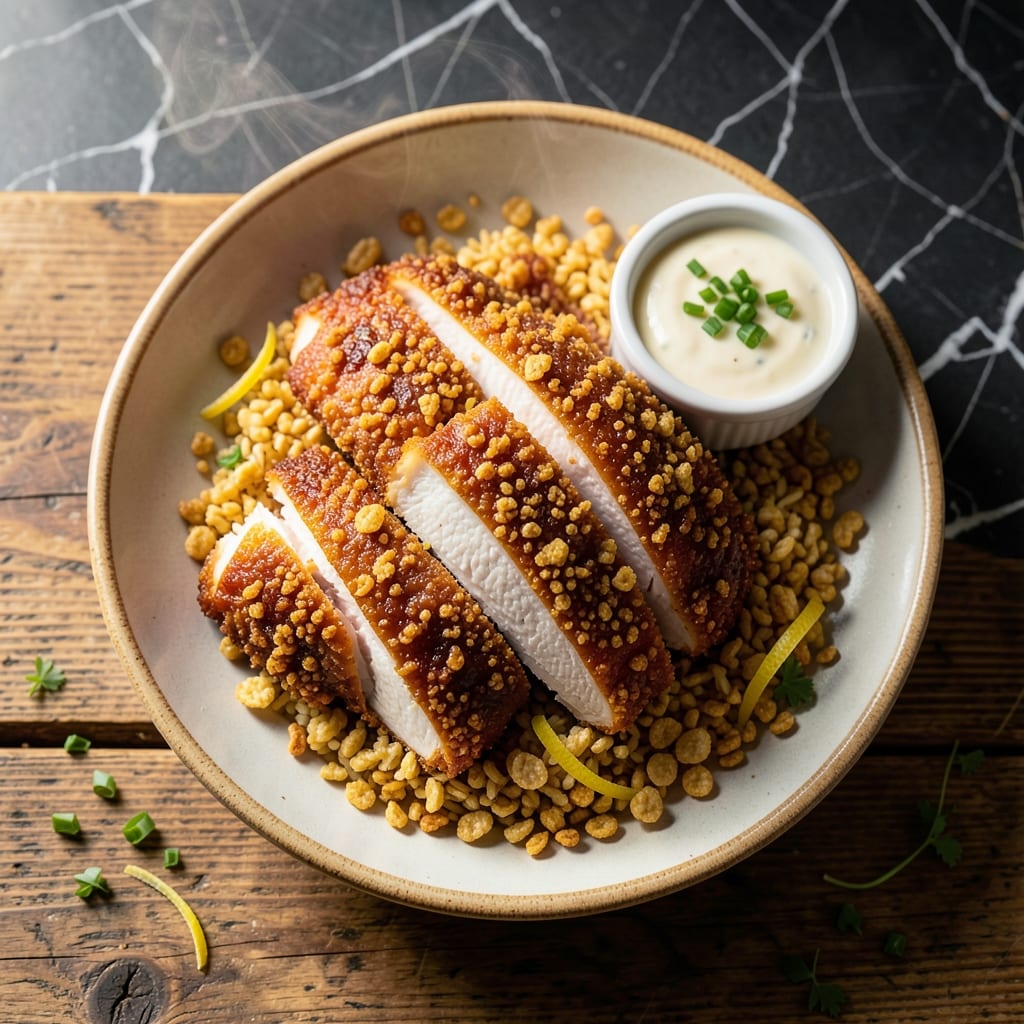
This method transforms humble chicken into a juicy masterpiece with an irresistibly crispy coating. The secret lies in using crushed Rice Krispies for a texture that’s lighter and crunchier than traditional breadcrumbs.
I developed this technique while working at The Smoky Pig, where we needed a way to add crunch without weighing down the meat. The cereal creates a delicate, airy crust that stays crisp even when baked at 375°F for 25 minutes.
Each bite delivers tender chicken encased in a golden, shatteringly crisp shell. The contrast between the moist interior and the crunchy exterior makes this dish unforgettable. It’s a foolproof way to elevate weeknight dinners.
Serve with honey mustard or ranch for dipping. This approach guarantees consistent results every time.
Ingredients for Rice Krispie Chicken Breast
Transform chicken with crispy Rice Krispies coating and juicy, tender meat inside.
| Ingredient | Amount | Notes |
|---|---|---|
| Chicken Breast 🍗 | 1 ½ lb | Boneless, skinless, pounded to 1/2-inch thickness |
| Rice Krispies Cereal 🥣 | 4 cups | Crushed to fine crumbs |
| All-Purpose Flour 🌾 | ½ cup | For dredging chicken |
| Large Eggs 🥚 | 2 whole | Beaten for egg wash |
| Salt 🧂 | 1 tsp | Diamond Crystal kosher preferred |
| Black Pepper 🌶️ | ½ tsp | Freshly ground preferred |
| Garlic Powder 🧄 | 1 tsp | For seasoning flour |
| Onion Powder 🧅 | 1 tsp | For seasoning flour |
| Paprika 🌶️ | 1 tsp | Sweet or smoked variety |
| Olive Oil 🫒 | ½ cup | For baking, divided |
| Honey Mustard 🍯 | ½ cup | For dipping (store-bought or homemade) |
| Ranch Dressing 🥣 | ½ cup | For dipping (store-bought or homemade) |
The chicken breast quality is paramount here. Opt for air-chilled, free-range breasts from a trusted butcher or Whole Foods for superior texture and flavor. Pounding to an even 1/2-inch thickness ensures uniform cooking—use a meat mallet or rolling pin. The Rice Krispies must be freshly crushed; stale cereal won’t deliver the signature crunch. Look for the classic Kellogg’s brand for consistent results.
No Rice Krispies on hand? Corn Flakes or Special K work as substitutes, though the texture will differ slightly. For a gluten-free version, use crushed gluten-free corn cereal. The egg wash can be replaced with buttermilk for extra tang, or a flax egg for binding. Panko breadcrumbs at half the quantity will yield a denser crust if cereal isn’t available.
Prepared chicken keeps in the fridge for 3-4 days in an airtight container, though it’s best served fresh for optimal crunch. Reheat in a 350°F oven for 10-15 minutes to revive the coating. The crushed cereal can be stored in a sealed bag for up to 1 week before use.
Why You’ll Love This Recipe
- No-Fuss Coating: Honestly, crushing Rice Krispies takes 30 seconds, and the egg-flour combo sticks like magic—no fancy techniques here.
- Crunchy Comfort: That snap from the cereal coating with the juicy chicken inside? Between us, it’s way better than takeout.
- Kid-Approved Winner: My picky nephew devoured it, and I’ll be real: the mild flavor works for school lunches or quick dinners.
- Budget Stretcher: A box of cereal and chicken breasts feed four for under ten bucks. Leftovers? Still crispy the next day.
Step-by-Step Instructions for Rice Krispie Chicken Breast
Here’s the method. Straightforward, tested, works every time.
Step 1: Season and Dredge the Chicken
In a shallow bowl, whisk the 0.5 cup all-purpose flour with 1 tsp salt, 0.5 tsp black pepper, 1 tsp garlic powder, 1 tsp onion powder, and 1 tsp paprika until evenly combined. This seasoned flour creates the first layer of flavor and ensures the coating adheres properly.
Pat the 1.5 lb chicken breast dry with paper towels, then dredge each piece in the flour mixture, pressing gently to coat all sides. Shake off any excess—you want a thin, even layer. This step prevents the egg wash from sliding off and helps create that perfect crunch.
Step 2: Apply the Egg Wash and Rice Krispie Coating
In a separate bowl, beat the 2 whole large eggs until uniform in color. Dip each floured chicken piece into the egg wash, allowing any excess to drip off. The egg acts as a glue for the next layer, so don’t skip this step.
Place the 4 cups Rice Krispies cereal (crushed to fine crumbs) in a third bowl. Press each egg-coated chicken piece into the crumbs, turning to coat completely. Use firm pressure to ensure the coating sticks and creates an even, crispy layer. The cereal should adhere in a thick, uniform crust.
Step 3: Pan-Fry to Golden Perfection
Heat 0.25 cup olive oil in a large skillet over medium-high heat until it shimmers. Carefully place the coated chicken in the pan, working in batches if necessary to avoid crowding. Cook for 4-5 minutes per side until the coating turns deep golden brown and crispy.
Resist the urge to move the chicken too soon—it needs time to develop that perfect crust. You’ll know it’s ready to flip when the edges look set and the bottom releases easily from the pan. Add the remaining 0.25 cup olive oil between batches if needed.
Step 4: Finish and Serve with Dipping Sauces
Transfer the cooked chicken to a paper towel-lined plate to drain any excess oil. The internal temperature should reach 165°F—use a meat thermometer to confirm doneness. The coating should be crisp and golden, with the juices from the chicken visible at the edges.
Serve immediately with 0.5 cup honey mustard and 0.5 cup ranch dressing for dipping. The contrast between the crunchy exterior and the juicy, tender chicken inside makes this dish irresistible. For best results, enjoy right away while the coating is at its crispiest.
Pro Tips For Making Rice Krispie Chicken Breast
- Crush Finely: Pulse the Rice Krispies in a food processor until they’re the texture of coarse breadcrumbs—this ensures even coating and maximum crunch. I learned this the hard way after biting into a piece with a whole cereal piece still intact.
- Dry the Chicken: Pat the chicken breasts very dry with paper towels before dredging; any moisture will prevent the coating from sticking. Sounds tedious, but it’s the thing that matters most for that perfect crust.
- Use Cold Eggs: Keep your eggs ice-cold when dipping the chicken—it makes the flour coating cling better and keeps the breading from sliding off. My grandmother swore by this, and she was right.
- Rest Before Frying: Let the breaded chicken rest for 5-10 minutes on a wire rack before frying so the coating sets. Skip this and you’ll end up with a sad, patchy crust.
Serving Suggestions for This Recipe
Plating Presentation
Arrange the golden Rice Krispie-crusted chicken on a white platter for contrast. Stack 2 pieces per serving at a slight angle to showcase the crispy texture. The visual appeal is half the battle with this dish. 💫
Fresh Accompaniments
A simple shredded lettuce bed adds crunch and color without overpowering the main event. I love adding thin tomato slices and cucumber ribbons for freshness. These light elements balance the richness perfectly.
Dipping Sauce Display
Serve the honey mustard and ranch dressing in small ramekins alongside. For a restaurant touch, drizzle each sauce in a zigzag pattern on the plate. This makes the dish feel special for guests.
Family-Style Service
For casual gatherings, place all the chicken on a large wooden board. Scatter lemon wedges and fresh herbs like parsley between pieces. This encourages sharing and makes for a beautiful centerpiece.
Garnish Touches
Sprinkle chopped chives or green onion over the top just before serving. A light dusting of smoked paprika adds color and hints at the flavor profile. These small details elevate the presentation significantly.
Nutrition Facts
Frequently Asked Questions
Can I use chicken tenders instead of breasts?
Chicken tenders work perfectly and cook faster. Reduce cooking time to 3-4 minutes per side since they’re thinner. The crispy coating will still turn out beautifully.
How do I keep the coating from falling off?
Press firmly when coating and let the egg wash drip off slightly before adding the cereal. Chill the coated pieces for 10 minutes before cooking to help the crust set. This prevents premature detachment.
Can I bake this instead of pan-frying?
Yes, bake at 375°F for 20-25 minutes on a wire rack over a baking sheet. Flip halfway through for even browning. The texture will be slightly less crispy but still delicious.
What if my cereal coating burns?
Lower the heat to medium and cook more slowly. Use fresh oil with a higher smoke point, like avocado oil. Burnt cereal tastes bitter, so monitor the color closely.

- Jollof Rice Sauce Recipe: West African Tomato and Spice Infusion - September 25, 2026
- Japanese Rice Soup Recipe: Umami-Rich Comfort in a Bowl - September 25, 2026
- Homemade Cream Of Rice Recipe: Silk-Smooth Breakfast in Minutes - September 25, 2026