
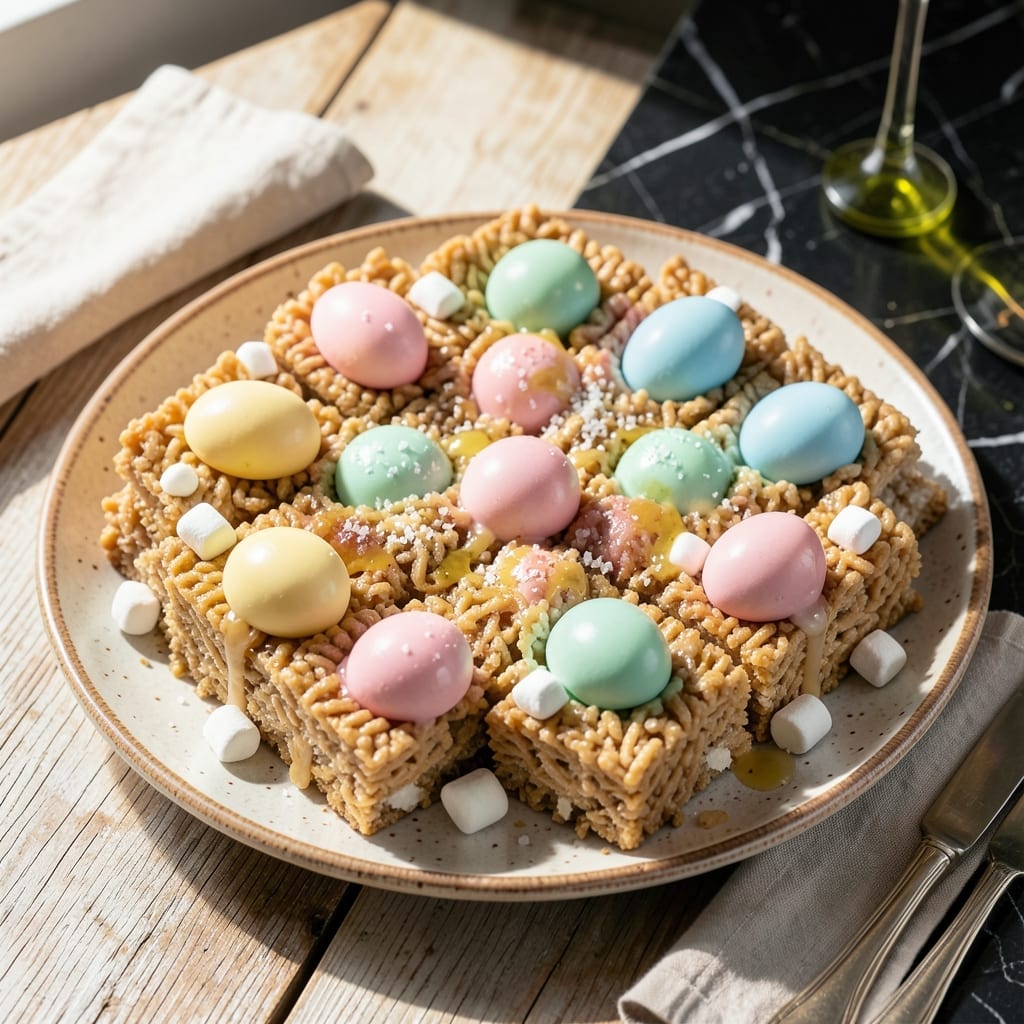
This no-bake creation transforms classic Rice Krispie treats into a festive, edible nest perfect for spring celebrations. I developed this method after years of making Easter desserts in my no-fuss Boston kitchen.
The genius lies in shaping the cereal mixture into hollow eggs, then filling them with colorful candy or chocolate. No oven required, just simple ingredients and a little patience while the treats set.
You’ll end up with charming, crispy nests that delight both kids and adults. The texture stays perfectly chewy, with just enough structure to hold their shape.
Customize with pastel candies or melt-in-your-mouth chocolate for a personalized touch that wows every time.
Ingredients for Rice Krispie Treats Eggs
Simple ingredients for a festive no-bake treat that wows everyone every time.
| Ingredient | Amount | Notes |
|---|---|---|
| Rice Krispies Cereal 🥣 | 6 cups | Standard variety, not puffed rice |
| Mini Marshmallows 🍬 | 10 cups | Regular size works too |
| Unsalted Butter 🧈 | ½ cup | For melting with marshmallows |
| Vanilla Extract 💧 | 1 tsp | Pure vanilla for best flavor |
| Salt 🧂 | ¼ tsp | Fine sea salt preferred |
| Pastel Colored Candy 🍭 | 1 ½ cups | Mini eggs or jelly beans |
| Milk Chocolate 🍫 | 8 oz | For filling, chopped or chips |
| Coconut Oil 🥥 | 1 tsp | For shaping, optional |
| Powdered Sugar 🧂 | ¼ cup | For dusting, optional |
| Food Coloring 🎨 | 4 drops | Pastel colors, optional |
The marshmallows are the backbone here. Jet-Puffed or store brand both work, but freshness matters—old marshmallows get tough and won’t melt smoothly. I grab mine from Market Basket when stocking up for spring baking. The Rice Krispies should be fresh and crisp (check the box date). Butter quality shows in the final texture, so skip the margarine.
No mini marshmallows? Large ones cut in half work in a pinch. Want to skip the candy? Melted chocolate alone makes a rich filling. The vanilla can be swapped for almond extract (use half the amount—it’s potent). Food coloring is totally optional, but gel colors give more vibrant results than liquid. And yes, you can use vegan marshmallows if that’s your thing.
These keep at room temp for 3-4 days in an airtight container. If it’s humid, add a silica packet to prevent sticking. They freeze well too—up to 1 month—but let them thaw before serving. The texture’s best fresh, though.
Why You’ll Love This Recipe
- 5-Minute Magic: I can melt the butter, stir in the marshmallows, and fold in the cereal before the kids even finish arguing over who gets the last spoon.
- Buttery Vanilla Hug: That warm, gooey mix of melted butter and vanilla with the crispy cereal is pure nostalgic comfort in every bite.
- Easter Basket Hero: These egg-shaped treats are my secret for filling those plastic eggs with something better than candy.
- Pantry MVP: Honestly, I always have these ingredients on hand, so I can whip up a batch whenever a last-minute school treat request pops up.
Step-by-Step Instructions for Festive Rice Krispie Treats Eggs
Here’s my no-bake method for creating these adorable edible nests with a sweet surprise inside.
Step 1: Melt Butter and Marshmallows to Perfect Consistency
In a large saucepan, melt the 0.5 cup unsalted butter over low heat. Once melted, add all 10 cups mini marshmallows and stir constantly with a silicone spatula. This prevents scorching and ensures even melting.
The mixture is ready when it’s completely smooth with no marshmallow lumps visible, which should take about 5-7 minutes. Immediately remove from heat and stir in the 1 tsp vanilla extract and 0.25 tsp salt. The vanilla deepens the flavor, while the salt balances the sweetness perfectly.
Step 2: Combine with Rice Krispies Cereal
Working quickly while the marshmallow mixture is still warm, add all 6 cups Rice Krispies cereal to the saucepan. Gently fold the cereal into the marshmallow mixture using the spatula, pressing down slightly to ensure every piece gets coated.
You’ll know it’s properly combined when the cereal looks evenly glossy and sticks together when pressed. Avoid overmixing, or the cereal will become soggy. If using 4 drops food coloring, divide the mixture into portions and add the coloring now for pastel nests.
Step 3: Shape the Nests
Lightly grease your hands with the 1 tsp coconut oil to prevent sticking. Take about ½ cup of the cereal mixture and press it into a loose nest shape in your palm, leaving a small indentation in the center for the eggs.
Place each nest on parchment paper to cool and firm up, which takes about 15-20 minutes. The coconut oil helps maintain the shape without altering the flavor. If the mixture starts to harden before you finish shaping, briefly warm it in the microwave for 10-15 seconds to soften.
Step 4: Fill with Chocolate and Pastel Colored Candy
While the nests cool, melt the 8 oz milk chocolate in a microwave-safe bowl in 30-second intervals, stirring between each until smooth. Spoon about 1 tablespoon of melted chocolate into the center of each nest.
Immediately add 2-3 pieces of the 1.5 cups pastel colored candy on top of the chocolate, pressing them in slightly so they set in place. The chocolate will firm up as it cools, securing the candy eggs in their nests. For extra flair, dust the finished treats with 0.25 cup powdered sugar using a fine mesh sieve.
Pro Tips For Making Rice Krispie Treats Eggs
- Melt Butter Low: Keep the heat on low when melting the butter and marshmallows—I learned this the hard way after scorching two batches. Medium or high heat turns the sugar in the marshmallows bitter.
- Use Fresh Cereal: Skip the stale Rice Krispies sitting in your pantry; they won’t crisp up the same way. Fresh cereal gives that perfect snap in every bite.
- Press While Warm: Shape the treats into egg forms right after mixing, while the marshmallow is still pliable. Waiting even 5 minutes makes the mixture stiff and hard to mold without cracking.
- Butter Your Hands: Lightly coat your hands with butter before shaping the eggs—it prevents sticking and makes the process way less messy. Sounds weird, but it works.
Pro Cooking Tips for This Recipe
Butter Temperature Control
Always melt the 0.5 cup unsalted butter over low heat first—this prevents browning that can add unwanted nuttiness. I learned this the hard way in my tiny Boston kitchen when a batch turned golden too fast and the treats tasted like butterscotch instead of pure vanilla sweetness. 💡
Marshmallow Melting Technique
Stir the 10 cups mini marshmallows constantly with a silicone spatula. The moment they’re completely smooth (after about 5-7 minutes), pull them off the heat. Overheating makes the mixture too thin, and your nests won’t hold their shape.
Cereal Coating Trick
Press the 6 cups Rice Krispies cereal gently into the marshmallow mix—don’t stir vigorously. I use a folding motion to keep the cereal crisp. If the mixture cools too much, microwave it for 10-15 seconds to restore workability.
Perfect Nest Shaping
Use 1 tsp coconut oil on your hands to shape each ½ cup portion into a nest. Press firmly but leave a shallow center for the pastel colored candy. The coconut oil prevents sticking without adding flavor.
Chocolate Setting Tip
Melt the 8 oz milk chocolate in 30-second bursts, stirring between each. Spoon 1 tablespoon into each nest, then press in 2-3 candy pieces immediately. The chocolate sets fast, securing everything in place. 💫
Nutrition Facts
Frequently Asked Questions
Why add eggs to Rice Krispie treats?
This recipe shapes treats into hollow nests for candy, not actual eggs. The name refers to the final presentation, not an ingredient.
How do I prevent the nests from falling apart?
Press the ½ cup portions firmly and use 1 tsp coconut oil on hands. Let them set for 15-20 minutes before filling.
Can I make these ahead of time?
Yes! Store in an airtight container at room temperature for 3-4 days. Avoid humidity to keep them crisp.

- Rice Pudding Recipe With Eggs and Milk: Old-Fashioned Custard-Style Comfort - September 30, 2026
- Rice Noodle Sauce Recipe: Bold Umami Depth for Authentic Stir-Fry - September 30, 2026
- Rice Pilaf Recipe: Fragrant Basmati With Toasted Vermicelli - September 30, 2026