
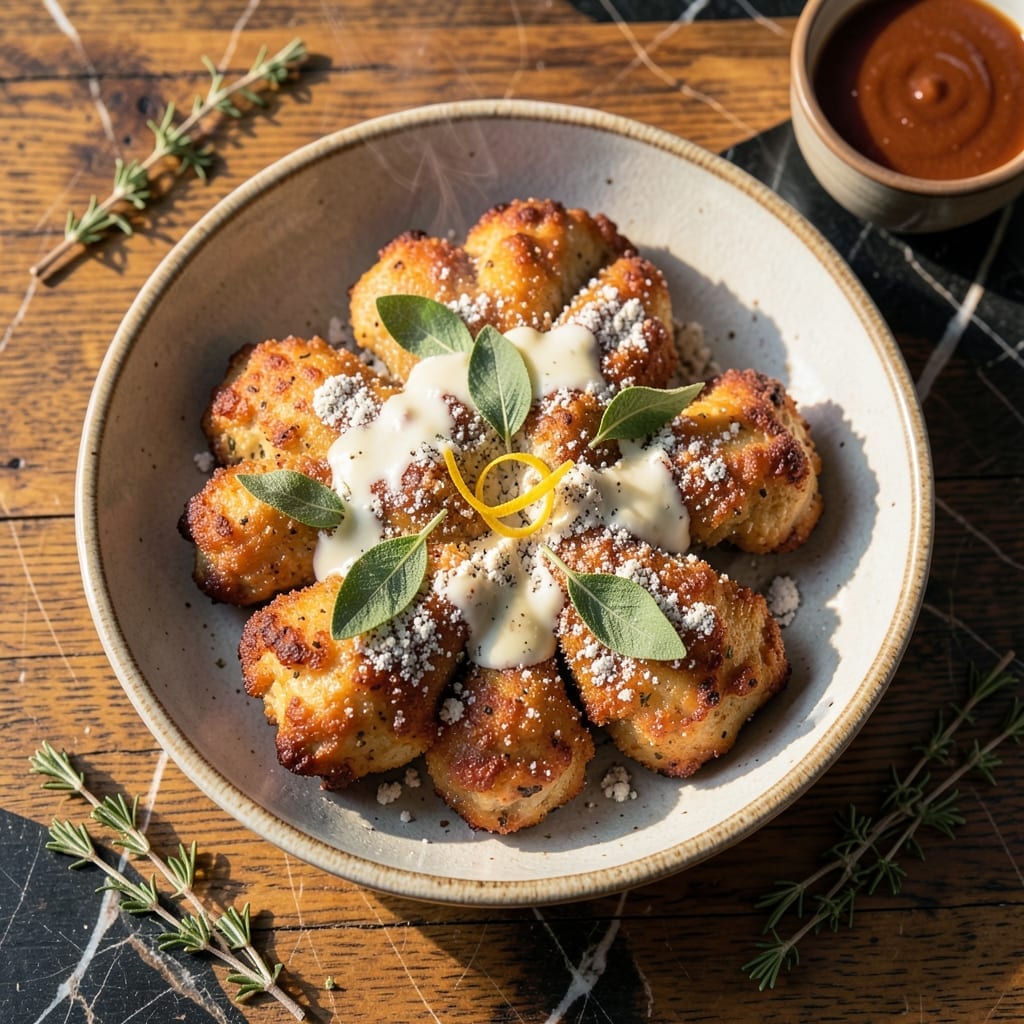
This fried chicken delivers on every crispy promise with an herb-infused twist that elevates the classic. The sage adds a subtle earthy note that complements the golden, shatteringly crispy coating without overpowering it.
I developed this method after testing countless variations to achieve that perfect balance between flavor and texture. The key is using fresh sage in the buttermilk marinade and the flour dredge, which layers the herb throughout every bite.
The result is chicken with a coating so crispy it cracks when you bite into it, while the meat stays juicy and infused with sage’s warm aroma. It’s the kind of chicken that disappears fast at any gathering.
Serve it hot for the best texture, with honey or hot sauce on the side. This technique works for both bone-in and boneless pieces.
Ingredients for Sage Fried Chicken
Crispy, herb-infused perfection starts with these fresh, quality ingredients for a standout dish.
| Ingredient | Amount | Notes |
|---|---|---|
| Chicken Thighs and Drumsticks 🍗 | 3 lb | Bone-in, skin-on preferred |
| Buttermilk 🥛 | 2 cups | Full-fat for richness |
| All-Purpose Flour 🌾 | 3 cups | For dredging and coating |
| Fresh Sage Leaves 🍃 | ½ cup | Finely chopped, packed |
| Garlic Cloves 🧄 | 4 cloves | Minced for marinade |
| Salt 🧂 | 2 tbsp | Diamond Crystal kosher |
| Black Pepper 🌶️ | 1 tbsp | Freshly ground preferred |
| Paprika 🌶️ | 1 tbsp | Sweet or smoked variety |
| Cayenne Pepper 🔥 | ½ tsp | Adjust for heat preference |
| Baking Powder 🧂 | 1 tbsp | For extra crispiness |
| Vegetable Oil 🫒 | 4 cups | For deep frying |
| Honey 🍯 | ¼ cup | For serving drizzle |
| Hot Sauce 🌶️ | ½ cup | For serving (optional) |
The chicken matters most here. Bone-in, skin-on thighs and drumsticks give you that juicy interior and extra-crispy exterior. Look for pieces that are similar in size so they cook evenly. I grab mine from Whole Foods or a trusted local butcher—avoid those pre-packaged trays that have been sitting in the case for days. The sage should be fresh and vibrant, not wilted or brown.
No buttermilk? Whole milk plus a tablespoon of vinegar or lemon juice works in a pinch. Swap fresh sage for dried at one-third the amount, but fresh really is best here. Vegetable oil can be peanut or canola oil—anything with a high smoke point. If you’re avoiding gluten, cornstarch or rice flour can replace the all-purpose flour, though the texture will differ slightly.
Marinate the chicken in the buttermilk mixture for at least 4 hours (overnight is ideal). Leftovers keep in the fridge for up to 3 days, but honestly, this is best eaten fresh. Reheat in the oven to maintain some crispiness—microwaving will make it soggy.
Why You’ll Love This Recipe
- I’ll be real: this is my go-to when the kids have friends over. Hearty, affordable, and nobody leaves hungry.
- One Pan Magic: I just love how the buttermilk soak and quick fry come together in my cast iron—no fancy equipment, no mess.
- That Sage Crisp: The fresh sage leaves fry up like delicate little chips, and paired with garlic? Ridiculously good.
- Feeds My Crew: I’ll be real: this is my go-to when the kids have friends over. Hearty, affordable, and nobody leaves hungry.
Step-by-Step Instructions for Sage Fried Chicken
This method ensures maximum crispiness and locking in all the herb-infused flavor.
Step 1: Marinate the Chicken in Buttermilk and Herbs
In a large bowl, combine the 2 cups buttermilk, 0.5 cup fresh sage leaves, and 4 cloves garlic cloves. I always let the sage and garlic sit in the buttermilk for 5 minutes before adding the chicken to allow the flavors to meld.
Add the 3 lb chicken thighs and drumsticks to the bowl, ensuring each piece is fully coated. Cover and refrigerate for at least 4 hours, or preferably overnight. This step is crucial for tenderizing the meat and infusing it with the herby, garlicky buttermilk marinade.
Step 2: Prepare the Seasoned Flour Coating
In a shallow dish, whisk together the 3 cups all-purpose flour, 2 tbsp salt, 1 tbsp black pepper, 1 tbsp paprika, 0.5 tsp cayenne pepper, and 1 tbsp baking powder. The baking powder creates tiny air pockets in the coating, giving it extra crunch.
Let the flour mixture rest for 5 minutes to allow the spices to distribute evenly. This ensures every bite of the finished dish has balanced seasoning. Real talk: don’t skip this resting period—it makes a noticeable difference in flavor consistency.
Step 3: Dredge and Fry to Golden Perfection
Heat the 4 cups vegetable oil in a deep, heavy-bottomed pot to 350°F. While the oil heats, remove the chicken from the marinade, allowing excess buttermilk to drip off, then dredge each piece thoroughly in the seasoned flour. Press the flour into the meat to ensure it adheres well.
Fry the chicken in batches to avoid crowding the pot, which would lower the oil temperature. Cook for 12-15 minutes, turning occasionally, until the coating is deep golden brown and the internal temperature reaches 165°F. Drain on a wire rack to keep it crispy.
Here’s the thing—maintaining the oil temperature is critical. If it drops below 325°F, the chicken will absorb oil and become greasy instead of crispy. Use a thermometer to monitor it closely.
Step 4: Rest and Serve with Drizzles
Let the fried chicken rest on the rack for 5 minutes before serving. This allows the crust to set and the juices inside to redistribute, ensuring every bite is moist and flavorful.
Drizzle with the 0.25 cup honey or serve with the 0.5 cup hot sauce on the side for dipping. The sweetness of the honey balances the savory, herby notes, while hot sauce adds a kick for those who want it. Serve immediately while the coating is at its crispiest.
Pro Tips For Making Sage Fried Chicken
- Fry in Batches: Crowding the pan drops the oil temperature and gives you soggy chicken instead of crispy. I learned this the hard way—now I fry in two batches, giving each piece room to sizzle.
- Bruise the Sage: Rub the fresh sage leaves between your palms before adding them to the oil—it releases the oils and makes the flavor pop. Sounds weird, but it works.
- Pat Dry First: Skip drying the chicken and your coating won’t stick. I use paper towels and press hard—even the buttermilk-marinated pieces need this step.
- Double-Dip Coat: For extra-crispy crust, dip the chicken back in buttermilk after the first flour coat, then dredge again. My grandmother swore by this, and she was right.
Flavor Customization for This Dish
Herb Variations
Swap sage for rosemary or thyme for different earthy profiles. Use 1 tbsp fresh rosemary or 2 tbsp fresh thyme in the marinade and coating. Rosemary adds a piney depth, while thyme brings a subtler, lemony note that pairs beautifully with chicken.
Spice Adjustments
For a spicier kick, increase the cayenne pepper to 1 tsp or add ½ tsp red pepper flakes to the flour mix. If you prefer a milder version, omit the cayenne entirely and add 1 tsp onion powder for extra savory depth without heat.
Crispier Coating
Replace 1 cup of all-purpose flour with cornstarch in the dredge for an ultra-crispy texture. Cornstarch creates a lighter, airier crust. I also add 1 tsp msg to the flour mix for an umami boost that enhances the sage flavor. 💡
Citrus Twist
Add zest of 1 lemon to the buttermilk marinade for brightness. The acidity helps tenderize the chicken while adding a fresh contrast to the rich, fried coating. A pinch of lemon pepper seasoning in the flour mix also works wonders.
Sweet and Savory
Mix 2 tbsp brown sugar into the flour dredge for a caramelized, slightly sweet crust. The sugar helps the coating brown faster, so reduce frying time by 1-2 minutes to prevent over-browning. This pairs especially well with the honey drizzle. ✨
Gluten-Free Option
Use 3 cups gluten-free all-purpose flour blend plus 1 tbsp xanthan gum for the dredge. The xanthan gum helps bind the coating, as gluten-free flours can be crumbly. Fry at a slightly lower temp, 340°F, to prevent burning.
Nutrition Facts
Frequently Asked Questions
Can I use dried sage instead of fresh?
Yes, but use 1/3 the amount since dried sage is more concentrated. Fresh sage provides the best flavor, but dried works in a pinch.
Why is my coating not crispy?
Oil temperature is likely too low. Maintain 350°F and fry in batches to avoid crowding. Drain on a wire rack, not paper towels, to keep it crispy.
Can I bake this instead of frying?
For a lighter version, bake at 400°F for 25-30 minutes on a wire rack. The texture won’t be as crispy, but it’s still flavorful. Turn halfway through.
How do I store leftovers?
Keep in an airtight container in the fridge for up to 3 days. Reheat in the oven at 375°F for 10-15 minutes to restore some crispiness.

- Jollof Rice Sauce Recipe: West African Tomato and Spice Infusion - September 25, 2026
- Japanese Rice Soup Recipe: Umami-Rich Comfort in a Bowl - September 25, 2026
- Homemade Cream Of Rice Recipe: Silk-Smooth Breakfast in Minutes - September 25, 2026