
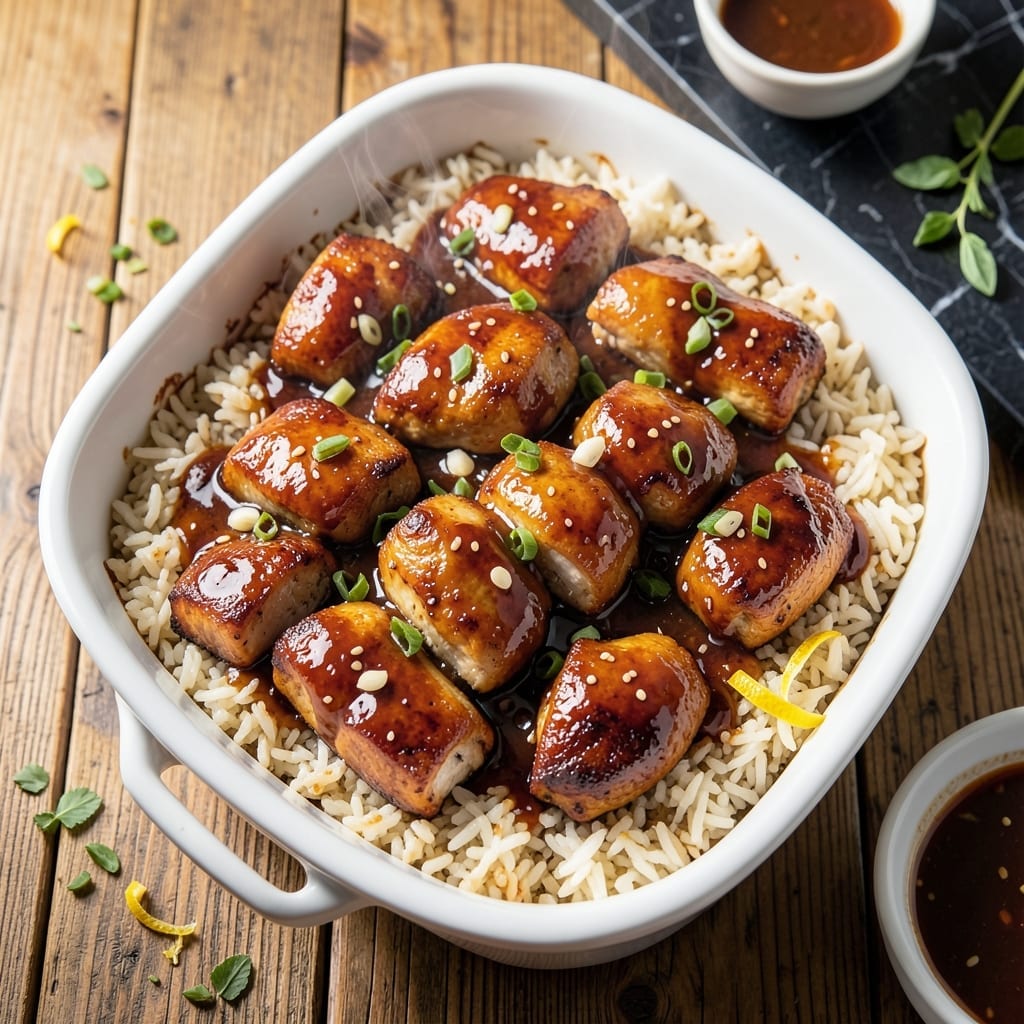
This casserole delivers perfectly balanced teriyaki flavor in every bite. I developed this recipe to bring restaurant-quality Asian-inspired dishes to the home kitchen with minimal effort.
The dish combines tender chicken, fluffy rice, and a glossy teriyaki glaze that caramelizes beautifully during baking. Each ingredient plays a crucial role in creating that signature sweet-savory profile.
What emerges from the oven is a golden-brown casserole with sticky, glazed edges and moist, flavorful chicken throughout. The rice absorbs the teriyaki sauce while maintaining its texture.
Serve this as a complete meal with steamed vegetables for a satisfying dinner that comes together in one baking dish.
Ingredients for Teriyaki Chicken and Rice Casserole
Restaurant-quality Asian flavors start with these balanced, fresh ingredients for a complete meal.
| Ingredient | Amount | Notes |
|---|---|---|
| Boneless, Skinless Chicken Thighs 🍗 | 1 ½ lb | Cut into bite-sized pieces |
| Long-Grain White Rice 🍚 | 1 ½ cups | Uncooked, rinsed thoroughly |
| Soy Sauce 🥢 | ½ cup | Low-sodium preferred for balance |
| Brown Sugar 🍚 | ⅓ cup | Packed, for caramelization |
| Honey 🍯 | ¼ cup | For natural sweetness and gloss |
| Fresh Garlic Cloves 🧄 | 4 cloves | Minced finely for even distribution |
| Fresh Ginger Root 🌿 | 1 tbsp | Peeled and grated |
| Rice Vinegar 🍶 | 2 tbsp | For tangy brightness |
| Sesame Oil 🫒 | 1 tbsp | Toasted, for nutty aroma |
| Vegetable Oil 🫒 | 1 tbsp | For sautéing chicken |
| Chicken Broth 🥣 | 1 ½ cups | Low-sodium preferred |
| Cornstarch 🌾 | 2 tbsp | For thickening the sauce |
| Green Onions 🧅 | ½ cup | Thinly sliced for garnish |
| Sesame Seeds 🌰 | 1 tbsp | Toasted, for finishing |
The chicken is the foundation here. Boneless, skinless thighs stay juicier than breasts during baking—look for plump, pale pink pieces at the store. For rice, jasmine or long-grain white gives the best texture (avoid instant). The soy sauce should be low-sodium so you can control the saltiness. I always grab Kikkoman or San-J tamari for consistent quality.
No honey? Maple syrup or agave at a 1:1 ratio works fine. Fresh ginger is ideal but ground ginger at one-quarter the amount is acceptable in a pinch. For extra depth, swap 1 tablespoon of the soy sauce for fish sauce (just don’t tell the vegetarians). The cornstarch can be replaced with arrowroot powder if you prefer a clearer glaze.
This casserole keeps 4-5 days in the fridge, though the rice may firm up slightly. Reheat covered with foil to prevent drying. For freezing, portion before baking and store for up to 3 months—thaw overnight before cooking.
Why You’ll Love This Recipe
- One Pan Wonder: I toss the chicken, rice, and teriyaki sauce together in a single dish and let the oven do the work—no stovetop babysitting required.
- Sweet-Savory Balance: The combo of soy sauce, brown sugar, and honey gives that sticky, caramelized glaze that makes every bite irresistibly good.
- Meal Prep Hero: I make a big batch on Sunday and it reheats beautifully for lunches all week—no soggy textures, just consistent flavor.
- Budget Stretcher: Chicken thighs stay juicy and affordable, and a little rice goes a long way to fill up a crowd. Between us, it’s my go-to for feeding six without breaking the bank.
Step-by-Step Instructions for Teriyaki Chicken and Rice Casserole
Here’s the method for achieving a perfectly baked casserole with glazed chicken and fluffy rice.
Step 1: Prepare and Cook the Chicken
Cut the 1.5 lb Boneless, Skinless Chicken Thighs into bite-sized pieces. Heat 1 tbsp Vegetable Oil in a large skillet over medium-high heat. Add the chicken and cook for 5-6 minutes, stirring occasionally, until the pieces are golden brown and cooked through. The chicken should reach an internal temperature of 165°F.
Transfer the cooked chicken to a plate lined with paper towels to drain excess fat. This step ensures the chicken stays tender and doesn’t release too much moisture into the casserole. Set aside while you prepare the rice and sauce.
Step 2: Create the Teriyaki Sauce
In a medium saucepan, combine 0.5 cup Soy Sauce, 0.33 cup Brown Sugar, 0.25 cup Honey, 4 cloves Fresh Garlic Cloves (minced), 1 tbsp Fresh Ginger Root (grated), and 2 tbsp Rice Vinegar. Bring to a simmer over medium heat, stirring until the sugar dissolves.
In a small bowl, mix 2 tbsp Cornstarch with 2 tablespoons of cold water to create a slurry. Slowly whisk this into the simmering sauce. Continue cooking for 2-3 minutes until the sauce thickens enough to coat the back of a spoon. Remove from heat and stir in 1 tbsp Sesame Oil.
Step 3: Assemble and Bake the Casserole
Preheat your oven to 375°F. In a greased 9×13-inch baking dish, spread the 1.5 cups Long-Grain White Rice (rinsed thoroughly) in an even layer. Pour the 1.5 cups Chicken Broth over the rice, ensuring it’s evenly distributed.
Arrange the cooked chicken pieces over the rice. Pour the teriyaki sauce evenly over the chicken and rice. Use a spoon to gently press the chicken into the rice so the flavors meld during baking. Cover the dish tightly with aluminum foil.
Step 4: Bake and Finish
Bake in the preheated oven for 30 minutes. Then, remove the foil and bake for an additional 15-20 minutes until the rice is tender and has absorbed most of the liquid. The top should be lightly caramelized and the sauce should be bubbling at the edges.
Remove from the oven and let rest for 5 minutes. Sprinkle with 0.5 cup Green Onions (thinly sliced) and 1 tbsp Sesame Seeds just before serving. This allows the flavors to settle and the garnishes to retain their freshness and crunch.
Pro Tips For Making Teriyaki Chicken And Rice Casserole
- Sear the Thighs: Brown the chicken thighs first in a hot pan—3-4 minutes per side—before adding the sauce. I learned this the hard way after my first few casseroles tasted bland because the meat didn’t develop that deep, caramelized flavor.
- Rinse the Rice: Give the long-grain white rice a quick rinse under cold water to remove excess starch. Sounds weird, but it works: your casserole won’t turn into a gummy mess at the bottom of the dish.
- Balance the Sweet: Cut the brown sugar back by 2 tablespoons if your honey is particularly strong. After burning one batch with an overpowering teriyaki glaze, I finally figured out that less sugar lets the soy sauce shine.
- Cover Tightly: Use foil and a lid if your casserole dish has one—this locks in steam so the rice cooks evenly. My grandmother swore by this, and she was right: no one wants crunchy rice hiding under perfectly cooked chicken.
Essential Equipment for Perfect Results
Baking Dish Essentials
For this casserole, a 9×13-inch baking dish is non-negotiable—it provides the perfect surface area for even cooking and caramelization. I swear by my Le Creuset stoneware for its heat retention and easy cleanup. A metal pan works too but may require slightly less baking time. 🔥
Saucepan for Glaze
A medium saucepan (about 2-3 quarts) is ideal for making the teriyaki sauce. I use a heavy-bottomed All-Clad stainless steel pan to prevent scorching. The wider base helps the sauce reduce evenly without hot spots.
Skillet for Chicken
Cook your chicken in a 12-inch skillet with high sides to prevent splattering. My go-to is a Lodge cast iron from my vintage collection—it gives the chicken a perfect sear. If using nonstick, opt for Scanpan or Calphalon for durability.
Mixing Bowls
Have at least 2 mixing bowls ready: one for the cornstarch slurry and another for draining the chicken. I prefer stainless steel bowls with pour spouts—they’re lightweight and won’t break if dropped. A 1-quart size handles the slurry perfectly.
Essential Utensils
A whisk is crucial for blending the cornstarch slurry into the sauce smoothly. Use a wooden spoon to press the chicken into the rice. And don’t forget a microplane for grating the ginger—it extracts maximum flavor with minimal waste.
Measuring Tools
Precision matters here. Use liquid measuring cups for the sauce ingredients and dry measuring cups for the rice. I keep a set of OXO Good Grips measuring spoons in my apron pocket—they’re magnetic and easy to grab. 💡
Nutrition Facts
Frequently Asked Questions
Can I use chicken breast instead of thighs?
Yes, but thighs stay juicier. If using breasts, reduce baking time by 5 minutes to prevent dryness. Brining the chicken for 30 minutes first helps maintain moisture.
How do I make it gluten-free?
Swap soy sauce for tamari and use gluten-free chicken broth. Ensure all other ingredients, like rice vinegar, are certified gluten-free. The texture remains identical.
Can I prepare this ahead of time?
Assemble the casserole up to 24 hours in advance, but don’t bake it. Refrigerate covered, then add 10 minutes to the baking time when cooking from cold.
Why is my sauce too thin?
Likely the cornstarch slurry didn’t simmer long enough. Cook it for 2-3 minutes until thickened. If already baked, mix 1 tbsp cornstarch with water, drizzle over, and broil for 2 minutes.

- Jollof Rice Sauce Recipe: West African Tomato and Spice Infusion - September 25, 2026
- Japanese Rice Soup Recipe: Umami-Rich Comfort in a Bowl - September 25, 2026
- Homemade Cream Of Rice Recipe: Silk-Smooth Breakfast in Minutes - September 25, 2026