
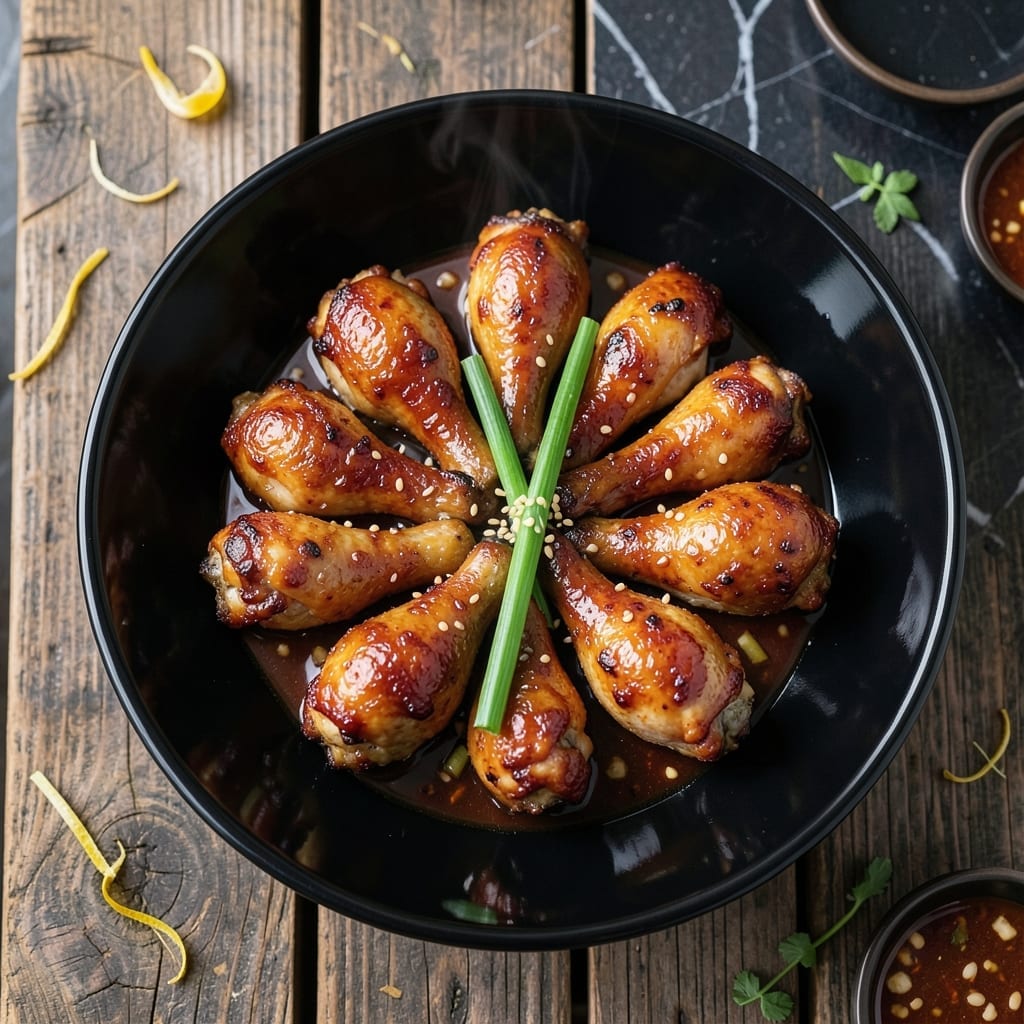
This teriyaki chicken legs recipe delivers a balance of sweet and savory with minimal effort. The secret lies in the glaze, which caramelizes beautifully under high heat for that signature sticky finish.
I’ve refined this method to ensure the meat stays juicy while the skin crisps perfectly. A simple marinade infuses flavor deep into the meat, and a quick reduction transforms the sauce into a glossy, restaurant-quality coating.
You’ll achieve fall-off-the-bone tenderness with just a handful of pantry staples. The oven does most of the work, leaving you with tender, flavorful chicken every time.
Serve with steamed rice and steamed vegetables for a complete, satisfying meal.
Ingredients for Teriyaki Chicken Legs
Pantry staples come together for a restaurant-quality dish with minimal effort required.
| Ingredient | Amount | Notes |
|---|---|---|
| Chicken Legs 🍗 | 8 pieces | Bone-in, skin-on preferred |
| Soy Sauce 🫒 | ½ cup | Low-sodium recommended |
| Brown Sugar 🍚 | ½ cup | Packed for rich sweetness |
| Honey 🍯 | ¼ cup | Pure for best texture |
| Fresh Garlic Cloves 🧄 | 4 cloves | Minced finely for marinade |
| Fresh Ginger Root 🌿 | 1 tbsp | Peeled, grated |
| Rice Vinegar 🍶 | 2 tbsp | Balances sweetness |
| Sesame Oil 🫒 | 1 tbsp | Toasted for depth |
| Cornstarch 🌾 | 1 tbsp | Thickens glaze |
| Water 💧 | ¼ cup | For marinade consistency |
| Vegetable Oil 🫒 | 1 tbsp | For searing chicken |
| Green Onions 🧅 | 3 whole | Thinly sliced for garnish |
| Sesame Seeds 🌰 | 1 tbsp | Toasted for crunch |
| Red Pepper Flakes 🌶️ | ½ tsp | Optional for heat |
The chicken legs are the foundation—bone-in, skin-on ensures juiciness and crispiness. Source from Whole Foods or a trusted butcher for consistent sizing. The soy sauce should be low-sodium to control the salt level in the glaze. For ginger and garlic, fresh is non-negotiable; pre-minced versions lack the vibrant punch needed for depth of flavor.
No honey? Maple syrup or agave work in a pinch (use slightly less). Swap brown sugar for coconut sugar at a one-to-one ratio. If rice vinegar isn’t on hand, apple cider vinegar adds a similar tang. The cornstarch can be replaced with arrowroot powder, but avoid flour—it won’t give the same glossy finish. Fresh ginger can be subbed with ground ginger at one-fourth the amount.
Marinate the chicken for up to 24 hours for maximum flavor penetration. Store leftovers in an airtight container—they’ll keep for 4-5 days in the fridge. Freeze cooked chicken legs for up to 3 months; reheat in the oven to restore crispiness.
Why You’ll Love This Recipe
- One Pan Wonder: I just toss the chicken legs with soy sauce, brown sugar, honey, and garlic, then let the oven do the work—minimal cleanup, maximum flavor.
- Sweet-Savory Magic: That glossy teriyaki glaze from the honey and soy sauce caramelizes into this ridiculous sticky-sweet crust on the chicken. My kids lick their fingers clean every time.
- Weeknight MVP: Between us, this is my go-to for busy evenings—it’s hearty enough for dinner but also packs well for next-day lunches.
- Budget Feast: Chicken legs are cheap, and a little soy sauce and honey stretch a long way. I feed my family of four for under ten bucks.
Step-by-Step Instructions for Teriyaki Chicken Legs
This method guarantees perfectly glazed chicken with tender meat that pulls away from the bone.
Step 1: Prepare the Teriyaki Marinade
In a medium bowl, whisk together the 0.5 cup soy sauce, 0.5 cup brown sugar, 0.25 cup honey, 2 tablespoons rice vinegar, 1 tablespoon sesame oil, minced 4 cloves fresh garlic cloves, and grated 1 tablespoon fresh ginger root until the brown sugar fully dissolves. This balance of sweet, salty, and tangy creates the signature teriyaki depth.
The mixture should be smooth with no sugar granules remaining. I always let it sit for 5 minutes to allow the flavors to meld before adding the chicken. This step ensures every bite carries the full complexity of the glaze.
Step 2: Marinate and Sear the Chicken
Pat the 8 pieces chicken legs dry with paper towels to ensure proper browning. Submerge them in the marinade, turning to coat completely. Let marinate at room temperature for 20 minutes while you preheat the oven to 400°F.
Heat the 1 tablespoon vegetable oil in a large oven-safe skillet over medium-high heat. Remove the chicken from the marinade (reserve the marinade) and sear for 3-4 minutes per side until the skin is deep golden brown. This initial sear locks in juices and builds flavor.
Step 3: Create the Glaze and Finish in Oven
Pour the reserved marinade into the skillet with the chicken. In a small bowl, mix the 1 tablespoon cornstarch with the 0.25 cup water until smooth, then stir this slurry into the skillet. The mixture will begin to thicken almost immediately as it comes to a simmer.
Transfer the skillet to the preheated oven and bake uncovered for 25-30 minutes, basting the chicken with the sauce every 10 minutes. The glaze should reduce to a thick, sticky consistency that coats the back of a spoon, and the chicken should reach an internal temperature of 165°F.
Step 4: Garnish and Serve
Remove the chicken from the oven and transfer to a serving platter. Spoon the thickened teriyaki glaze from the skillet over the top, ensuring each piece is thoroughly coated. The sauce should be glossy and cling to the chicken like lacquer.
Garnish with thinly sliced 3 whole green onions, 1 tablespoon sesame seeds, and a pinch of 0.5 teaspoon red pepper flakes for color and subtle heat. Let rest for 5 minutes before serving to allow the juices to redistribute, ensuring fall-off-the-bone tenderness in every piece.
Pro Tips For Making Teriyaki Chicken Legs
- Score the Skin: I learned this the hard way—slash the chicken skin 2-3 times before marinating so the teriyaki soaks in deeper and the skin crisps up better.
- Bloom the Garlic: Cook the minced fresh garlic in a little oil for 30 seconds before adding the soy sauce and sugars—it mellows the bite and fills the sauce with way more flavor.
- Skip the Boil: Simmer the teriyaki sauce gently instead of boiling it hard, or the honey and brown sugar will burn and turn bitter.
- Rest Before Serving: Give the legs 5 minutes off the heat under foil after glazing—the juices redistribute and the sauce clings instead of running off.
Pro Cooking Tips for This Dish
Marinade Timing
For maximum flavor penetration, marinate the chicken for at least 20 minutes at room temperature, or up to 24 hours refrigerated. I’ve found that 4-6 hours in the fridge gives the best balance of flavor and convenience. 💡
Searing Technique
Pat the chicken completely dry before searing to ensure crispy skin. Use a heavy skillet like Lodge cast iron for even heat distribution. Sear over medium-high heat for 3-4 minutes per side until deep golden brown.
Glaze Thickness
Mix the cornstarch slurry with cold water to prevent lumps. Stir it into the simmering marinade gradually, letting it thicken to a syrupy consistency. If it’s too thin, mix another ½ tbsp cornstarch with 1 tbsp water and repeat.
Oven Finishing
Bake uncovered at 400°F to reduce the sauce and caramelize the glaze. Baste every 10 minutes for even coating. The chicken is done when the internal temperature reaches 165°F and the sauce clings like lacquer.
Resting Importance
Let the chicken rest for 5-10 minutes after baking. This allows juices to redistribute, ensuring fall-off-the-bone tenderness. Skipping this step can result in dry meat. ✨
Sauce Consistency
If the glaze thickens too much in the oven, add 2-3 tbsp water to loosen it. The perfect consistency should coat the back of a spoon but still drip slowly. Taste and adjust sweetness or saltiness if needed.
Nutrition Facts
Frequently Asked Questions
Can I use chicken thighs instead of legs?
Chicken thighs work well with the same cooking time. The bone-in, skin-on variety gives the best results for tender, juicy meat and crispy skin.
What if my glaze is too thin?
Mix ½ tablespoon cornstarch with 1 tablespoon cold water and stir into the simmering sauce. Let it cook for 1-2 minutes to thicken to your desired consistency.
Is it safe to marinate chicken overnight?
Yes, marinating overnight in the fridge is safe and enhances flavor. Just ensure the chicken is fully submerged and the container is sealed.
How do I prevent the sauce from burning?
Baste the chicken every 10 minutes and keep the oven at 400°F. If the sauce starts to darken too much, add 2-3 tablespoons water to the pan.

- Jollof Rice Sauce Recipe: West African Tomato and Spice Infusion - September 25, 2026
- Japanese Rice Soup Recipe: Umami-Rich Comfort in a Bowl - September 25, 2026
- Homemade Cream Of Rice Recipe: Silk-Smooth Breakfast in Minutes - September 25, 2026