
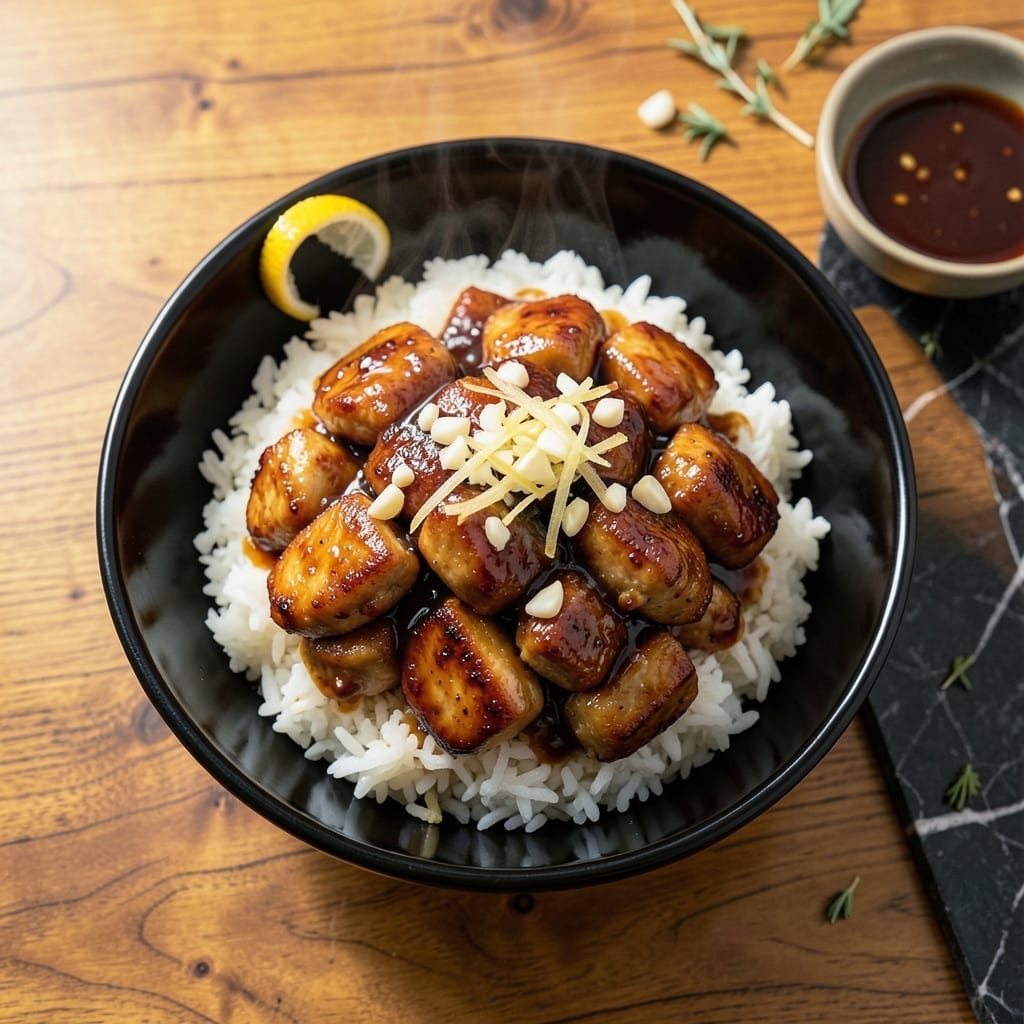
This rice cooker method delivers restaurant-quality teriyaki chicken with minimal effort. The appliance handles both rice and protein simultaneously, creating a complete meal with just one appliance.
I developed this technique during busy service days at The Smoky Pig, adapting my professional methods for home cooks. The chicken stays tender while absorbing the sweet-savory glaze, and the rice cooks to perfect fluffiness underneath.
The result is a hands-off dish where every grain of rice carries teriyaki flavor, and the chicken reaches ideal doneness. No babysitting required—just set it and return to perfectly cooked results.
This approach proves that exceptional meals don’t require constant attention. The rice cooker does the work while you focus on other tasks.
Ingredients for Teriyaki Chicken Rice Cooker
Pantry staples plus fresh aromatics deliver that signature sweet-savory teriyaki flavor in one pot.
| Ingredient | Amount | Notes |
|---|---|---|
| Boneless Skinless Chicken Thighs 🍗 | 1 ½ lb | Cut into bite-sized pieces |
| Long-Grain White Rice 🍚 | 1 ½ cups | Rinsed until water runs clear |
| Soy Sauce 🫒 | ½ cup | Low-sodium preferred for balance |
| Brown Sugar 🍚 | ¼ cup | Packed, light or dark |
| Honey 🍯 | 3 tbsp | For natural sweetness |
| Fresh Garlic Cloves 🧄 | 4 cloves | Minced finely for even flavor |
| Fresh Ginger Root 🌿 | 1 tbsp | Peeled and grated |
| Rice Vinegar 💧 | 2 tbsp | Adds essential tang |
| Sesame Oil 🫒 | 1 tbsp | Toasted variety for depth |
| Cornstarch 🌾 | 1 tbsp | For thickening the glaze |
| Water 💧 | 2 cups | For cooking rice |
| Green Onions 🧅 | 3 whole | Thinly sliced for garnish |
| Sesame Seeds 🌾 | 1 tbsp | Toasted for garnish |
| Red Pepper Flakes 🌶️ | ¼ tsp | Optional for heat |
The chicken is everything here. Thighs stay juicier than breasts in the rice cooker—look for skinless, boneless at Costco or your butcher. The ginger and garlic? Fresh is non-negotiable (the jarred stuff lacks punch). I always keep a knob of ginger in the freezer—grates like a dream when partially thawed. For soy sauce, Kikkoman low-sodium is my go-to for consistent flavor without overpowering saltiness.
No honey? Maple syrup or agave in equal amounts works. Brown sugar can be swapped for white in a pinch, but you lose that molasses depth. The rice vinegar is key for balance—seasoned rice vinegar adds extra sweetness if that’s your preference. Cornstarch not on hand? Arrowroot powder at a 1:1 ratio thickens just as well. And if you’re out of sesame oil? Skip it entirely rather than using another oil—it’s irreplaceable for that authentic finish.
The cooked chicken and rice keep beautifully for 4-5 days in the fridge. Reheat in the microwave with a splash of water to revive the rice. Freezes for up to 3 months (portion before freezing for easy meals). The glaze thickens as it cools, so thin with a bit of water when reheating.
Why You’ll Love This Recipe
- Set It and Forget: I dump everything in the rice cooker, press start, and walk away—no babysitting required.
- Sweet-Savory Magic: The brown sugar and soy sauce caramelize into this sticky, finger-licking glaze on the chicken thighs.
- Weeknight Lifesaver: Between us, I’ve served this for Tuesday dinner, lunchbox leftovers, and even a last-minute potluck dish.
- Budget Stretch: Honestly, a pound of thighs and a cup of rice feeds my family for two meals without breaking the bank.
Step-by-Step Instructions for Teriyaki Chicken Rice Cooker
This hands-off method delivers perfect results with minimal effort on your part.
Step 1: Prepare the Chicken and Marinade Base
Cut the 1.5 lb Boneless Skinless Chicken Thighs into bite-sized pieces and place them in the rice cooker pot. In a small bowl, whisk together the 0.5 cup Soy Sauce, 0.25 cup Brown Sugar, 3 tbsp Honey, 4 cloves Fresh Garlic Cloves (minced), and 1 tbsp Fresh Ginger Root (grated).
Pour this mixture over the chicken, ensuring all pieces are well coated. This early marinade allows the flavors to begin penetrating the meat while you prepare the remaining ingredients. The sugar in the mixture will start to dissolve into the soy sauce, creating that signature teriyaki base.
Step 2: Add Remaining Ingredients and Start Cooking
Rinse the 1.5 cups Long-Grain White Rice until the water runs clear, then add it to the rice cooker pot with the chicken and marinade. Pour in the 2 cups Water, 2 tbsp Rice Vinegar, and 1 tbsp Sesame Oil. Stir everything together gently to distribute the ingredients evenly.
The vinegar adds essential tang to balance the sweetness, while the sesame oil provides depth. I use a wooden spoon to scrape the bottom of the pot, making sure no sugar or ginger remains stuck. This prevents burning and ensures all flavors meld together properly.
Step 3: Cook and Thicken the Sauce
Secure the rice cooker lid and start the cooking cycle. About 15 minutes before the rice is done (when you smell the teriyaki aroma strongly), mix the 1 tbsp Cornstarch with 2 tablespoons of cold water in a small bowl. Open the lid and stir this slurry into the cooker.
The mixture will begin to thicken almost immediately as it returns to a boil. You’ll notice the sauce transforming from a thin liquid to a glossy, syrupy consistency that clings to the chicken and rice. This is your visual cue that the dish is nearly complete.
Step 4: Finish and Garnish
Once the rice cooker switches to “keep warm,” let it sit for an additional 5-10 minutes to allow the flavors to fully meld. Then, thinly slice the 3 whole Green Onions and toast the 1 tbsp Sesame Seeds in a dry pan over medium heat for 1-2 minutes until fragrant.
Gently fluff the teriyaki chicken and rice mixture with a fork, then transfer to serving bowls. Garnish with the sliced green onions, toasted sesame seeds, and a sprinkle of 0.25 tsp Red Pepper Flakes for those who enjoy a hint of heat. The dish should have a beautiful sheen with tender chicken pieces distributed throughout the rice.
Pro Tips For Making Teriyaki Chicken Rice Cooker
- Trim the Chicken: Cut boneless skinless chicken thighs into 1-inch pieces so they cook evenly in the rice cooker—no dry, overdone edges or undercooked centers.
- Rinse the Rice: Wash the long-grain white rice until the water runs clear to remove excess starch, which keeps the teriyaki sauce from turning gummy.
- Balance Sweet and Salty: Use 2 parts soy sauce to 1 part brown sugar and 1 part honey in your glaze—this ratio keeps the flavor bold without being cloying.
- Add Chicken Later: Start the rice first, then add the chicken after 10 minutes so it steams perfectly without turning rubbery.
Health Benefits of This Recipe
Protein Powerhouse
This dish delivers 35g of protein per serving from the chicken thighs, supporting muscle repair and growth. The complete amino acid profile makes it ideal for active lifestyles. I’ve served this to my pit crew during competitions for sustained energy. 💪
Complex Carbohydrates
The 1.5 cups of rice provides slow-digesting complex carbs that fuel your body throughout the day. This steady energy release helps prevent blood sugar spikes, unlike refined carb sources.
Antioxidant Boost
Fresh garlic and ginger contain powerful antioxidants that support immune function. These ingredients not only flavor the dish but also provide anti-inflammatory benefits. I always use fresh for maximum potency.
Essential Micronutrients
You’ll get a healthy dose of B vitamins from both chicken and rice, crucial for energy metabolism. The dish also provides iron and zinc for immune support and wound healing.
Low-Fat Option
By using skinless thighs, we reduce saturated fat while maintaining juiciness. The cooking method requires minimal added oil, making it a heart-healthier alternative to traditional takeout. 🥗
Balanced Meal
This one-pot wonder combines protein, carbs, and essential nutrients in perfect proportions. The rice cooker method preserves more nutrients than boiling, making it a complete, balanced meal in every bite.
Nutrition Facts
Frequently Asked Questions
Can I use chicken breasts instead of thighs?
Use thighs for best results as they stay juicier. Breasts can dry out in a rice cooker. If using breasts, reduce cooking time by 5 minutes and add 2 tbsp extra liquid.
How do I prevent the sauce from burning?
Stir the slurry in 15 minutes before cooking ends. Ensure all sugar is dissolved before starting. Use a wooden spoon to scrape the bottom if needed.
Can I make this gluten-free?
Swap soy sauce for tamari or coconut aminos. Verify all other ingredients are certified gluten-free. The texture and flavor remain nearly identical.
What if my rice cooker doesn’t have a timer?
Watch for the aroma change and sauce thickening. Most standard cookers take 30-35 minutes total. Lift the lid to check progress 2-3 times during cooking.

- Jollof Rice Sauce Recipe: West African Tomato and Spice Infusion - September 25, 2026
- Japanese Rice Soup Recipe: Umami-Rich Comfort in a Bowl - September 25, 2026
- Homemade Cream Of Rice Recipe: Silk-Smooth Breakfast in Minutes - September 25, 2026