
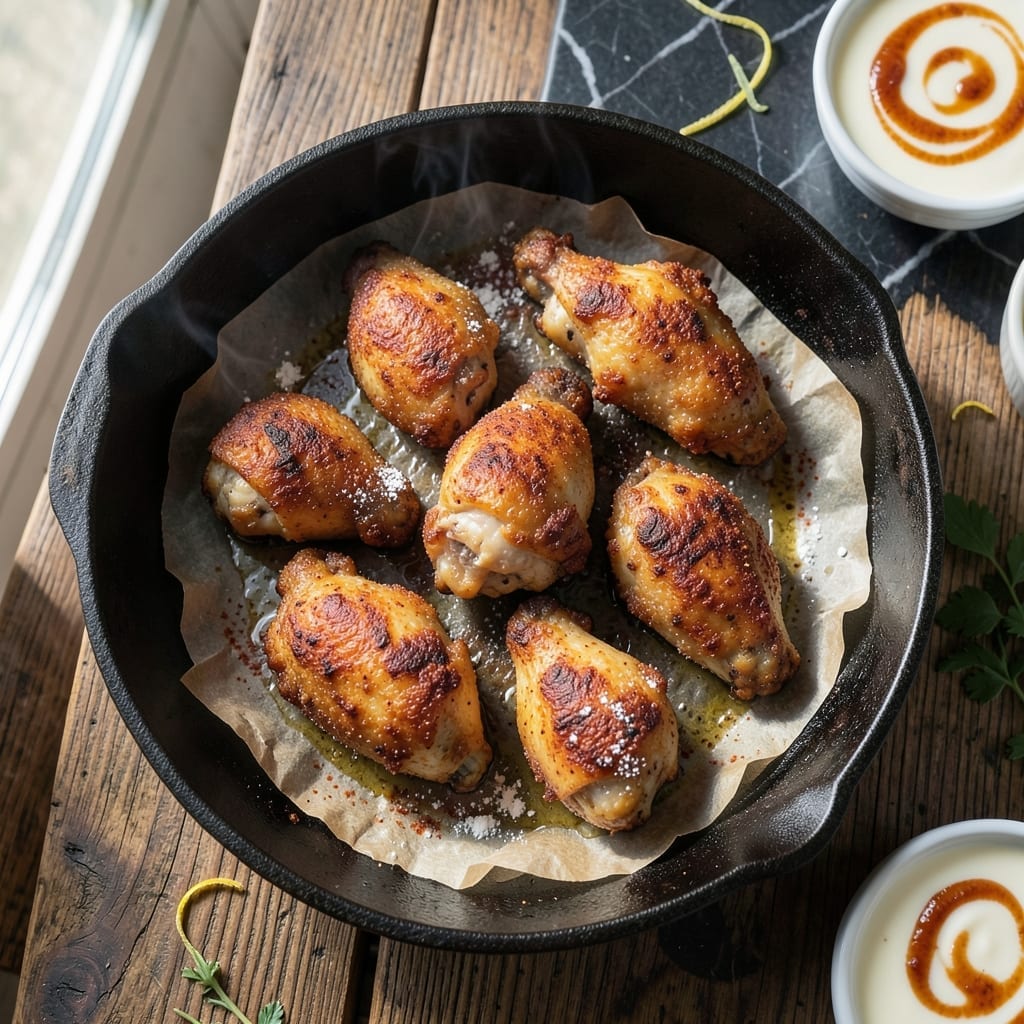
There’s nothing quite like the sound of sizzling chicken hitting hot oil, promising that crispy golden exterior we all crave. This method harks back to simpler times when every bite was a celebration of texture and flavor.
I’ve perfected this technique through years of trial and error, focusing on the ideal oil temperature and a well-seasoned flour coating. The secret lies in patience—letting the chicken cook undisturbed until it reaches that perfect crispy finish.
What emerges from the fryer is chicken with a shatteringly crispy skin that gives way to juicy, tender meat. The seasoning penetrates every bite, while the exterior maintains its satisfying crunch.
Serve it hot for the best experience, when the skin is at its crispy peak. This is comfort food at its most authentic.
Ingredients for Vintage Fried Chicken
Classic southern pantry staples deliver that nostalgic crispy perfection every time.
| Ingredient | Amount | Notes |
|---|---|---|
| Chicken Thighs and Drumsticks 🍗 | 3 ½ lb | Bone-in, skin-on preferred |
| All-Purpose Flour 🌾 | 2 cups | For crispy coating |
| Cornstarch 🌽 | ½ cup | For extra crunch |
| Kosher Salt 🧂 | 1 ½ tbsp | Diamond Crystal preferred |
| Freshly Ground Black Pepper 🌶️ | 1 tbsp | Coarse grind ideal |
| Paprika 🌶️ | 2 tsp | Sweet or smoked variety |
| Garlic Powder 🧄 | 2 tsp | Not garlic salt |
| Onion Powder 🧅 | 2 tsp | Fresh ground preferred |
| Cayenne Pepper 🔥 | ½ tsp | Adjust for heat preference |
| Buttermilk 🥛 | 2 cups | Full-fat for tenderness |
| Vegetable Shortening 🫒 | 4 cups | Crisco brand recommended for frying |
| Hot Sauce 🌶️ | 1 tbsp | Tabasco or similar |
The chicken is everything here. Bone-in, skin-on thighs and drumsticks yield the juiciest, most flavorful results—boneless dries out too fast. Source from local butchers or Whole Foods for superior quality. The flour should be all-purpose (nothing fancy), but White Lily if you’re going for true Southern authenticity. Buttermilk must be full-fat—low-fat versions lack the acidity needed to tenderize.
No buttermilk? Whole milk plus 1 tbsp vinegar per cup works in a pinch. For gluten-free, swap the all-purpose flour for rice flour—it crisps up beautifully. If you dislike spice, reduce cayenne by half. The shortening is non-negotiable for that vintage crunch; vegetable oil works but won’t be as crisp. Hot sauce can be omitted, but it adds a subtle tang that balances the richness.
Fry in batches to avoid crowding—keeps the oil temp steady. Leftovers? They’ll lose some crunch but still taste great cold. Store in the fridge for up to 3 days, though best eaten fresh. Reheat in a 400°F oven for 10-15 minutes to revive the crispiness.
Why You’ll Love This Recipe
- One Pan Magic: I just dump flour, cornstarch, and spices in a bag, shake the chicken, and fry—no fancy steps.
- Crispy Perfection: That cornstarch in the mix gives it a shatteringly crisp crust with juicy meat underneath.
- Feeds the Gang: I’ve served this at picnics, Sunday suppers, and even packed it cold for lunches—always disappears.
- Budget Stretch: Thighs and drumsticks stay cheap, and the pantry staples mean I’m not buying extra junk.
Step-by-Step Instructions for Vintage Fried Chicken
This method delivers perfectly crispy skin and juicy meat using time-tested technique.
Step 1: Prepare and Season the Buttermilk Marinade
In a large bowl, whisk together the 2 cups buttermilk and 1 tbsp hot sauce until fully combined. The buttermilk’s acidity tenderizes the chicken while the hot sauce adds subtle depth of flavor.
Add all 3.5 lb chicken thighs and drumsticks to the marinade, ensuring each piece is fully coated. Cover the bowl and refrigerate for at least 8 hours, or preferably overnight. This extended marinating time allows the buttermilk to penetrate deeply, resulting in exceptionally moist meat.
Step 2: Create the Seasoned Dredge Mixture
In a separate large bowl, combine the 2 cups all-purpose flour, 0.5 cup cornstarch, 1.5 tbsp kosher salt, 1 tbsp freshly ground black pepper, 2 tsp paprika, 2 tsp garlic powder, 2 tsp onion powder, and 0.5 tsp cayenne pepper.
Whisk thoroughly until all ingredients are evenly distributed. The cornstarch is the secret to achieving that vintage-style extra crispiness, while the combination of spices creates the classic flavor profile. This mixture should be used within 1 hour of preparation for optimal results.
Step 3: Dredge and Rest the Chicken
Remove the chicken from the buttermilk marinade, allowing any excess to drip off. Dredge each piece in the flour mixture, pressing firmly to ensure the coating adheres completely to all surfaces. Shake off any excess flour—too much will create a thick, gummy coating rather than a crisp one.
Place the dredged chicken on a wire rack set over a baking sheet. Let it rest at room temperature for 15-20 minutes. This resting period allows the coating to set and adhere better to the meat, preventing it from falling off during frying.
Step 4: Fry to Golden Perfection
In a deep, heavy-bottomed pot or Dutch oven, melt the 4 cups vegetable shortening over medium heat until it reaches 350°F on a deep-fry thermometer. Carefully add several pieces of chicken to the hot oil, being careful not to overcrowd the pot—this would lower the oil temperature and result in greasy chicken.
Fry the chicken for 12-15 minutes, turning occasionally, until the coating is deep golden brown and the internal temperature reaches 165°F. Dark meat like thighs and drumsticks can handle slightly higher temperatures, so don’t be afraid to let them cook until they’re truly crispy. Use a slotted spoon to transfer the cooked chicken to a wire rack set over a paper towel-lined baking sheet to drain.
Step 5: Rest and Serve
Allow the fried chicken to rest for 5-10 minutes before serving. This brief resting period lets the juices redistribute throughout the meat, ensuring each bite is moist and flavorful. The coating will also crisp up slightly as it cools.
Serve the chicken hot, when the skin is at its crispiest. The exterior should have a satisfying crunch that gives way to tender, juicy meat inside. For the most authentic experience, serve with classic sides like mashed potatoes and biscuits to soak up any delicious drippings.
Pro Tips For Making Vintage Fried Chicken
- Dry the Skin: Pat the thighs and drumsticks completely dry with paper towels before dredging—this guarantees the flour sticks and creates that shatteringly crisp crust vintage fried chicken is known for.
- Double Dredge: Dip each piece in flour, shake off the excess, then repeat for a thicker, more durable coating that won’t flake off in the oil.
- Skip the Crowding: Fry in batches with at least an inch of space between pieces, or the oil temp drops and you’ll end up with greasy, soggy chicken instead of that golden, crisp finish.
- Rest Before Frying: Let the dredged chicken sit on a wire rack for 10-15 minutes before frying—this helps the coating set and actually changes the outcome, giving you a more even, crunchy crust.
Perfect Pairings for This Dish
Classic Southern Sides
You can’t go wrong with creamy mashed potatoes—I make mine with Yukon Golds and plenty of butter. They soak up the chicken’s crispy bits beautifully. For a lighter option, buttermilk biscuits from scratch are my go-to. 💛
Fresh Salad Pairings
A crisp green salad cuts through the richness perfectly. I love a simple mix of iceberg lettuce, cherry tomatoes, and cucumber with a tangy buttermilk ranch. Add thinly sliced red onions for a little bite.
Comfort Food Combos
Mac and cheese is a classic pairing that feels like a warm hug. I prefer a baked version with a sharp cheddar crust. For a Southern twist, serve with collard greens slow-cooked with bacon.
Beverage Choices
Sweet tea is the ultimate Southern companion—brew Luzianne tea bags strong and serve over ice. For beer lovers, a crisp lager like Miller High Life cleanses the palate between bites. 🍺
Condiments and Extras
Always serve with hot honey for drizzling—it adds a sweet-spicy kick. I keep a bottle of Texas Pete on the table for those who want extra heat. Pickle spears on the side add a refreshing crunch.
Nutrition Facts
Frequently Asked Questions
Why use buttermilk in the marinade?
The buttermilk’s acidity tenderizes the meat while adding moisture. It also helps the flour coating adhere better during frying for maximum crispiness.
Can I use chicken breasts instead?
Not recommended. Breasts dry out quickly and lack the fat content needed for juicy results. Stick with bone-in, skin-on thighs and drumsticks for authentic flavor and texture.
What’s the best oil temperature for frying?
Maintain 350°F throughout cooking. Too low causes greasy chicken, too high burns the coating before the meat cooks. Use a thermometer for accuracy.
How do I keep the coating crispy?
Drain on a wire rack, not paper towels, to prevent steam from softening the crust. Serve immediately for peak crispiness.

- Jollof Rice Sauce Recipe: West African Tomato and Spice Infusion - September 25, 2026
- Japanese Rice Soup Recipe: Umami-Rich Comfort in a Bowl - September 25, 2026
- Homemade Cream Of Rice Recipe: Silk-Smooth Breakfast in Minutes - September 25, 2026