
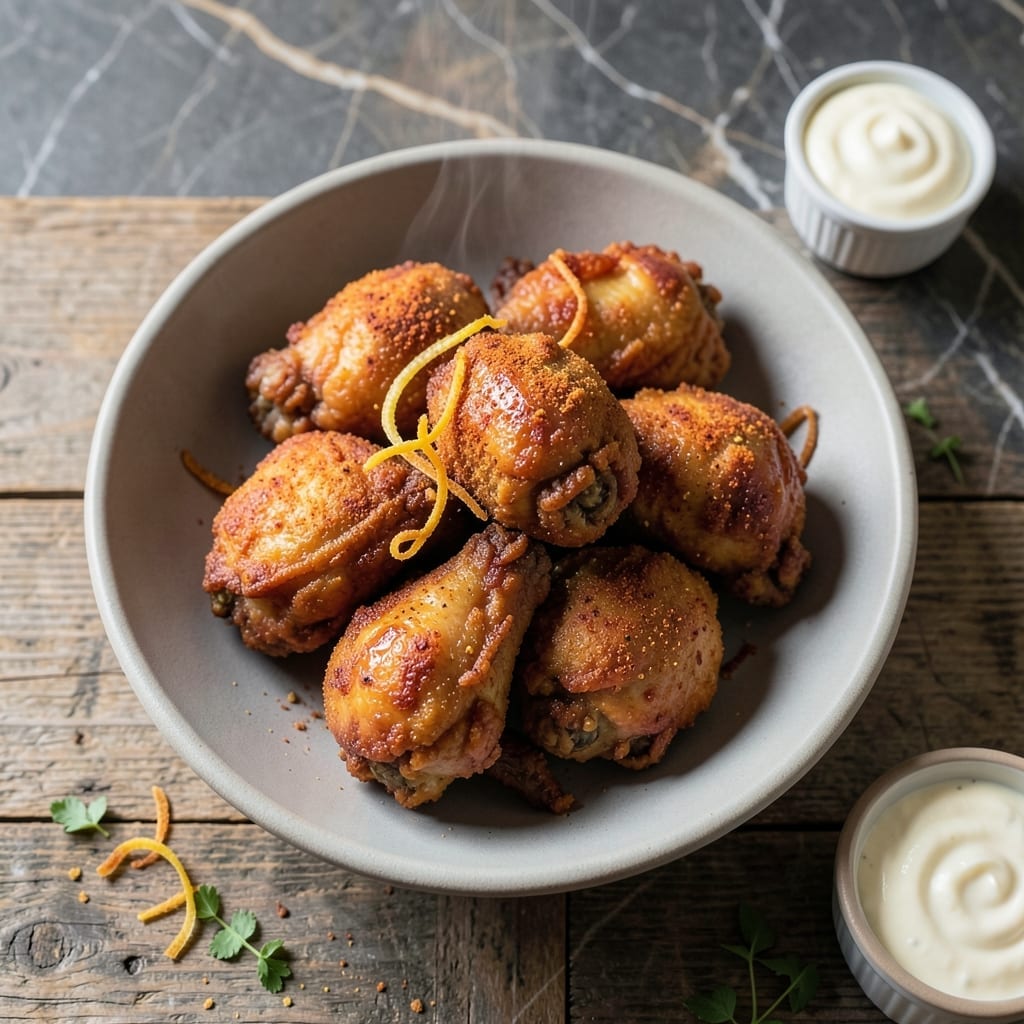
This recipe delivers the genuine taste of Southern fried chicken with a crispy, golden coating that stays crunchy even after sitting. The secret lies in a carefully balanced spice blend and a traditional frying technique.
I developed this method after years of testing to achieve that perfect balance between a crispy exterior and juicy, tender meat inside. The chicken is marinated in buttermilk, which tenderizes the meat and helps the coating adhere beautifully.
The result is fried chicken that’s authentic in flavor and texture, with each bite offering a satisfying crunch followed by succulent, well-seasoned meat. It’s a dish that honors tradition while being simple enough for home cooks.
Serve it hot for the best experience, with your favorite sides for a meal that feels like a true Southern classic.
Ingredients for Authentic Fried Chicken
Traditional Southern ingredients for that authentic, crispy golden coating everyone loves.
| Ingredient | Amount | Notes |
|---|---|---|
| Chicken Thighs 🍗 | 3 lb | Bone-in, skin-on for best texture |
| Buttermilk 🥛 | 2 cups | Full-fat for tenderizing |
| All-Purpose Flour 🌾 | 3 cups | For crispy coating |
| Cornstarch 🌽 | ½ cup | Enhances crunch in coating |
| Paprika 🌶️ | 2 tbsp | Sweet or smoked variety |
| Garlic Powder 🧄 | 2 tsp | Fine grind preferred |
| Onion Powder 🧅 | 2 tsp | Balances spice blend |
| Salt 🧂 | 1 ½ tbsp | Kosher or sea salt |
| Black Pepper 🌶️ | 1 tbsp | Freshly ground preferred |
| Cayenne Pepper 🔥 | 1 tsp | Adjust for heat preference |
| Vegetable Oil 🫒 | 4 cups | For deep frying |
| Large Eggs 🥚 | 2 whole | Helps coating adhere |
| Dried Thyme 🍃 | 1 tsp | Optional for depth |
| Dried Oregano 🌿 | 1 tsp | Mediterranean oregano |
The chicken is everything here. Bone-in, skin-on thighs give you that juicy interior and crispy exterior—breasts dry out too fast. Buttermilk is non-negotiable (the full-fat version at Whole Foods or any major grocery store). For the flour, King Arthur is my go-to, but any all-purpose works. The cornstarch is the secret for extra crunch—don’t skip it.
No buttermilk? Mix 2 cups milk with 2 tbsp vinegar and let it sit 5 minutes. Out of paprika? Extra cayenne and garlic powder can fill the gap (though the flavor changes). For a lighter option, peanut oil instead of vegetable oil works great—higher smoke point, cleaner taste. The egg wash can be skipped, but the coating won’t stick as well.
Marinate the chicken overnight for maximum tenderness. Store unused buttermilk in the fridge for 1 week. The spice blend keeps in an airtight container for 6 months. Always fry in small batches—crowding the pan drops the oil temp and makes soggy chicken.
Why You’ll Love This Recipe
- One Pan Magic: I just toss the chicken in buttermilk, coat it in flour and cornstarch, and fry—no complicated steps.
- Crispy & Juicy: The buttermilk brine keeps the thighs tender while the paprika-spiced crust stays shatteringly crisp.
- Crowd Pleaser: I’ve served this at picnics and weeknight dinners—everyone from picky kids to my foodie uncle asks for seconds.
- Budget Winner: Chicken thighs are cheap, and the flour-cornstarch mix stretches to feed a hungry family with leftovers for sandwiches.
Step-by-Step Instructions for Authentic Fried Chicken
Master the technique for perfectly crispy, juicy chicken with a well-seasoned crust.
Step 1: Marinate Chicken in Buttermilk
Begin by placing the 3 lb Chicken Thighs in a large bowl. Pour in the 2 cups Buttermilk and ensure each piece is fully coated. The buttermilk tenderizes the meat and helps the coating adhere later.
Cover and refrigerate for at least 4 hours, or ideally overnight. This extended marinating time allows the buttermilk to penetrate deeply, resulting in exceptionally moist and flavorful chicken. The longer you marinate, the more pronounced the tenderness will be.
Step 2: Prepare the Seasoned Coating
In a large bowl, combine the 3 cups All-Purpose Flour, 0.5 cup Cornstarch, 2 tbsp Paprika, 2 tsp Garlic Powder, 2 tsp Onion Powder, 1.5 tbsp Salt, 1 tbsp Black Pepper, 1 tsp Cayenne Pepper, 1 tsp Dried Thyme, and 1 tsp Dried Oregano. Whisk thoroughly to distribute the spices evenly.
The cornstarch is the secret to an extra-crispy crust, while the blend of spices creates that signature authentic flavor profile. Make sure there are no clumps in the mixture for an even coating.
Step 3: Coat and Rest the Chicken
Remove the chicken from the buttermilk, letting any excess drip off. Dredge each piece in the flour mixture, pressing firmly to ensure a thick, even coating. For extra crunch, dip the coated chicken back into the buttermilk, then back into the flour mixture for a double coating.
Place the coated chicken on a wire rack set over a baking sheet. Let it rest for 15-20 minutes at room temperature. This resting period allows the coating to set, which prevents it from falling off during frying.
Step 4: Fry to Golden Perfection
Heat the 4 cups Vegetable Oil in a deep, heavy-bottomed pot or Dutch oven to 350°F. Use a deep-fry thermometer to monitor the temperature accurately. The oil is ready when a small piece of coated chicken sizzles immediately upon contact.
Carefully lower the chicken into the hot oil in batches, being careful not to overcrowd the pot. Fry for 12-15 minutes, turning occasionally, until the coating is deep golden brown and the internal temperature reaches 165°F. Drain on a wire rack or paper towels to maintain crispiness.
Between batches, allow the oil to return to 350°F before adding more chicken. This ensures even cooking and a consistent texture for every piece.
Pro Tips For Making Authentic Fried Chicken
- Soak Overnight: Let the chicken thighs bathe in buttermilk for at least 12 hours—I learned this the hard way after my first few batches turned out dry and bland.
- Double Dredge: Dip the buttermilk-soaked thighs in the flour-cornstarch mix twice, with a 5-minute rest in between, to guarantee that thick, craggy crust.
- Skip Cold Oil: Resist the urge to start frying until the oil hits 350°F; tossing chicken into cool oil just gives you greasy, soggy skin.
- Rest Before Serving: Give the fried thighs 5-10 minutes on a wire rack after frying—this keeps the crust crisp while the juices settle back into the meat.
Essential Equipment for This Dish
Deep Fryer Essentials
For home frying, I swear by my Cuisinart Deep Fryer—it maintains 350°F perfectly and has a 4-liter capacity, ideal for batches. The built-in thermostat prevents oil overheating, which is crucial for consistent results. 🔥
Heavy-Duty Dutch Oven
If you prefer stovetop frying, a Lodge Enamel Dutch Oven is my go-to. Its 6-quart size handles 4-5 chicken pieces at once without crowding. The heavy base distributes heat evenly, preventing hot spots that burn coating.
Thermometer is Non-Negotiable
Never fry without a deep-fry thermometer—I use the Taylor Precision model. Oil temp drops when adding chicken, so constant monitoring is essential. 325-350°F is the sweet spot for crispy, golden results.
Wire Rack for Draining
A stainless steel wire rack over a baking sheet lets air circulate under chicken, keeping it crispy. Avoid paper towels for draining—they steam the coating. I picked up mine at Bed Bath & Beyond for under $15.
Tongs for Safe Handling
Use 12-inch locking tongs to safely lower and flip chicken in hot oil. The long handles keep your hands safe from splatters. I prefer OXO Good Grips—their silicone tips won’t scratch your cookware.
Splatter Screen
Frying creates grease splatters, so a stainless steel splatter screen is a kitchen savior. It fits over your pot and catches oil droplets while allowing steam to escape. A $10 investment that prevents messy cleanup.
Nutrition Facts
Frequently Asked Questions
Can I use chicken breasts instead of thighs?
Thighs stay juicier, but breasts work if pounded to even 1/2-inch thickness. Reduce frying time to 10-12 minutes to prevent dryness. Always check internal temp hits 165°F.
Why rest the coated chicken before frying?
Letting it sit for 15-20 minutes helps the coating adhere better. This prevents flaking during frying and ensures a crispier crust. Skipping this step risks uneven cooking.
How do I keep the coating crispy after frying?
Drain on a wire rack, not paper towels, to avoid steam. Keep finished pieces in a 200°F oven while frying batches. Never cover—trapped moisture softens the crust.
Can I bake this instead of frying?
Yes, but texture differs. Bake at 400°F for 25-30 minutes on a rack for airflow. Spray with oil first for extra crispiness. Frying still delivers the best crunch.

- Jollof Rice Sauce Recipe: West African Tomato and Spice Infusion - September 25, 2026
- Japanese Rice Soup Recipe: Umami-Rich Comfort in a Bowl - September 25, 2026
- Homemade Cream Of Rice Recipe: Silk-Smooth Breakfast in Minutes - September 25, 2026