
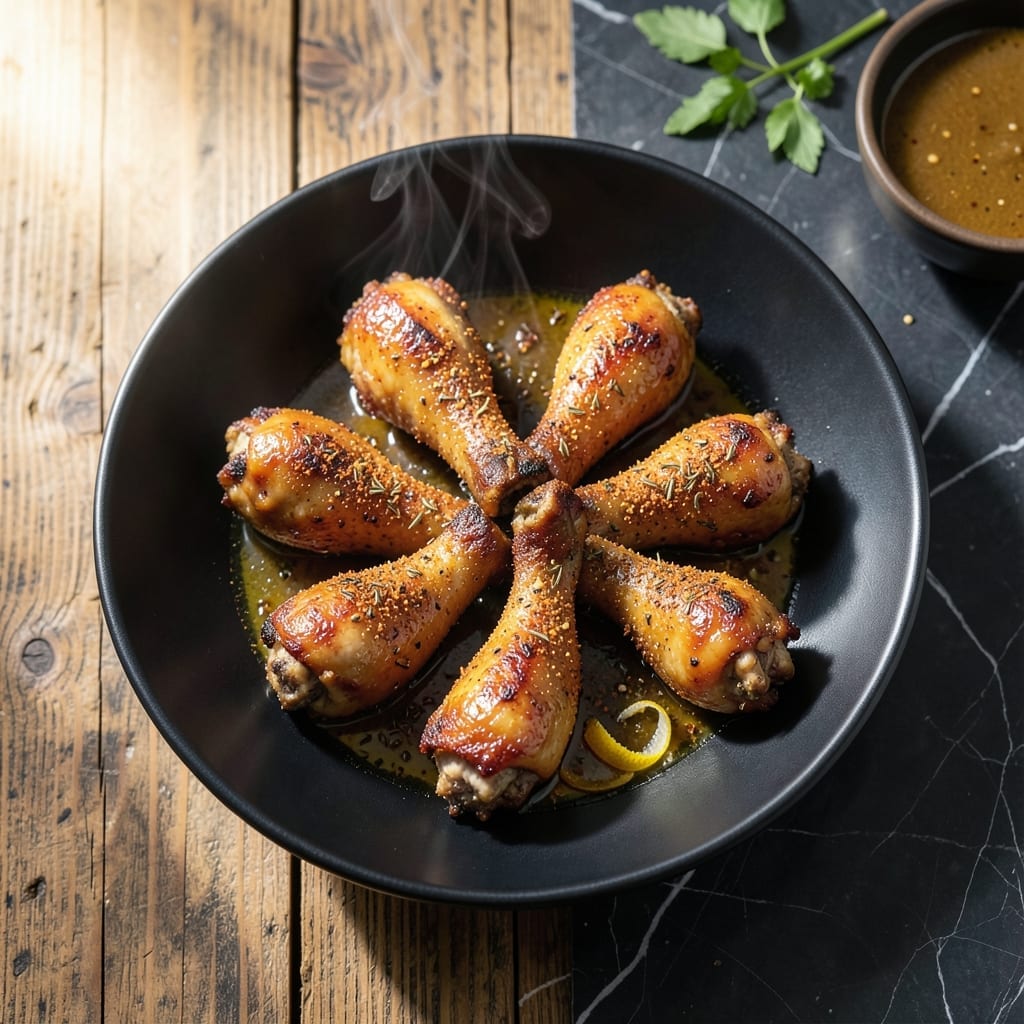
I’ve perfected a method for achieving crispy chicken drumsticks in the oven without the mess of frying. This approach delivers a golden, shatteringly crispy skin while keeping the meat juicy and tender inside.
The secret lies in a high-heat oven and a simple dry rub that enhances flavor without overpowering. In just 25 minutes, you’ll have drumsticks that rival your favorite takeout—no special equipment required.
What you’ll get is a foolproof dish with a satisfying crunch in every bite, perfect for busy weeknights. The process is straightforward, with minimal prep and maximum payoff.
Serve with roasted vegetables or a simple salad for a complete meal that’s ready before you know it.
Ingredients for Chicken Drumsticks Quick
Simple dry rub and a hot oven create that perfect crunch without deep frying.
| Ingredient | Amount | Notes |
|---|---|---|
| Chicken Drumsticks 🍗 | 2 ½ lb | Skin-on, bone-in preferred |
| Olive Oil 🫒 | 2 tbsp | Extra-virgin for best flavor |
| Paprika 🌶️ | 1 ½ tsp | Sweet or smoked variety |
| Garlic Powder 🧄 | 1 tsp | Freshly ground preferred |
| Onion Powder 🧅 | 1 tsp | Balanced flavor base |
| Dried Thyme 🌿 | 1 tsp | Crushed for even distribution |
| Dried Oregano 🍃 | 1 tsp | Mediterranean blend favorite |
| Salt 🧂 | 1 tsp | Diamond Crystal kosher preferred |
| Black Pepper 🌶️ | ½ tsp | Freshly ground for punch |
| Cayenne Pepper 🔥 | ¼ tsp | Optional for heat lovers |
| Baking Powder 🧂 | 1 tsp | Secret for extra crispiness |
| Cornstarch 🌾 | 2 tbsp | For ultra-crispy skin coating |
The chicken drumsticks are the star here. Look for uniform size so they cook evenly—about 4-5 inches long is ideal. I grab mine from Costco for bulk savings, but any supermarket will have them in the fresh meat section. Skin-on is non-negotiable for that shatteringly crisp texture. If you find them skinless, save those for another recipe (they just won’t crisp up the same).
No paprika? Cayenne or chipotle powder adds heat and color, but go easy—start with half the amount. Swap dried thyme for rosemary or sage at the same quantity. The cornstarch is doing the heavy lifting for crispiness, so don’t skip it. Arrowroot powder works as a 1:1 substitute if that’s what you’ve got. For the baking powder, just make sure it’s fresh—old stuff loses its oomph.
Drumsticks keep well in the fridge for 3-4 days raw, or freeze for 9 months. The dry rub? Mix it up fresh each time—takes 30 seconds. Leftovers reheat best in the oven or air fryer to maintain that crisp skin. Never microwave, or you’ll lose the crunch.
Why You’ll Love This Recipe
- Ready in 20: Honestly, just toss the drumsticks with olive oil and spices, then bake—no marinating, no fuss.
- Smoky & Savory: That paprika and garlic powder combo gives them a deep, crave-worthy flavor without overpowering.
- Feeds the Crew: I make a big batch for Sunday dinner, and the leftovers vanish by Tuesday.
Step-by-Step Instructions for Oven-Baked Chicken Drumsticks
Here’s how to achieve that perfect crispy skin and juicy meat in just minutes.
Step 1: Prep the Chicken and Seasoning Mix
Pat the 2.5 lb chicken drumsticks completely dry with paper towels—this ensures maximum crispiness. In a large bowl, whisk together the 1.5 tsp paprika, 1 tsp garlic powder, 1 tsp onion powder, 1 tsp dried thyme, 1 tsp dried oregano, 1 tsp salt, 0.5 tsp black pepper, 0.25 tsp cayenne pepper, 1 tsp baking powder, and 2 tbsp cornstarch.
The baking powder is the secret weapon here—it raises the pH of the skin, helping it brown faster and stay extra crispy. Don’t skip it.
Step 2: Coat and Rest the Drumsticks
Drizzle the 2 tbsp olive oil over the chicken drumsticks and toss them until evenly coated. Then, sprinkle the seasoning mix over the drumsticks and toss again, pressing the mixture into the skin so it adheres well.
Let the drumsticks rest for 5-10 minutes at room temperature. This short rest allows the cornstarch to absorb moisture from the surface, creating a better crust when baked. Meanwhile, preheat your oven to 425°F.
Step 3: Bake on High Heat for Crispy Skin
Arrange the drumsticks on a wire rack set over a rimmed baking sheet, leaving space between each piece for air circulation. Bake on the upper-middle rack for 20 minutes at 425°F.
You’ll start to see the skin puff and turn golden brown—this is the baking powder working its magic. Flip the drumsticks halfway through to ensure even browning and crispiness on all sides.
Step 4: Finish with a Final Broil (Optional)
For extra crispiness, switch the oven to broil for the last 2-3 minutes. Watch closely—broiling can go from perfect to burnt in seconds. The skin should be deep golden brown and crackling crisp when done.
The internal temperature should read 165°F on an instant-read thermometer inserted into the thickest part of the meat. If you don’t have a thermometer, pierce the thickest drumstick with a knife—the juices should run clear.
Step 5: Rest and Serve Immediately
Let the drumsticks rest for 5 minutes before serving. This brief rest allows the juices to redistribute, ensuring every bite is moist and flavorful. The skin will stay crispy if you serve them right away.
These drumsticks are best enjoyed fresh out of the oven, while the skin is still at its crispiest. Pair with your favorite sides and dig in!
Pro Tips For Making Chicken Drumsticks Quick
- Pat Them Dry: I learned this the hard way—wet drumsticks steam instead of sear. Use paper towels to dry them thoroughly before adding olive oil and spices, or you’ll end up with soggy skin.
- Hot Pan, Fast Sear: Crank the heat to medium-high before adding the drumsticks. Sounds obvious, but a screaming-hot pan is what gives you that crispy, paprika-spiced crust in under 5 minutes per side.
- Skip the Overcrowding: After burning three batches, I finally figured out that cramming all the drumsticks in one pan steams them. Cook in batches if needed—it’s the only way to get even browning.
- Double the Spices: Sounds weird, but it works: use twice as much garlic powder and onion powder as you think you need. Drumsticks can handle bold flavor, and the quick cook time means you need that extra punch.
Flavor Customization for chicken drumsticks quick
Spicy Kick
For heat lovers, increase the cayenne pepper to ½ tsp in your dry rub. I also love adding ½ tsp chipotle powder for a smoky heat that complements the crispy skin beautifully. 🌶️
Herb Variations
Swap the dried herbs for fresh—use 1 tbsp chopped fresh rosemary and 1 tbsp fresh thyme leaves. The aromatic oils in fresh herbs will infuse the meat with incredible fragrance. Press them into the skin before baking.
Citrus Zing
Add 1 tsp lemon zest and 1 tsp orange zest to your seasoning mix for bright, citrusy notes. The acidity cuts through the richness and adds a refreshing twist to each bite.
Sweet and Smoky
Mix in 1 tbsp brown sugar and replace paprika with smoked paprika for a sweet-smoky flavor profile. This creates a caramelized glaze on the skin that’s irresistibly sticky and crispy.
Global Flavors
For a Middle Eastern twist, add 1 tsp ground cumin and 1 tsp ground coriander. Or go Asian-inspired with 1 tbsp soy sauce and 1 tsp grated ginger in the rub.
Cheesy Crust
Sprinkle ¼ cup grated Parmesan or Pecorino Romano over the drumsticks during the last 5 minutes of baking. The cheese melts into the crispy skin, creating an umami-rich, savory crust. 💛
Nutrition Facts
Frequently Asked Questions
Can I use boneless drumsticks for this?
Boneless won’t get as crispy since they lack the skin and bone structure. Stick with skin-on, bone-in for the best texture. If you must use boneless, reduce cooking time to 15-18 minutes to avoid drying out.
Why is baking powder in the seasoning?
Baking powder raises the skin’s pH, helping it brown faster and stay extra crispy. It’s the secret to that golden, crackling crust without frying. Don’t skip it!
How do I know when they’re done?
Use a meat thermometer—165°F in the thickest part means they’re safe. No thermometer? Pierce the thickest piece—the juices should run clear, not pink.
Can I make these ahead of time?
For best crispiness, serve immediately. Reheat in a 425°F oven for 5-10 minutes to revive the skin. Avoid microwaving—it’ll make them soggy.

- Jollof Rice Sauce Recipe: West African Tomato and Spice Infusion - September 25, 2026
- Japanese Rice Soup Recipe: Umami-Rich Comfort in a Bowl - September 25, 2026
- Homemade Cream Of Rice Recipe: Silk-Smooth Breakfast in Minutes - September 25, 2026