
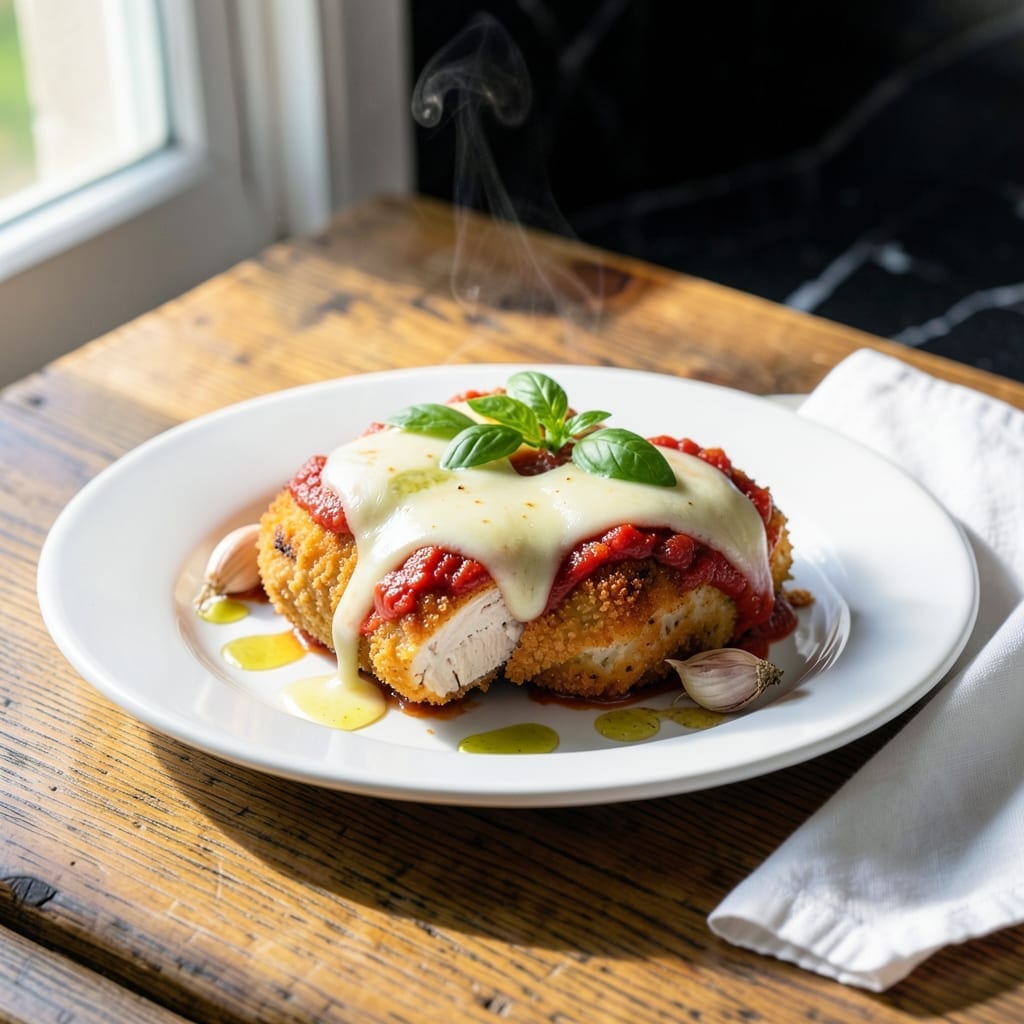
This baked chicken dish transforms simple ingredients into a restaurant-worthy meal with minimal effort. The combination of juicy chicken, tangy tomatoes, and melty parmesan creates layers of flavor that satisfy every time.
I’ve refined this method to ensure the chicken stays tender while the cheese develops a golden crust. A quick sear before baking locks in moisture, and a brief broil at the end guarantees that perfect cheesy finish.
The tomatoes soften and meld with the parmesan, forming a rich, savory sauce that coats every bite. It’s a one-pan wonder that’s as easy to make as it is delicious to eat.
Serve with pasta or crusty bread to soak up every last drop. Here’s how to make it.
Ingredients for Chicken Tomato Parmesan
Simple pantry staples and fresh cheese create this restaurant-worthy baked dish with ease.
| Ingredient | Amount | Notes |
|---|---|---|
| Boneless Skinless Chicken Breasts 🍗 | 1 ½ lb | Pounded to even thickness |
| Olive Oil 🫒 | 2 tbsp | Divided for searing and drizzling |
| All-Purpose Flour 🌾 | ½ cup | For light dredging |
| Salt 🧂 | 1 tsp | Kosher or sea salt |
| Black Pepper 🌶️ | ½ tsp | Freshly ground preferred |
| Garlic Cloves 🧄 | 3 cloves | Minced for sauce |
| Canned Diced Tomatoes 🍅 | 2 cups | With juices, San Marzano preferred |
| Tomato Paste 🍅 | 2 tbsp | For concentrated tomato flavor |
| Dried Oregano 🌿 | 1 tsp | Mediterranean variety ideal |
| Dried Basil 🍃 | 1 tsp | Or substitute fresh basil |
| Parmesan Cheese 🧀 | 1 ½ cups | Freshly grated from block |
| Mozzarella Cheese 🧀 | 8 oz | Shredded for topping |
| Fresh Basil Leaves 🌿 | ¼ cup | Chopped for garnish |
The Parmesan is non-negotiable for that perfect golden crust. Grab a wedge of Parmigiano-Reggiano from Whole Foods or your local specialty grocer—pre-grated lacks the melt and depth. The chicken breasts should be similar in size for even cooking. Costco often has great pre-portioned options (just pound them thin). Look for bright red tomatoes with no added preservatives for the best flavor.
No Parmigiano-Reggiano? Pecorino Romano works in a pinch (it’s saltier, so reduce by one-third the amount). Fresh tomatoes can replace canned—use about 4 medium, diced. If you’re out of mozzarella, provolone or fontina melt beautifully. The flour dredge can be skipped for a gluten-free version, but the crust won’t be as crispy.
This dish rehearses well—assemble it earlier in the day, then bake when ready. Keeps in the fridge for 3-4 days (the cheese will soften but still taste great). Freeze before baking for up to 2 months; thaw completely before cooking.
Why You’ll Love This Recipe
- One Pan Wonder: I love that everything cooks in a single skillet with just olive oil and a quick flour dredge.
- That Tomato Crust: The juicy tomatoes melt into the parmesan crust on the chicken—honestly, it’s the best part.
- Weeknight Hero: Between us, this is my go-to when I need dinner ready before soccer practice.
- Leftovers? Yes Please: The flavors deepen overnight, so lunch the next day tastes even better.
Step-by-Step Instructions for Chicken Tomato Parmesan
Here’s the method. Straightforward, tested, works every time.
Step 1: Prep and Sear the Chicken
Pound the boneless skinless chicken breasts to an even ½-inch thickness using a meat mallet. This ensures even cooking and prevents dry spots. Season both sides with 1 tsp salt and 0.5 tsp black pepper, then lightly dredge in 0.5 cup all-purpose flour, shaking off any excess.
Heat 1 tbsp olive oil in a large oven-safe skillet over medium-high heat until shimmering. Add the chicken and sear for 3-4 minutes per side until golden brown and cooked through. The flour creates a light crust that helps the sauce cling later. Transfer to a plate and set aside.
Step 2: Build the Tomato Sauce Base
In the same skillet, add the remaining 1 tbsp olive oil and reduce heat to medium. Add 3 cloves minced garlic cloves and cook for 30 seconds until fragrant—don’t let it brown or it will turn bitter.
Stir in 2 tbsp tomato paste and cook for 1 minute to deepen its flavor. Add 2 cups canned diced tomatoes (with juices), 1 tsp dried oregano, and 1 tsp dried basil. Simmer for 5 minutes until the sauce thickens slightly and the flavors meld together.
Step 3: Layer with Cheeses and Bake
Return the seared chicken to the skillet, nestling it into the tomato sauce. Sprinkle 1 cup of the 1.5 cups parmesan cheese evenly over the chicken and sauce. Then top with all 8 oz shredded mozzarella cheese, ensuring full coverage for that signature melty topping.
Transfer the skillet to a preheated 375°F oven and bake for 15-20 minutes until the cheese is bubbly and golden brown and the sauce is heated through. The dish is done when the edges start to crisp and the mozzarella has melted completely.
Step 4: Garnish and Serve
Remove from the oven and let rest for 5 minutes to allow the cheese to set slightly. Sprinkle the remaining 0.5 cup parmesan cheese over the top, then garnish with 0.25 cup chopped fresh basil leaves for a bright, aromatic finish.
Serve immediately while hot. The chicken should be tender and juicy, with each bite featuring tangy tomato sauce, melty mozzarella, and sharp parmesan. The fresh basil adds a pop of color and freshness that balances the richness of the cheeses.
Pro Tips For Making Chicken Tomato Parmesan
- Pound the Chicken: Use a meat mallet to pound the breasts to an even ½-inch thickness—this guarantees they cook through without drying out and the parmesan topping melts perfectly.
- Dry the Chicken: Pat the breasts completely dry with paper towels before dredging in flour. I learned this the hard way—wet chicken steams instead of searing, and the coating slides right off.
- Skip the Overcrowding: Cook the chicken in batches if needed, giving each piece at least an inch of space in the pan. Steer clear of cramming them in, or they’ll boil in their own juices instead of getting that golden crust.
- Use Fresh Parmesan: Grate a block of parmesan yourself instead of using the pre-shredded stuff. Sounds fussy, but the pre-shredded has anti-caking agents that make the melt uneven and grainy.
Essential Equipment for chicken tomato parmesan
Oven-Safe Skillet
An oven-safe skillet is non-negotiable for this dish. I use a 12-inch Lodge cast iron skillet—it transitions seamlessly from stovetop to oven. The even heat distribution ensures the chicken cooks uniformly while the cheese melts perfectly. Avoid non-stick pans unless they’re rated for 450°F. 🔥
Meat Mallet
Pounding the chicken to an even ½-inch thickness prevents dry spots. A heavy-duty meat mallet works best, but a rolling pin or heavy saucepan can substitute. I wrap the chicken in plastic wrap before pounding to minimize mess and tears.
Quality Cheese Grater
Freshly grated Parmesan melts better than pre-shredded. I use a Microplane grater for fine, fluffy texture that clings to the chicken. For mozzarella, a box grater with large holes gives perfect shreds without clumping.
Digital Thermometer
A instant-read thermometer takes the guesswork out of doneness. Chicken is safe at 165°F internal temperature. I check the thickest piece to ensure it’s fully cooked before adding the cheese topping.
This small tool prevents overcooking and guarantees juicy results every time.
Tongs
Long stainless steel tongs help flip the chicken without piercing it, keeping those juices sealed inside. I prefer 12-inch tongs with a locking mechanism for easy storage. They also help arrange the cheese evenly over the chicken.
Mixing Bowls
A set of nested mixing bowls keeps your prep organized. I use one for the flour dredge and another for the grated cheeses. Look for bowls with non-slip bases to prevent spills while you work. ✨
Nutrition Facts
Frequently Asked Questions
Can I use chicken thighs instead of breasts?
Chicken thighs stay juicier and are more forgiving with cooking times. Use bone-in, skin-on for best flavor, and sear for 5-6 minutes per side before baking.
Why is my cheese not browning?
Your oven might not be hot enough. Try broiling for 1-2 minutes at the end, watching closely to avoid burning. Also, ensure you’re using freshly grated cheese as pre-shredded contains anti-caking agents.
Can I make this ahead of time?
Yes! Assemble everything up to the baking step, cover, and refrigerate for up to 24 hours. Add 5-10 minutes to the baking time if cooking straight from the fridge.
What if my sauce is too watery?
Simmer the tomato mixture uncovered for an extra 3-5 minutes before adding the chicken. This reduces excess liquid. You can also drain the canned tomatoes before using.

- Jollof Rice Sauce Recipe: West African Tomato and Spice Infusion - September 25, 2026
- Japanese Rice Soup Recipe: Umami-Rich Comfort in a Bowl - September 25, 2026
- Homemade Cream Of Rice Recipe: Silk-Smooth Breakfast in Minutes - September 25, 2026