
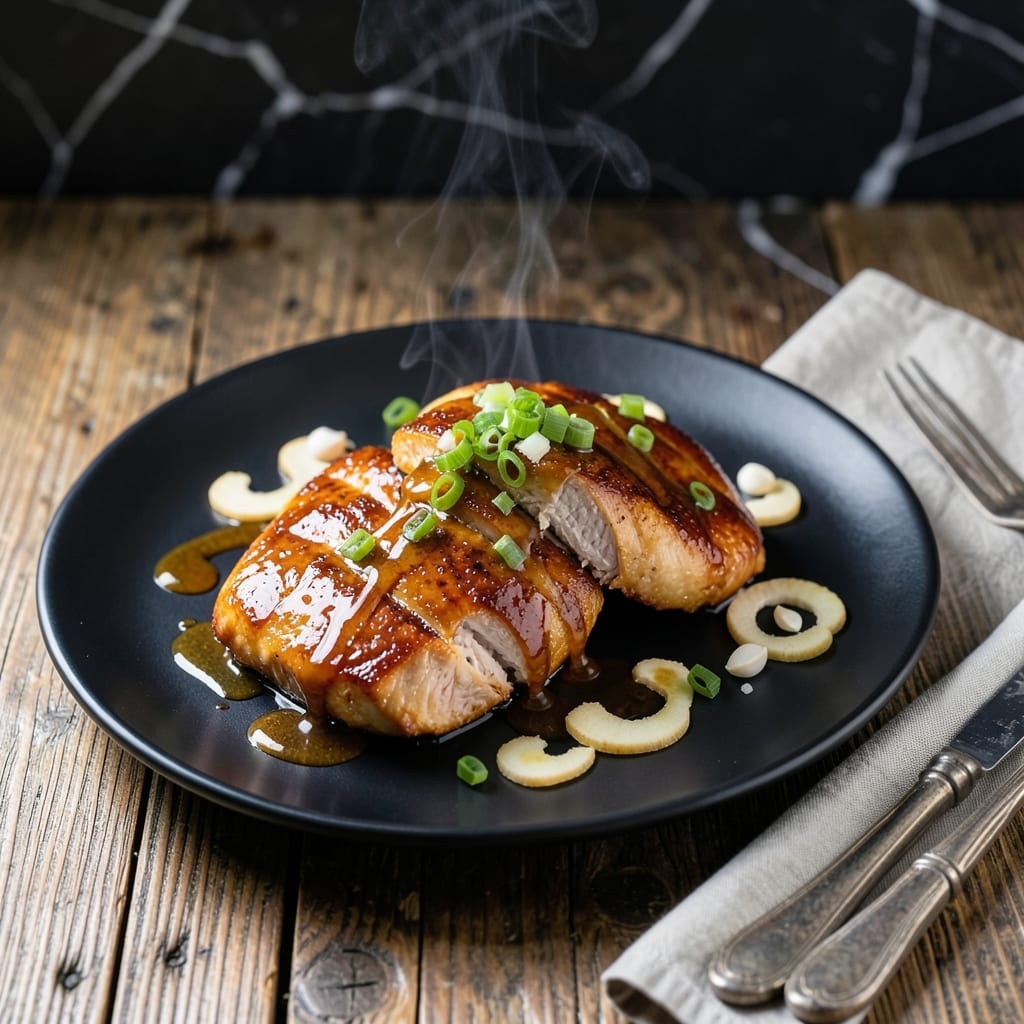
I’ve perfected this teriyaki chicken breast to deliver juicy results every time. The key is a quick marinade that infuses flavor without overpowering the meat.
Cooking at high heat ensures a caramelized glaze while keeping the inside tender. A simple sauce of soy, mirin, and sugar reduces to a glossy finish that coats each piece.
This method guarantees moist, flavorful chicken with minimal effort. The balance of sweet and savory makes it a crowd-pleaser for any meal.
Serve over rice with steamed vegetables for a complete dish. The technique is straightforward but delivers restaurant-quality taste.
Ingredients for Teriyaki Chicken Breast
Quality chicken and a simple glaze transform into restaurant-worthy juicy bites every time.
| Ingredient | Amount | Notes |
|---|---|---|
| Boneless Skinless Chicken Breast 🍗 | 1 ½ lb | Pounded to even thickness |
| Soy Sauce 🫒 | ½ cup | Low-sodium preferred for balance |
| Mirin 🍶 | ⅓ cup | Japanese sweet rice wine |
| Granulated Sugar 🥄 | ¼ cup | Or substitute brown sugar |
| Fresh Garlic Cloves 🧄 | 3 cloves | Minced finely for sauce |
| Fresh Ginger Root 🌿 | 1 tbsp | Grated or minced |
| Cornstarch 🌾 | 1 tbsp | For thickening the glaze |
| Water 💧 | 2 tbsp | To dissolve cornstarch |
| Vegetable Oil 🫒 | 2 tbsp | High smoke point for searing |
| Rice Vinegar 🍚 | 1 tbsp | Adds subtle acidity |
| Sesame Seeds 🌼 | 1 tsp | Toasted for garnish |
| Green Onions 🧅 | 3 whole | Thinly sliced for topping |
| Kosher Salt 🧂 | ½ tsp | For seasoning chicken |
| Ground Black Pepper 🌶️ | ¼ tsp | Freshly ground preferred |
The chicken quality is paramount here. Air-chilled boneless, skinless breasts from Whole Foods or Trader Joe’s yield the juiciest results—avoid pre-brined varieties as they can throw off the sauce balance. Pound the breasts to an even 1-inch thickness for uniform cooking (a rolling pin wrapped in plastic wrap works perfectly). For the mirin, Kikkoman’s Aji-Mirin is widely available and reliable.
No mirin? Substitute dry sherry with 1 tsp sugar per 3 tbsp. Brown sugar can replace granulated in a 1:1 ratio for a deeper flavor profile. For gluten-free, swap soy sauce for tamari. The cornstarch slurry is essential for that glossy finish—arrowroot powder works equally well. Skip the sesame seeds if allergic, but they add that final professional touch.
The glaze keeps for 5 days refrigerated in an airtight container. Cooked chicken is best served immediately but holds well for 3-4 days stored separately from the sauce. Freeze uncooked marinated chicken for up to 3 months—thaw in the fridge overnight before cooking.
Why You’ll Love This Recipe
- One Pan Wonder: I just throw the chicken in with the soy sauce, mirin, and sugar—no fancy techniques, no extra dishes.
- Sweet-Savory Magic: The garlic and mirin balance that rich, glossy sauce that clings to every bite.
- Meal Prep Hero: I make a big batch on Sunday and it tastes just as good reheated for lunch all week.
- Budget Stretcher: Boneless chicken breast stays affordable, and a little sauce goes a long way to flavor the whole meal.
Step-by-Step Instructions for Teriyaki Chicken Breast
Master the technique for juicy, perfectly glazed chicken with this proven method.
Step 1: Prepare and Season the Chicken
Begin by pounding the 1.5 lb boneless skinless chicken breast to an even ½-inch thickness using a meat mallet. This ensures uniform cooking and prevents dry, overdone edges. Place the pounded chicken between plastic wrap to avoid tearing.
Season both sides generously with 0.5 tsp kosher salt and 0.25 tsp ground black pepper. I press the seasoning into the meat lightly to ensure it adheres. Let the chicken rest at room temperature for 10 minutes to allow the salt to penetrate the surface slightly.
Step 2: Create the Teriyaki Glaze
In a small saucepan, combine 0.5 cup soy sauce, 0.33 cup mirin, and 0.25 cup granulated sugar. Add 3 cloves fresh garlic cloves (minced) and 1 tbsp fresh ginger root (grated). Heat over medium-high until the mixture begins to simmer and the sugar fully dissolves.
In a separate bowl, whisk together 1 tbsp cornstarch with 2 tbsp water until smooth. Slowly pour this slurry into the simmering sauce while stirring constantly. The glaze should thicken within 1-2 minutes to coat the back of a spoon. Remove from heat and stir in 1 tbsp rice vinegar for balance.
Step 3: Cook the Chicken to Juicy Perfection
Heat 2 tbsp vegetable oil in a large skillet over medium-high heat until it shimmers but doesn’t smoke. Add the seasoned chicken and cook undisturbed for 5-6 minutes per side. You’ll know it’s ready to flip when the edges turn opaque and it releases easily from the pan.
Use tongs to flip the chicken only once—this preserves the juices. The internal temperature should reach 165°F when fully cooked. Transfer the chicken to a plate and tent loosely with foil to keep warm while you finish the glaze.
Step 4: Glaze and Finish
Return the skillet to medium heat and pour in the prepared teriyaki glaze. Let it simmer for 1-2 minutes until it reduces slightly and becomes glossy. Slice the rested chicken into ½-inch thick strips against the grain for maximum tenderness.
Add the sliced chicken to the skillet and toss to coat evenly in the glaze. Cook for an additional 1-2 minutes until the chicken is thoroughly glazed and heated through. The sauce should cling beautifully to each piece, creating that signature sticky, sweet-savory finish.
Transfer to a serving platter and sprinkle with 1 tsp sesame seeds and thinly sliced 3 whole green onions. Serve immediately while the glaze is still glossy and the chicken remains juicy.
Pro Tips For Making Teriyaki Chicken Breast
- Pound the Chicken: Use a meat mallet to even out the thickness to ½-inch—this guarantees even cooking and prevents dry, chewy edges.
- Bloom the Garlic: Cook minced garlic in oil for just 30 seconds until fragrant before adding liquids, or it’ll taste raw and bitter in the finished sauce.
- Reduce the Sauce: Simmer the soy, mirin, and sugar mixture for 3-4 minutes until it thickens slightly—watery sauce slides right off the chicken.
- Rest Before Slicing: Let the cooked chicken rest 5 minutes under foil to redistribute juices, otherwise they’ll all spill out when you cut into it.
Health Benefits of This Dish
Lean Protein Power
Chicken breast is one of the leanest protein sources, with a 6-ounce serving providing about 53 grams of protein and only 280 calories. This makes it ideal for muscle maintenance and weight management. I rely on it for post-workout recovery meals. 💪
Heart-Healthy Choice
With just 3 grams of saturated fat per serving, this dish supports heart health when prepared with minimal oil. The monounsaturated fats from vegetable oil in the recipe add beneficial nutrients without excess calories.
Vitamin B Boost
You’ll get a significant dose of B vitamins, particularly B6 and niacin, which aid metabolism and energy production. A single serving covers about 30% of your daily B6 needs. These nutrients help convert food into fuel efficiently.
Selenium Source
Chicken breast is rich in selenium, a powerful antioxidant that supports thyroid function and immune health. Just 1 serving provides nearly 50% of your daily requirement. I notice better energy levels when I include it regularly.
Low-Carb Friendly
With only 0 grams of carbs in the chicken itself, this dish fits perfectly into low-carb or keto diets. The sugar in the glaze is minimal per serving, making it a balanced option for those watching their carb intake. 🥗
Muscle Recovery
The high-quality protein in chicken contains all essential amino acids needed for muscle repair. Consuming it after exercise helps rebuild tissue and reduce soreness. I always feel the difference in my recovery when I include it post-gym.
Nutrition Facts
Frequently Asked Questions
Can I use chicken thighs instead?
Yes! Use 1.5 lb boneless skinless thighs and adjust cooking to 6-7 minutes per side. The higher fat keeps them extra juicy.
How do I make it gluten-free?
Swap soy sauce for tamari and verify your mirin is gluten-free. The cornstarch remains safe for thickening.
What if my glaze is too thin?
Simmer it longer until it coats a spoon. For quick fixes, mix ½ tsp cornstarch with 1 tsp water and stir in.
Can I make this ahead?
Cook and glaze the chicken, then store separately in the fridge for 3-4 days. Reheat gently to preserve texture.

- Jollof Rice Sauce Recipe: West African Tomato and Spice Infusion - September 25, 2026
- Japanese Rice Soup Recipe: Umami-Rich Comfort in a Bowl - September 25, 2026
- Homemade Cream Of Rice Recipe: Silk-Smooth Breakfast in Minutes - September 25, 2026