
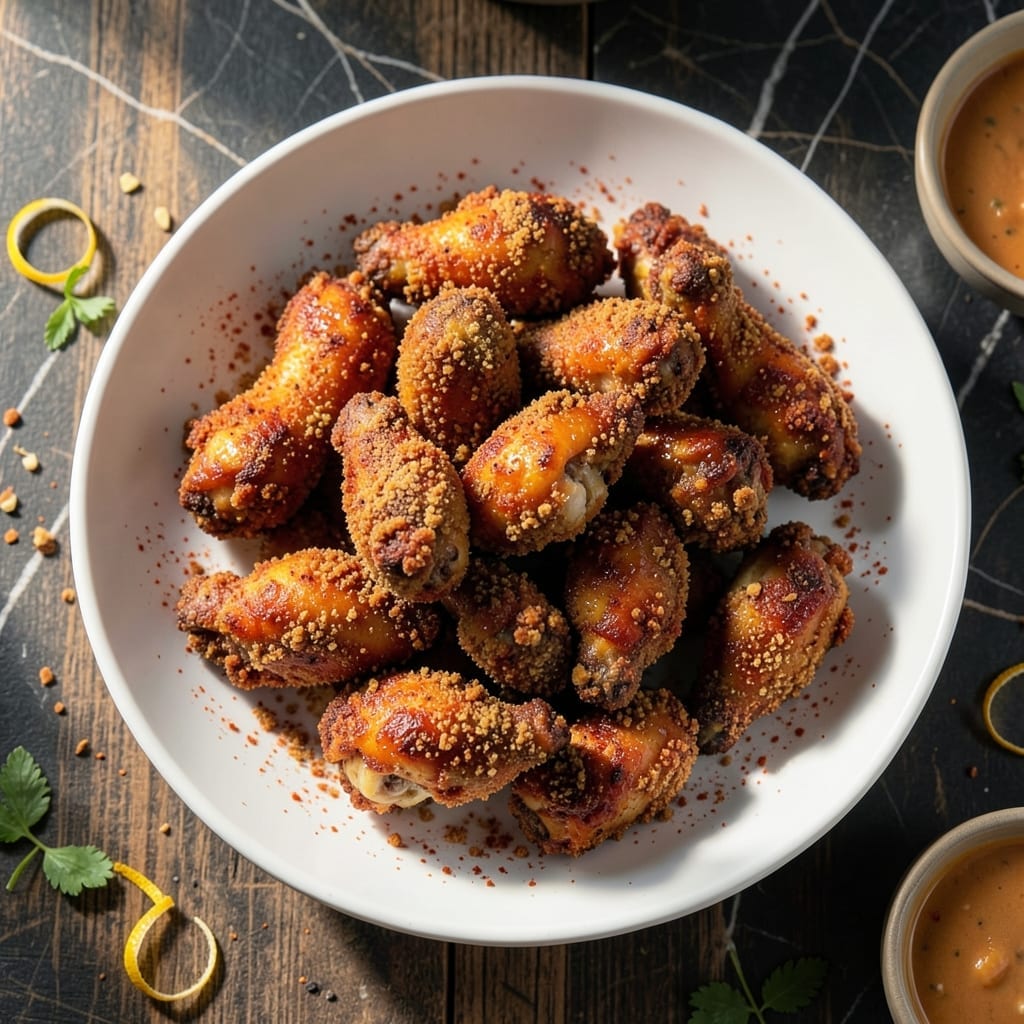
This breading method delivers crispy chicken wings without the mess of deep frying. The secret is a two-step coating process that creates a shatteringly crisp exterior while keeping the meat juicy inside.
I developed this technique after years of experimenting with different flour combinations and cooking methods. The result is wings that stay crispy even after baking, not fried.
Each bite offers that satisfying crunch you love, with seasoning that penetrates every ridge of the breading. The texture holds up whether served immediately or reheated later.
Perfect for game day, parties, or when you want restaurant-quality wings at home. Here’s how to achieve that ideal crispy coating every time.
Ingredients for Chicken Wing Breading
Two pounds of wings and a handful of pantry staples. That’s all you need for shatteringly crisp results.
| Ingredient | Amount | Notes |
|---|---|---|
| Chicken Wings 🍗 | 2 lb | Split into drumettes and flats |
| All-Purpose Flour 🌾 | 1 ½ cups | First coating layer |
| Baking Powder 🧂 | 1 tbsp | For extra crispiness |
| Kosher Salt 🧂 | 1 tbsp | Diamond Crystal preferred |
| Garlic Powder 🧄 | 1 tbsp | Fine grind for even distribution |
| Onion Powder 🧅 | 1 tbsp | Balances the seasoning blend |
| Paprika 🌶️ | 1 tbsp | Sweet or smoked variety |
| Black Pepper 🌶️ | 1 tsp | Freshly ground for best flavor |
| Cayenne Pepper 🔥 | ½ tsp | Adjust for heat preference |
| Large Eggs 🥚 | 2 whole | Beaten for binding |
| Buttermilk 🥛 | ½ cup | Second coating layer for moisture |
| Panko Breadcrumbs 🍞 | 2 cups | Final crispy coating layer |
| Cornstarch 🌾 | ¼ cup | Ensures extra crunch |
| Vegetable Oil 🫒 | 2 tbsp | For light baking spray |
The wings are the foundation—look for split drumettes and flats at your butcher or Costco for the best value. Freshness matters here; avoid anything that’s been sitting in the case too long. The flour should be plain all-purpose, nothing self-rising. For the baking powder, Clabber Girl or any name-brand works fine (just check it’s not expired). The seasoning blend is where the magic happens, so don’t skip the paprika or cayenne.
No buttermilk? Whole milk plus a tablespoon of vinegar does the trick. Out of panko? Crushed cornflakes or saltines add crunch in a pinch. The cornstarch is key for that next-level crisp, but if you’re desperate, arrowroot powder at the same amount works. For extra kick, swap the paprika for smoked—Trader Joe’s has a great version that’s not too overpowering.
Prep the wings the morning of if you’re short on time—keeps the coating clingy. Baked wings hold their crisp for 2-3 days in the fridge, but they’re best straight out of the oven. Freeze uncooked breaded wings for up to 1 month (bake from frozen, adding 10 minutes).
Why You’ll Love This Recipe
- Five-Minute Prep: I toss the wings in the flour mixture with baking powder and garlic—no marinating, no fuss.
- That Garlic Crunch: The powder in the breading gives every bite a savory punch you can’t resist.
- Game Day Staple: Honestly, I double the batch so there’s enough for the whole crowd and leftovers.
- Budget Friendly: A bag of wings, a few pantry staples, and I’ve fed four for less than takeout.
Step-by-Step Instructions for Chicken Wing Breading
Here’s my proven method for achieving that restaurant-style crunch without frying.
Step 1: Prepare the Seasoned Flour Base
In a large bowl, whisk together the 1.5 cups all-purpose flour, 1 tbsp baking powder, 1 tbsp kosher salt, 1 tbsp garlic powder, 1 tbsp onion powder, 1 tbsp paprika, 1 tsp black pepper, and 0.5 tsp cayenne pepper until fully combined. I like to press the spices against the bowl sides with the whisk to break up any clumps.
The baking powder creates micro-bubbles during cooking that make the coating extra crispy. Don’t skip it—this is the secret to that perfect crunch. The flour should look evenly speckled with all the spices, with no visible streaks of white.
Step 2: Create the Wet Binding Station
In a second bowl, beat the 2 whole large eggs lightly with a fork until the yolks and whites are fully incorporated. Pour in the 0.5 cup buttermilk and whisk until smooth. The mixture should be pale yellow and slightly frothy on top.
This buttermilk-egg wash acts as the glue between your flour layer and the final breadcrumb coating. I use buttermilk instead of regular milk because its acidity helps tenderize the chicken while adding extra flavor to the breading.
Step 3: Prepare the Final Crispy Coating
In a third wide, shallow bowl, combine the 2 cups panko breadcrumbs and 0.25 cup cornstarch. Use your fingers to break up any large panko pieces and mix thoroughly. The cornstarch absorbs moisture and creates an even crispier texture than panko alone.
The mixture should look like fine, uniform crumbs with no visible white streaks of cornstarch. I recommend using a wide bowl for this step—it makes dredging the wings much easier and less messy.
Step 4: Apply the Three-Step Breading Process
Pat the 2 lb chicken wings completely dry with paper towels—this is crucial for the breading to adhere properly. Working with one wing at a time, dredge it in the seasoned flour, pressing gently to ensure full coverage. Shake off any excess flour.
Next, dip the floured wing into the buttermilk mixture, letting any excess drip off for 5 seconds. Finally, roll it in the panko-cornstarch mixture, pressing firmly so the crumbs adhere completely. The wing should look evenly coated with visible panko texture.
Place the breaded wings on a wire rack set over a baking sheet. This allows air to circulate underneath, preventing the breading from getting soggy. Don’t stack the wings—give each one space to crisp up properly.
Step 5: Bake to Golden Perfection
Preheat your oven to 425°F. Lightly brush the wire rack with 2 tbsp vegetable oil—this helps the breading crisp without deep frying. Bake the wings for 20 minutes, then flip each one carefully with tongs.
Return to the oven and bake for another 15-20 minutes until the coating is deep golden brown and crispy. You’ll know they’re done when the internal temperature reaches 165°F and the breading sounds hollow when tapped. Let them rest for 5 minutes before serving—the crunch will intensify as they cool slightly.
Pro Tips For Making Chicken Wing Breading
- Dry the Wings: Pat the wings completely dry with paper towels before breading—I learned this the hard way after my first few batches came out soggy instead of crispy.
- Boost with Baking Powder: Use 1 tablespoon of baking powder per cup of flour; it sounds weird, but it works to create that extra-crispy crust without frying.
- Skip the Overcrowding: Leave space between wings on the baking sheet, or they’ll steam instead of crisp up—my grandmother swore by this, and she was right.
- Rest Before Baking: Let the breaded wings sit for 10 minutes before baking to help the coating adhere better (yes, even if you’re impatient like me).
Flavor Customization for This Recipe
Spice It Up
For extra heat, increase the cayenne pepper to 1 full teaspoon or add ½ tsp chipotle powder to the flour mix. I love the smoky depth this brings. If you prefer milder wings, reduce cayenne to ¼ tsp or omit entirely.
Citrus Zing
Add 1 tbsp lemon or lime zest to the panko mixture for bright, zesty notes. The citrus oils release during baking, creating a subtle but noticeable aroma. This pairs especially well with honey mustard dipping sauce.
Herb Infusion
Mix 1 tbsp dried rosemary or thyme into the flour for an earthy twist. Fresh herbs work too—just use 2 tbsp finely chopped. I find rosemary holds up best to the baking process without burning.
Cheesy Crunch
Stir ½ cup grated Parmesan into the panko mixture for an umami boost. The cheese browns beautifully and adds a salty, crispy layer. For extra indulgence, try pecorino Romano for a sharper flavor. 🧀
Smoky Depth
Swap regular paprika for smoked paprika—Trader Joe’s has a great version. Add ½ tsp liquid smoke to the buttermilk wash for intense smokiness. This mimics the flavor of grilled wings without the grill.
Sweet & Spicy
Incorporate 2 tbsp brown sugar into the flour mix for a caramelized sweetness that contrasts with the heat. The sugar helps the coating brown faster, so keep an eye on the wings during the final 5 minutes of baking. 🔥
Nutrition Facts
Frequently Asked Questions
Why use baking powder in the flour mix?
The baking powder creates tiny air bubbles during baking, making the coating extra crispy and light. Without it, the breading can turn out dense.
Can I use regular breadcrumbs instead of panko?
Yes, but panko gives a better crunch. If using regular breadcrumbs, reduce the amount by 25% and add 1 extra tbsp cornstarch for crispiness.
How do I keep the breading from falling off?
Pat the wings completely dry before breading and let each coating layer set for 1-2 minutes. Press firmly when applying the panko mix.
Can I air fry these instead of baking?
Air fry at 400°F for 12-15 minutes, flipping halfway. The circulation gives even crispier results.

- Jollof Rice Sauce Recipe: West African Tomato and Spice Infusion - September 25, 2026
- Japanese Rice Soup Recipe: Umami-Rich Comfort in a Bowl - September 25, 2026
- Homemade Cream Of Rice Recipe: Silk-Smooth Breakfast in Minutes - September 25, 2026