
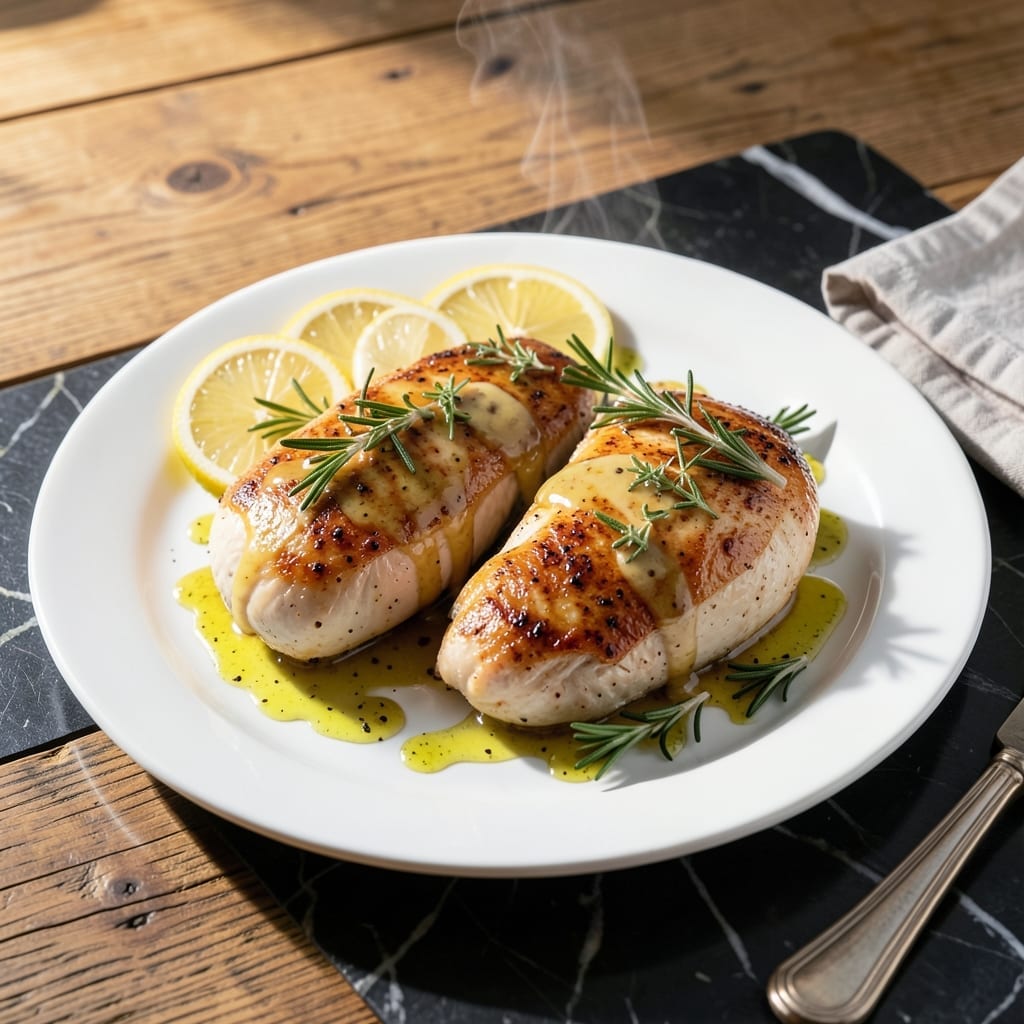
This chicken recipe proves that diabetes-friendly meals can be packed with bold, satisfying flavor. After years of refining dietary approaches, I’ve developed a method that keeps blood sugar stable without sacrificing taste or texture.
The dish relies on lean protein, fresh herbs, and a simple cooking technique that locks in moisture. High heat sears the chicken quickly, preventing dryness while creating a golden crust. A light pan sauce adds brightness without added sugars.
What you’ll get is tender, juicy chicken with a flavorful finish that feels indulgent. It pairs perfectly with non-starchy vegetables or a small portion of whole grains for a balanced plate.
Ready in 30 minutes with minimal prep, this is a meal you’ll want to make again and again.
Ingredients for Diabetes Chicken
Lean protein, fresh herbs, and a bright pan sauce create this balanced meal.
| Ingredient | Amount | Notes |
|---|---|---|
| Boneless Skinless Chicken Breasts 🍗 | 1 ½ lb | Pounded to even thickness |
| Extra-Virgin Olive Oil 🫒 | 2 tbsp | Divided for cooking and sauce |
| Garlic Cloves 🧄 | 4 cloves | Minced finely |
| Fresh Rosemary 🌿 | 2 tbsp | Chopped, stems discarded |
| Fresh Thyme 🍃 | 2 tbsp | Leaves stripped from stems |
| Dijon Mustard 🟡 | 1 tbsp | Sugar-free variety preferred |
| Lemon Juice 🍋 | 2 tbsp | Freshly squeezed |
| Low-Sodium Chicken Broth 🥣 | ½ cup | For pan sauce |
| Kosher Salt 🧂 | 1 tsp | Diamond Crystal preferred |
| Black Pepper 🌶️ | ½ tsp | Freshly ground |
| Smoked Paprika 🌶️ | ½ tsp | For depth of flavor |
| Unsalted Butter 🧈 | 1 tbsp | Optional for sauce richness |
The chicken is the foundation—boneless, skinless breasts ensure consistent cooking and lean protein content. Butcher shops often have the freshest cuts, but Whole Foods or Trader Joe’s offer reliable quality. Look for pieces of even thickness to avoid overcooking thinner sections. Pounding to a uniform ½-inch thickness (worth the extra minute) guarantees juicy results every time.
No fresh rosemary or thyme? Dried herbs at one-third the amount work in a pinch, though fresh delivers superior brightness. For a bolder crust, swap smoked paprika for chipotle powder. The Dijon mustard can be replaced with whole-grain mustard for texture, but ensure it’s sugar-free. Low-sodium broth is key—Swanson or Pacific Foods are solid store-bought options.
Prepped chicken keeps 1-2 days in the fridge, but cook it fresh for best texture. The pan sauce is best used immediately, though leftovers hold 3-4 days refrigerated. Reheat gently to preserve moisture—microwaving tends to dry it out.
Why You’ll Love This Recipe
- One Pan Wonder: I toss the chicken with olive oil, garlic, and herbs, then let the oven do the work.
- Herb-Infused Bite: The rosemary and thyme make every bite taste like a cozy Sunday dinner.
- Meal Prep Hero: I make a double batch on Sunday and pack it for lunches all week.
- Budget Stretcher: Boneless chicken breasts are affordable, and this recipe makes them shine.
Step-by-Step Instructions for Diabetes Chicken
This method delivers tender, flavorful chicken with a blood sugar-conscious approach.
Step 1: Prep and Season the Chicken
Begin by pounding the 1.5 lb boneless skinless chicken breasts to an even ½-inch thickness using a meat mallet. This ensures even cooking throughout each piece. Pat the chicken dry with paper towels to remove excess moisture—this promotes better browning.
Season both sides with the 1 tsp kosher salt, ½ tsp black pepper, and ½ tsp smoked paprika, pressing the seasoning into the meat gently. The smoked paprika adds depth without extra carbohydrates, making it ideal for a diabetes-friendly meal.
Step 2: Sear the Chicken to Golden Perfection
Heat 1 tbsp extra-virgin olive oil in a large skillet over medium-high heat until it shimmers. Add the seasoned chicken breasts and cook undisturbed for 4-5 minutes per side until they develop a golden-brown crust and release easily from the pan.
Resist the urge to move the chicken prematurely—this builds a flavorful fond that will enhance your sauce later. Transfer the seared chicken to a plate and tent loosely with foil to keep it warm.
Step 3: Build the Aromatic Pan Sauce
In the same skillet, reduce heat to medium and add the remaining 1 tbsp extra-virgin olive oil. Add the 4 cloves minced garlic cloves, 2 tbsp chopped fresh rosemary, and 2 tbsp fresh thyme leaves to the pan. Sauté for 30-45 seconds until fragrant, being careful not to burn the garlic.
Pour in the ½ cup low-sodium chicken broth, scraping up the browned bits from the bottom of the pan with a wooden spoon. Stir in the 1 tbsp Dijon mustard and 2 tbsp lemon juice, then add the optional 1 tbsp unsalted butter for richness, if using. Simmer for 2-3 minutes until the sauce thickens slightly.
Step 4: Finish and Serve
Return the chicken to the skillet, spooning the sauce over each piece. Reduce heat to low and let it warm through for 1-2 minutes. This allows the flavors to meld and the chicken to absorb some of the sauce.
Serve immediately, ensuring each portion is coated with the aromatic herb sauce. The dish delivers bold flavor without added sugars, making it a smart choice for managing blood sugar levels while still enjoying a satisfying meal.
Pro Tips For Making Diabetes Chicken
- Pound the Breasts: Use a rolling pin to even out the chicken to ½-inch thickness—this guarantees even cooking and prevents dry, chewy edges.
- Bloom the Herbs: Add rosemary and thyme to the warm olive oil for 30 seconds before the chicken goes in; this wakes up their oils and infuses the dish with deeper flavor.
- Skip Overcrowding: I learned this the hard way—cook the chicken in a single layer with space between pieces, or it’ll steam instead of sear.
- Rest Before Serving: Give it a solid 5 minutes under foil after cooking—this keeps the juices inside where they belong, not on your cutting board.
Essential Equipment for This Dish
Premium Skillet Choice
For this recipe, I always reach for my 12-inch stainless steel skillet—it distributes heat evenly and gives the chicken plenty of room to sear properly. Look for a heavy-bottomed pan from brands like All-Clad or Cuisinart for consistent results. 🔥
Meat Mallet Magic
A meat mallet is essential for pounding chicken to even thickness. I use a flat-sided mallet rather than the spiked version to avoid tearing the meat. OXO makes a great ergonomic option that’s comfortable for repeated use.
Precision Thermometer
While not strictly necessary for searing, I always keep my instant-read thermometer nearby. The ThermoWorks ThermoPop gives accurate readings in 3-4 seconds to confirm the chicken reaches 165°F without overcooking.
Wooden Spoon Essential
A wooden spoon is perfect for scraping up the fond—the browned bits that add so much flavor to your sauce. It won’t scratch your skillet like metal utensils might. I’ve had my bamboo spoon for years and it’s still going strong.
Tongs for Turning
Use 12-inch locking tongs to flip the chicken without piercing it, preserving those precious juices. I prefer OXO’s stainless steel tongs with silicone tips—they grip securely and won’t scratch your cookware.
Citrus Tool
For the fresh lemon juice, a handheld citrus juicer makes quick work of extracting every last drop. The Chef’n FreshForce model gets maximum juice with minimal effort. Fresh citrus makes all the difference in the pan sauce.
Nutrition Facts
Frequently Asked Questions
What makes this chicken recipe good for blood sugar?
It uses lean protein and avoids added sugars. The herbs and citrus add flavor without carbs.
Can I use chicken thighs instead of breasts?
Yes, but remove the skin first. Thighs stay juicier and cook in 5-6 minutes per side. Adjust seasoning to taste.
How do I know when the chicken is done?
Use a meat thermometer to check for 165°F in the thickest part. The juices should run clear.
Can I make this ahead of time?
Cooked chicken keeps 3-4 days refrigerated. Reheat gently in a skillet with a splash of broth.

- Jollof Rice Sauce Recipe: West African Tomato and Spice Infusion - September 25, 2026
- Japanese Rice Soup Recipe: Umami-Rich Comfort in a Bowl - September 25, 2026
- Homemade Cream Of Rice Recipe: Silk-Smooth Breakfast in Minutes - September 25, 2026