
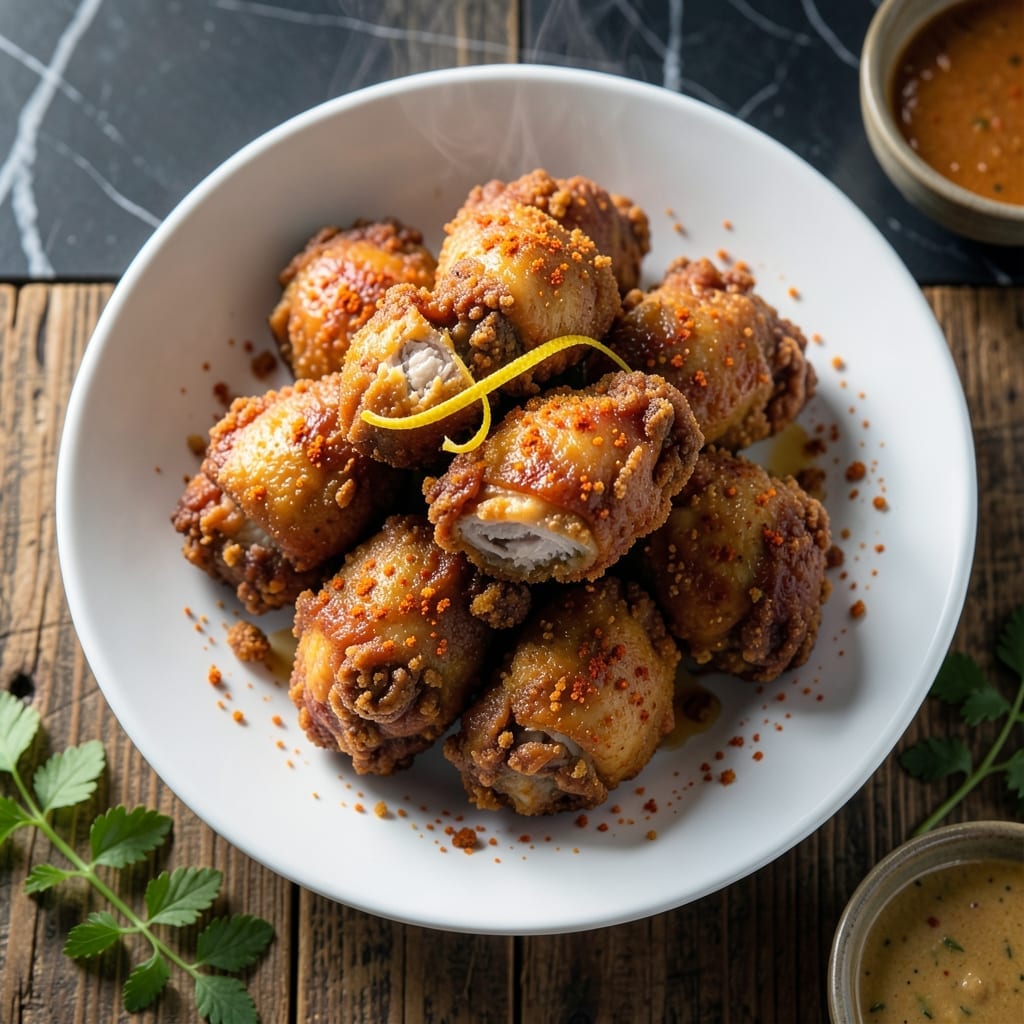
There’s a reason Nashville hot chicken has taken the country by storm, and this version captures that signature crispy coating with a fiery kick. I’ve refined the technique to ensure every bite delivers the perfect balance of heat and crunch.
The secret lies in the double-dredge method, which creates an extra-thick, shatteringly crispy crust. A well-seasoned flour blend and a spicy oil bath elevate the flavor beyond ordinary fried chicken.
What you’ll get is juicy chicken encased in a golden, spice-infused shell that crackles with each bite. The heat builds gradually, making it irresistible without overwhelming the senses.
Serve it with pickles and white bread to balance the spice. This dish is worth the effort.
Ingredients for Ezells Chicken
This dish demands bold spices, crispy coatings, and juicy chicken beneath it all.
| Ingredient | Amount | Notes |
|---|---|---|
| Chicken Thighs 🍗 | 3 lb | Boneless, skin-on, cut into pieces |
| Buttermilk 🥛 | 2 cups | Full-fat for best texture |
| All-Purpose Flour 🌾 | 3 cups | Divided for double-dredge method |
| Cornstarch 🌾 | ½ cup | For extra crispiness |
| Cayenne Pepper 🌶️ | 2 tbsp | Adjust for heat preference |
| Paprika 🌶️ | 1 tbsp | Smoked or sweet variety |
| Garlic Powder 🧄 | 1 tbsp | Freshly ground preferred |
| Onion Powder 🧅 | 1 tbsp | Balances spice blend |
| Salt 🧂 | 1 tbsp | Diamond Crystal or kosher |
| Black Pepper 🌶️ | 1 tsp | Freshly ground preferred |
| Vegetable Oil 🫒 | 4 cups | For frying, high smoke point |
| Lard or Shortening 🧈 | 1 cup | Traditional for authentic flavor |
| White Sugar 🍚 | 1 tbsp | Balances heat in coating |
| Dill Pickles 🥒 | 8 slices | For serving alongside |
| White Bread 🍞 | 4 slices | For serving, plain variety |
The chicken must be skin-on, bone-in thighs—they stay juicier than breasts during frying. Local butchers or Whole Foods often have the best selection, but any supermarket will do. For the flour, King Arthur all-purpose is ideal (consistent texture, no additives). The lard is non-negotiable for authentic flavor—look for leaf lard if you want the cleanest taste.
No buttermilk? Whole milk plus 1 tbsp vinegar or lemon juice per cup works in a pinch. cayenne too intense? Cut it in half and add more to taste. For extra crunch, swap 1 cup of flour for cornmeal. If you’re avoiding lard, Crisco shortening is the closest substitute. The sugar might seem odd, but it caramelizes beautifully with the spices.
Fry the chicken in batches—don’t crowd the pan. Leftovers keep 3-4 days in the fridge, but reheat in the oven (not microwave) to maintain crispiness. The oil can be reused once, but discard after that—it degrades with heat.
Why You’ll Love This Recipe
- One Bowl Wonder: I mix the buttermilk and spices in the same dish I’ll dredge the chicken in—no extra bowls, no extra mess.
- That Cayenne Kick: The buttermilk keeps the thighs juicy while the cayenne and cornstarch give it a spicy, shatter-crisp crust.
- Feeds My Crew: I double the batch on Sundays and we’re set for lunches or a quick dinner with just a reheat.
- Stretches the Wallet: Chicken thighs stay cheap, and a little flour and cornstarch go a long way to feed four.
Step-by-Step Instructions for Nashville Hot Crispy Chicken
Master this technique to achieve that signature crunch and heat in every bite.
Step 1: Buttermilk Brine for Juicy Meat
Cut the 3 lb Chicken Thighs into even pieces and submerge them completely in the 2 cups Buttermilk. I use a large bowl to ensure all pieces are fully coated. This acidic soak tenderizes the meat while adding moisture that prevents dryness during frying.
Cover and refrigerate for at least 4 hours, though overnight yields the juiciest results. The buttermilk will turn slightly thick as it works its magic. When ready to cook, remove the chicken from the fridge and let it sit at room temperature for 30 minutes while you prepare the coating.
Step 2: Create the Double-Dredge Spiced Coating
In a large bowl, whisk together 3 cups All-Purpose Flour, 0.5 cup Cornstarch, 2 tbsp Cayenne Pepper, 1 tbsp Paprika, 1 tbsp Garlic Powder, 1 tbsp Onion Powder, 1 tbsp Salt, 1 tsp Black Pepper, and 1 tbsp White Sugar until evenly distributed. The cornstarch creates that ultra-crispy texture.
Drain the chicken (discard buttermilk) and dredge each piece thoroughly in the flour mixture, pressing firmly to adhere. Shake off excess, then repeat the dredging process. This double coating ensures maximum crunch. Place coated pieces on a wire rack to rest for 10 minutes while the oil heats.
Step 3: Fry to Golden Perfection
In a deep cast-iron skillet, heat the 4 cups Vegetable Oil and 1 cup Lard or Shortening to 350°F over medium-high heat. The lard adds authentic flavor while the vegetable oil raises the smoke point. Use a candy thermometer for precision—this temperature is crucial for even cooking without burning.
Fry the chicken in batches to avoid crowding, turning occasionally, for 12-15 minutes until deep golden brown and the internal temperature reaches 165°F. The coating should be crisp and audibly crunchy when tapped. Drain on a wire rack set over paper towels to maintain crispiness.
Step 4: Serve with Traditional Sides
Transfer the fried chicken to a serving platter while still hot. The coating will be at its peak crispiness immediately after frying. Arrange the 8 slices Dill Pickles and 4 slices White Bread alongside for serving—the cool tang of pickles perfectly balances the heat.
For the most authentic experience, serve the chicken on the white bread to soak up any residual oil and spices. The bread should be plain to let the chicken’s flavors shine. This combination delivers the classic Nashville hot chicken experience with every bite.
Pro Tips For Making Ezells Chicken
- Soak Overnight: Let the chicken thighs bathe in buttermilk for at least 8 hours—I learned this the hard way after my first batch came out dry and bland.
- Double Dredge: Dip the buttermilk-soaked chicken in the flour-cornstarch mix, then back in buttermilk, then flour again. Sounds tedious, but it’s the only way to get that extra-crispy crust Ezell’s is known for.
- Heat the Oil: Use a deep fryer thermometer and keep the oil at 350°F. After burning two batches, I finally realized the oil wasn’t hot enough to seal the coating properly.
- Rest Before Frying: Give the dredged chicken 10-15 minutes on a wire rack before frying. My grandmother swore by this, and she was right: it keeps the coating from sliding off into the oil.
Troubleshooting This Dish
Coating Not Sticking
If your flour mixture isn’t adhering, the chicken might still be too wet from the buttermilk. Pat each piece dry with paper towels before dredging. I also let the first coat sit for 5 minutes before applying the second layer—this creates a sticky base for the outer coating. 💡
Oil Temperature Drops
Adding chicken to hot oil always causes the temperature to plummet. Maintain 350°F by frying in small batches and adjusting the heat as needed. If the oil gets too cool, your coating will be greasy, not crispy. A cast-iron skillet retains heat best for this.
Uneven Cooking
If some pieces cook faster than others, check that they’re similar in size. Larger pieces need more time, so cut them evenly. I use a meat thermometer to confirm all pieces hit 165°F internally, even if they look done on the outside.
Too Spicy or Not Enough
Adjust the heat by tweaking the cayenne pepper in the coating. For milder results, reduce to 1 tbsp. For extra heat, add 1 tsp more. Remember, the spice intensifies as the chicken rests—taste a piece after 5 minutes before committing to the full batch.
Soggy Coating
Drain the fried chicken on a wire rack, not paper towels, to allow air circulation. If you must use paper towels, swap them out frequently. Serving immediately is key—the coating loses crispness rapidly, especially in humid weather.
Lard Substitutes
If you’re avoiding lard, use Crisco shortening for the closest texture and flavor. Avoid butter, as it burns at frying temperatures. The lard adds richness, but vegetable oil alone works in a pinch—just expect a slightly different taste. 🔥
Nutrition Facts
Frequently Asked Questions
Can I use chicken breasts instead of thighs?
Thighs stay juicier, but breasts work if pounded to even thickness. Reduce frying time to 10-12 minutes since they cook faster. Brine them first to prevent dryness.
What if I don’t have a candy thermometer?
Test oil temperature with a wooden chopstick. If bubbles form around it, the oil is ready. Maintain medium-high heat throughout frying for best results.
How do I make it less spicy for kids?
Cut the cayenne pepper in half or omit it entirely. Boost the paprika and sugar for flavor without heat. Serve with extra pickles to cool the palate.
Can I bake this instead of frying?
Yes, but the coating won’t be as crispy. Bake at 400°F for 25-30 minutes on a wire rack. Spray with oil first for better browning.

- Jollof Rice Sauce Recipe: West African Tomato and Spice Infusion - September 25, 2026
- Japanese Rice Soup Recipe: Umami-Rich Comfort in a Bowl - September 25, 2026
- Homemade Cream Of Rice Recipe: Silk-Smooth Breakfast in Minutes - September 25, 2026