
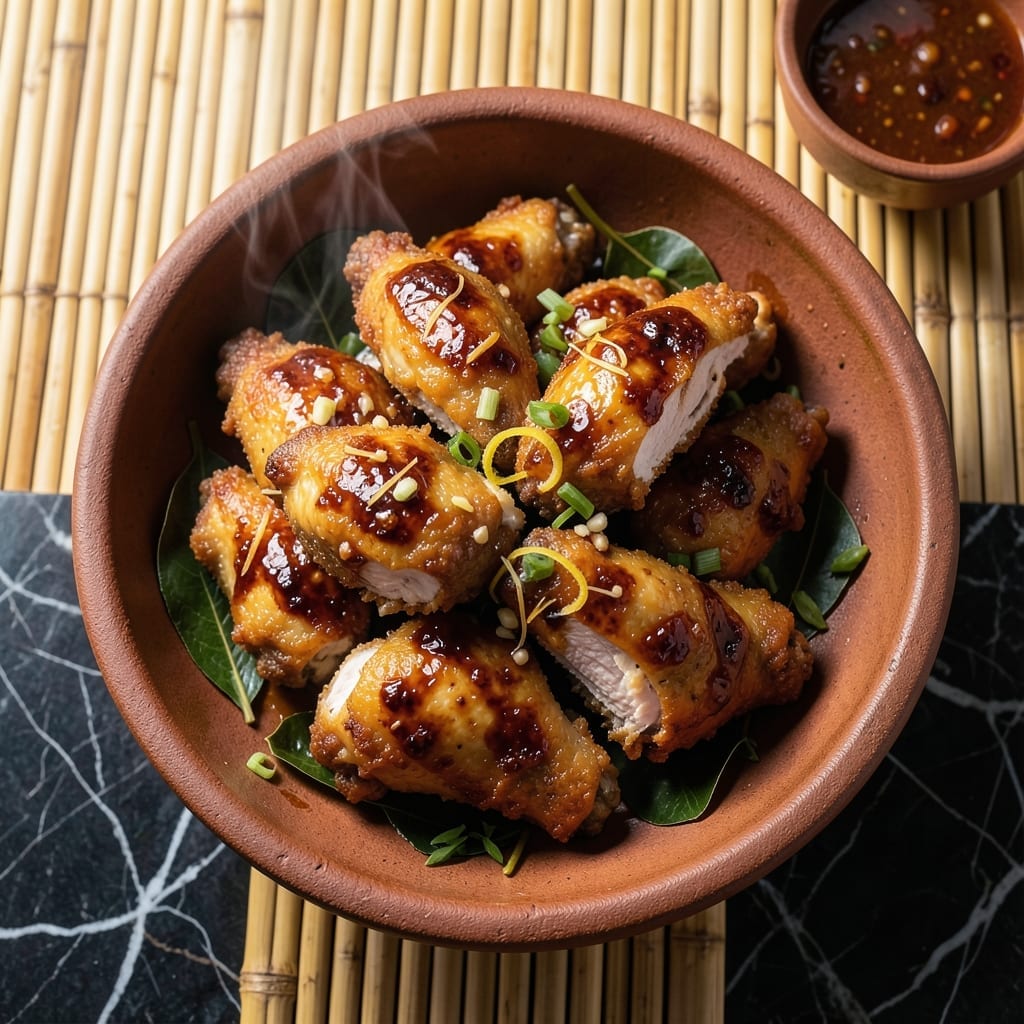
This Filipino fried chicken delivers on the promise of crispy, golden-brown perfection with every bite.
I’ve refined this method to achieve that signature crunch while keeping the meat juicy and flavorful. The secret lies in a simple marinade and double-frying technique that locks in moisture.
The result is chicken with a shatteringly crispy exterior and tender meat inside, seasoned with traditional Philippine flavors that make it irresistibly addictive.
Serve hot for the best texture, as the crust stays remarkably crispy even after sitting a few minutes.
Ingredients for Fried Chicken Philippines
Traditional Filipino flavors meet crispy perfection with these carefully selected ingredients for a standout dish.
| Ingredient | Amount | Notes |
|---|---|---|
| Chicken Thighs 🍗 | 2 lb | Boneless, skin-on, cut into pieces |
| Calamansi Juice 🍋 | ¼ cup | Freshly squeezed, or substitute lime |
| Soy Sauce 🫕 | ¼ cup | Use Filipino brands like Silver Swan |
| Garlic Cloves 🧄 | 6 cloves | Minced finely for marinade |
| Ginger 🌿 | 1 whole | Thumb-sized piece, grated |
| Brown Sugar 🍚 | 2 tbsp | Packed, for balance |
| Black Pepper 🌶️ | 1 tbsp | Freshly cracked preferred |
| Bay Leaves 🍃 | 3 pieces | Dried, for marinade |
| All-Purpose Flour 🌾 | 1 ½ cups | For crispy coating |
| Cornstarch 🌽 | ½ cup | Ensures extra crunch |
| Baking Powder 🧂 | 1 tsp | Makes coating lighter |
| Salt 🧂 | 1 tbsp | Adjust to taste |
| Vegetable Oil 🫒 | 4 cups | For deep frying |
| Vinegar 🍶 | 2 tbsp | White or cane vinegar |
| Fish Sauce 🐟 | 1 tbsp | Optional, for umami depth |
The chicken thighs are non-negotiable for authentic texture—skin-on, bone-in pieces yield the crispiest results. Source them from Asian markets for better quality and price. Calamansi is ideal, but key limes or regular limes work if unavailable. Silver Swan soy sauce is the gold standard for Filipino cooking, though any quality soy sauce will do in a pinch.
No calamansi? Lime or lemon juice at a 1:1 ratio substitutes nicely. Skip the fish sauce to keep it vegetarian, or use soy sauce or mushroom sauce for similar umami. The cornstarch can be swapped for arrowroot powder if needed. For extra flavor, add a pinch of msg (common in Filipino cooking) or a dash of sesame oil to the marinade.
Marinate the chicken for at least 4 hours (overnight is ideal) for maximum flavor penetration. Store leftovers in an airtight container for up to 3 days—reheat in an oven or air fryer to restore crispiness. The frying oil can be reused once if strained and stored properly.
Why You’ll Love This Recipe
- One Pan Wonder: I just toss the chicken thighs with calamansi, soy sauce, garlic, and ginger, then fry—no fancy prep or multiple bowls.
- Flavor Bomb: The mix of tangy calamansi and savory soy sauce with crispy garlic bits is ridiculously good.
- Feeds the Crew: I make a big batch for family dinners, and it’s always the first thing to disappear.
- Budget Winner: Chicken thighs stay cheap, and the simple marinade stretches flavor without breaking the bank.
Step-by-Step Instructions for Filipino Fried Chicken
Master the technique for achieving ultra-crispy skin and juicy meat with authentic Filipino flavors.
Step 1: Marinate the Chicken Thighs
In a large bowl, combine the 2 lb Chicken Thighs with 0.25 cup Calamansi Juice, 0.25 cup Soy Sauce, minced 6 cloves Garlic Cloves, grated 1 whole Ginger, 2 tbsp Brown Sugar, 1 tbsp Black Pepper, 3 pieces Bay Leaves, 2 tbsp Vinegar, and 1 tbsp Fish Sauce.
Mix thoroughly, ensuring each piece is fully coated. Cover and refrigerate for at least 2 hours (overnight for maximum flavor penetration). The calamansi and vinegar will tenderize the meat while the soy sauce and aromatics infuse it with depth.
Step 2: Prepare the Crispy Coating
In a separate bowl, whisk together 1.5 cups All-Purpose Flour, 0.5 cup Cornstarch, 1 tsp Baking Powder, and 1 tbsp Salt until fully combined. The cornstarch and baking powder are crucial for achieving that signature Filipino-style crunch.
Remove the chicken from the marinade (discard the marinade) and pat each piece dry with paper towels. This step ensures the coating adheres properly. Dredge each piece in the flour mixture, pressing firmly to create an even, thick layer.
Step 3: Deep-Fry to Golden Perfection
Heat 4 cups Vegetable Oil in a deep, heavy-bottomed pot to 350°F. Use a thermometer for accuracy—this temperature ensures even cooking without burning the coating. Carefully lower the coated chicken pieces into the hot oil, working in batches to avoid overcrowding.
Fry for 8-10 minutes per side until the coating is deep golden brown and the internal temperature reaches 165°F. The coating should be crisp and audibly crunchy when tapped. Drain on a wire rack set over a baking sheet to maintain crispness.
Step 4: Rest and Serve
Transfer the fried chicken to a serving platter and let it rest for 5 minutes before serving. This brief rest allows the juices to redistribute, ensuring moist meat beneath the crispy exterior.
Serve immediately while hot. The ideal result features a shatteringly crisp coating with a well-seasoned, juicy interior. Any leftovers should be reheated in a 375°F oven for 10 minutes to restore the crunch.
Pro Tips For Making Fried Chicken Philippines
- Marinate Overnight: Let the chicken thighs soak in calamansi juice, soy sauce, garlic, and ginger for at least 4 hours—overnight if you can. I learned this the hard way: the longer the marinade, the deeper the flavor.
- Pat Dry Before Frying: After marinating, pat the chicken thighs dry with a paper towel. Sounds weird, but it works: this guarantees a crispier crust instead of a soggy mess.
- Skip the Overcrowding: Fry in batches to avoid overcrowding the pan. Steer clear of the urge to fit it all in at once—this drops the oil temp and leads to greasy, unevenly cooked chicken.
- Use Medium Heat: Start with medium heat to cook the chicken through without burning the outside. After burning three batches, I finally figured out that high heat right away just chars the marinade.
Essential Equipment for This Recipe
Deep Fryer or Pot
For home cooks, a heavy-bottomed pot like Le Creuset Dutch oven works perfectly. It distributes heat evenly and prevents hot spots. I use my 5.5-quart pot for batches of 4-6 pieces at a time.
Candy Thermometer
Temperature control is non-negotiable for crispy results. I swear by my ThermoWorks Instant Read thermometer—it clips onto the pot and gives accurate readings in 3-5 seconds. Aim for 350°F consistently.
Wire Rack
Draining on a wire rack instead of paper towels keeps the coating crisp by allowing air circulation. Place it over a baking sheet to catch drips. I use a stainless steel cooling rack from my baking supplies.
Tongs
Long-handled stainless steel tongs are essential for safely turning chicken in hot oil. I prefer 12-inch tongs with a locking mechanism. Look for ones with silicone tips to avoid scratching your pots.
They also help remove the chicken without piercing the coating.
Paper Towels
Keep heavy-duty paper towels nearby for patting chicken dry before coating and for quick cleanups. I go through an entire roll during a frying session. The Bounty Select-A-Size sheets are my go-to.
Marinating Bowl
A large glass or ceramic bowl with a lid is perfect for marinating. I use a 4-quart Pyrex with snap-on lid. Avoid metal bowls as they can react with acidic marinade ingredients like calamansi or vinegar. 🔥
Nutrition Facts
Frequently Asked Questions
What can I use instead of calamansi juice?
Lime or lemon juice work perfectly as a 1:1 substitute. The acidity mirrors calamansi’s tenderizing effect and bright flavor.
How do I keep the chicken crispy after frying?
Drain on a wire rack instead of paper towels to allow air circulation. For leftovers, reheat in a 375°F oven for 10 minutes.
Can I use chicken breast instead of thighs?
Not recommended. Thighs stay juicier and the skin crisps better. Breast meat tends to dry out during frying.
Why does the recipe call for baking powder in the coating?
It creates tiny air pockets in the batter for extra crispiness. This is a traditional trick for achieving that signature crunch.

- Jollof Rice Sauce Recipe: West African Tomato and Spice Infusion - September 25, 2026
- Japanese Rice Soup Recipe: Umami-Rich Comfort in a Bowl - September 25, 2026
- Homemade Cream Of Rice Recipe: Silk-Smooth Breakfast in Minutes - September 25, 2026