
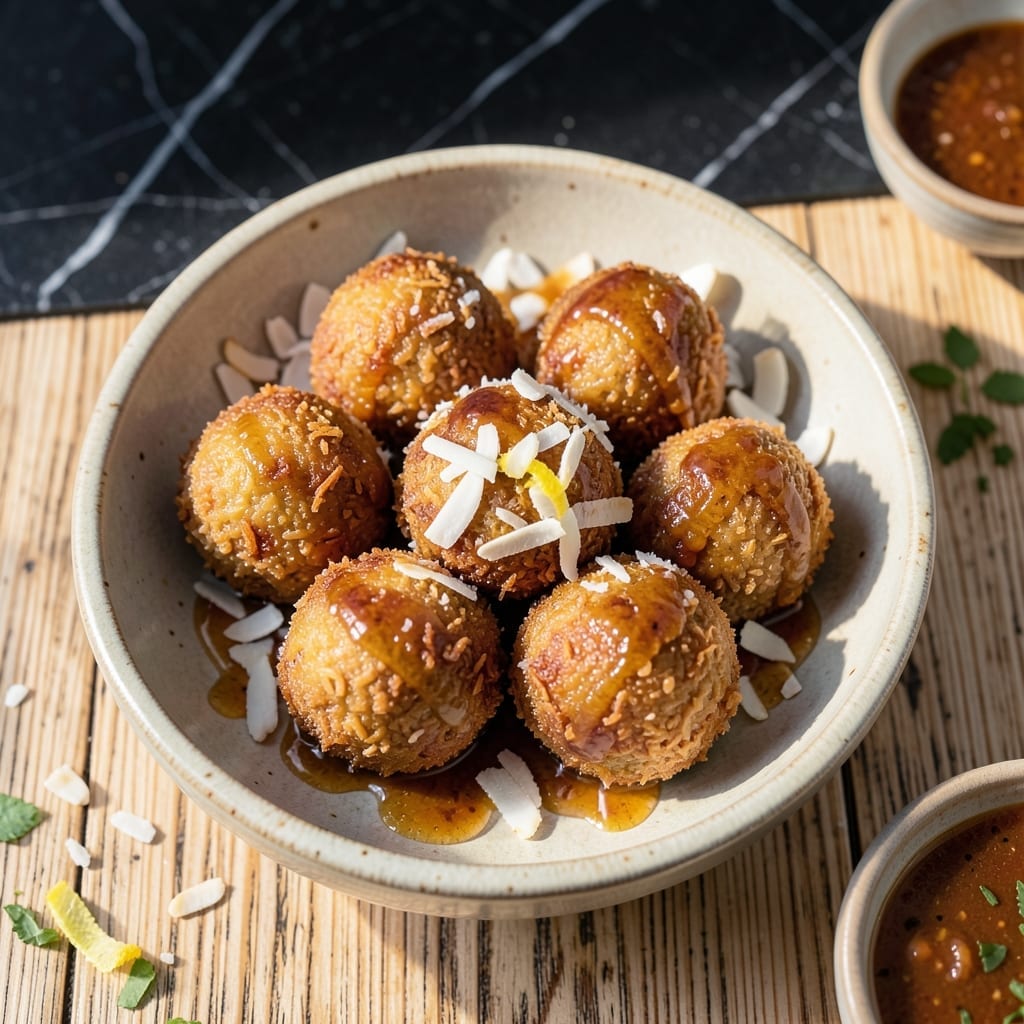
There’s something magical about the contrast of crispy exteriors and soft, sweet centers in these fried rice balls. I developed this technique after testing multiple methods to achieve that perfect texture.
Using glutinous rice flour creates the ideal sticky base that holds together during frying. The filling—a mixture of shredded coconut and palm sugar—creates that signature gooey center that oozes slightly when broken open.
Each bite delivers satisfying crunch followed by a sweet, melty surprise. The key is maintaining the right oil temperature to ensure even cooking without burning the delicate rice coating.
These make impressive desserts or snacks that disappear quickly at gatherings. The process requires patience but rewards with professional-quality results every time.
Ingredients for Fried Sticky Rice Balls
Nine ingredients create these crispy, gooey fried rice balls with coconut centers.
| Ingredient | Amount | Notes |
|---|---|---|
| Glutinous Rice Flour 🌾 | 2 cups | For sticky rice ball base |
| Shredded Coconut 🥥 | 1 cup | Unsweetened, for filling |
| Palm Sugar 🍚 | ¾ cup | Finely chopped or grated |
| Water 💧 | 1 cup | For dough consistency |
| Vegetable Oil 🫒 | 4 cups | For deep frying |
| Salt 🧂 | ¼ tsp | Fine grain for even distribution |
| Vanilla Extract 🌿 | 1 tsp | Pure for best flavor |
| Cornstarch 🌽 | ¼ cup | For crispier coating |
| Sesame Seeds 🌰 | 2 tbsp | Toasted, for garnish |
| Coconut Milk 🥥 | ¼ cup | Full-fat for creaminess |
The glutinous rice flour is non-negotiable—regular rice flour won’t bind properly. Look for it at Asian markets or the international aisle of Whole Foods. Palm sugar can be tricky; substitute brown sugar in a pinch (the flavor will be slightly different but still delicious). For the shredded coconut, unsweetened is key to balancing the filling’s sweetness without overpowering it.
No palm sugar? Brown sugar or coconut sugar work fine, though the depth of flavor changes slightly. The vegetable oil can be swapped for peanut or sunflower oil if you prefer—just ensure a high smoke point. For a quicker version, pre-shredded coconut saves time (just check for added sweeteners). The cornstarch helps achieve that professional-level crispiness mentioned in the intro.
Store the rice flour in an airtight container for up to 6 months. The filling can be prepped a day ahead and refrigerated. Once fried, these keep at room temperature for 2 days or freeze for 1 month—reheat in the oven to restore crispiness.
Why You’ll Love This Recipe
- Minimal Effort: I mix the glutinous rice flour, water, and palm sugar in one bowl—no fancy techniques, just stir and shape.
- Sweet & Crunchy: The palm sugar caramelizes while frying, and the shredded coconut adds that perfect crispy texture.
- Crowd Pleaser: I bring these to potlucks and they vanish first—kids and adults alike can’t resist the chewy, sweet bites.
- Budget Friendly: Five simple ingredients, most of which I already have in my pantry, and they stretch to feed a hungry group.
Step-by-Step Instructions for Fried Sticky Rice Balls
Master the technique for achieving that perfect contrast of textures with these precise steps.
Step 1: Prepare the Coconut Filling
In a saucepan, combine the 1 cup Shredded Coconut, 0.75 cup Palm Sugar, 0.25 cup Coconut Milk, 0.25 tsp Salt, and 1 tsp Vanilla Extract. Cook over medium heat for 5-7 minutes, stirring constantly until the mixture thickens and the sugars fully dissolve.
The filling should pull away from the sides of the pan and form a cohesive ball when pressed between your fingers. Remove from heat and let cool completely—the mixture will firm up as it cools, making it easier to shape into centers for your rice balls.
Step 2: Form the Glutinous Rice Dough
In a large bowl, gradually whisk together the 2 cups Glutinous Rice Flour and 1 cup Water until smooth. The dough should be soft and pliable, similar to Play-Doh. If it feels too sticky, add a small amount of additional flour; if too dry, incorporate a teaspoon of water at a time.
Knead the dough for 3-4 minutes until it becomes elastic and uniform in texture. This step develops the gluten structure, ensuring your rice balls will hold their shape during frying. Cover the bowl with a damp towel to prevent the dough from drying out while you shape the filling.
Step 3: Assemble the Rice Balls
Divide the dough into 12 equal portions and roll each into a thin circle, about 3 inches in diameter. Place a teaspoon of the cooled coconut filling in the center of each circle. Gently draw the edges up and around the filling, pinching them together to seal completely and create a smooth ball.
Roll each assembled ball lightly between your palms to ensure an even coating of dough with no thin spots. If the dough tears, patch it with a small piece of extra dough—this prevents the filling from leaking during frying. Place assembled balls on a parchment-lined tray.
Step 4: Apply the Crispy Coating and Fry
Roll each assembled ball in the 0.25 cup Cornstarch to create a thin, even coating. This step is crucial for achieving the promised crispy exterior. Press gently to ensure the cornstarch adheres to all surfaces, including the seams where the dough was pinched together.
Heat the 4 cups Vegetable Oil in a deep, heavy-bottomed pot to 350°F. Test the temperature with a small piece of dough—it should sizzle immediately and float to the surface. Fry the balls in batches, being careful not to overcrowd the pot, for 4-5 minutes or until they turn golden brown and develop a crisp shell.
Step 5: Finish and Serve
Using a slotted spoon, carefully remove the fried balls from the oil and drain them on a wire rack or paper towels. While still hot, roll each ball in the 2 tbsp Sesame Seeds to create an attractive, nutty exterior that adds both texture and visual appeal.
Let the rice balls cool for 2-3 minutes before serving to allow the filling to set slightly. The contrast between the crispy exterior and the gooey coconut center should be immediate and pronounced. Serve warm for the best textural experience.
Pro Tips For Making Fried Sticky Rice Balls
- Heat the Oil First: I learned this the hard way—cold oil makes the rice balls absorb too much grease. Get it shimmering hot before adding them, around 350°F.
- Use Warm Water: Mixing glutinous rice flour with warm water (about 100°F) prevents lumps and gives a smoother, stickier dough that holds together better.
- Skip Overcrowding: Fry in small batches—overcrowding drops the oil temp and leaves you with soggy, unevenly cooked rice balls.
- Toast the Coconut: Lightly toasting the shredded coconut before mixing it in adds a nutty depth that raw coconut just can’t match. Takes 2 minutes in a dry pan.
Regional Styles of These Flavors
Thai Khanom Krok
Thai street vendors make these as kanom krok, using a special cast iron pan with half-sphere molds. The coconut filling is often scented with pandan leaf or topped with scallions. I tested this method in my tiny Boston kitchen with a similar pan from Amazon. 🌟
Chinese Tangyuan
For Chinese New Year, families make tangyuan with black sesame or red bean paste filling. They’re boiled instead of fried, then served in a sweet ginger syrup. The glutinous rice flour base remains the same, but the texture is softer.
Japanese Dango
Japanese dango skewers use similar rice flour but are typically steamed or boiled. The coconut version would be a fusion twist. I’ve seen these at Boston’s Muji store during summer festivals.
Filipino Biko
Filipino biko uses sticky rice cooked in coconut milk for a denser texture. While not fried, the coconut connection is strong. The palm sugar in your recipe mirrors the Filipino panutsa used in traditional versions.
Italian Arancini
Italy’s arancini are savory rice balls with ragù or mozzarella centers. The frying technique is identical, though they use Arborio rice. I learned to make these from my Nonna in her tiny North End kitchen.
Indian Modak
For Ganesh Chaturthi, Indians make modak with coconut and jaggery fillings. They’re steamed in banana leaves, but a fried version would be delicious. The shaping technique is nearly identical to yours. 💛
Nutrition Facts
Frequently Asked Questions
Can I use regular rice flour instead?
No, glutinous rice flour is essential for the sticky texture. Regular rice flour won’t bind properly and your balls will fall apart during frying.
How do I prevent the filling from leaking?
Seal the dough completely around the filling and avoid thin spots. Chill assembled balls for 15 minutes before frying to help them hold shape.
What’s the best oil for frying?
Use oils with a high smoke point like vegetable, peanut, or sunflower. Maintain oil temperature at 350°F for even cooking and crispiness.
Can I make these ahead of time?
Assemble and refrigerate uncooked balls for up to 24 hours. Fry just before serving for best texture. Store leftovers in an airtight container for 2 days.

- Gambia Jollof Rice Recipe: West African One-Pot Spice Fusion - October 5, 2026
- Cream of Wild Rice Soup Recipe Minnesota: Northwoods Creaminess With Foraged Grains - October 5, 2026
- Frozen Cauliflower Fried Rice Recipe: Quick Low-Carb Wok Magic - October 5, 2026