
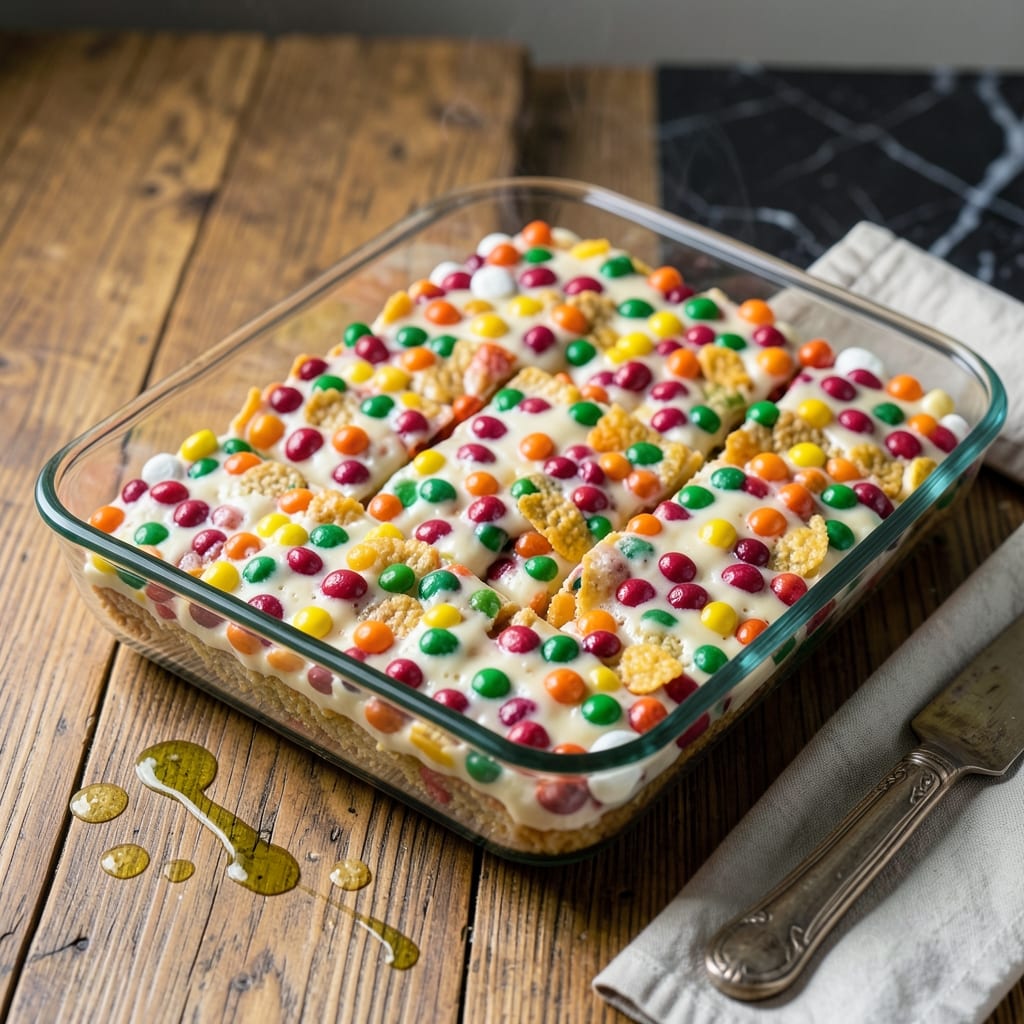
This recipe transforms a childhood favorite into a colorful, no-bake treat that’s as fun to make as it is to eat. The combination of crispy cereal and gooey marshmallows creates a texture that’s impossible to resist.
With just a few simple ingredients and 10 minutes of prep, you’ll have a batch of vibrant, chewy bars ready to enjoy. The Fruity Pebbles add a playful crunch and a burst of fruity flavor in every bite.
Ingredients for Fruity Pebbles Rice Krispie Bar
Bright cereal, gooey marshmallows, and a buttery crunch come together in minutes.
| Ingredient | Amount | Notes |
|---|---|---|
| Fruity Pebbles Cereal 🥣 | 6 cups | Plus extra for topping |
| Rice Krispies Cereal 🥣 | 3 cups | Standard variety |
| Mini Marshmallows 🍬 | 10 oz | About 5 cups |
| Unsalted Butter 🧈 | ½ cup | 1 stick, for melting |
| Vanilla Extract 💧 | 1 tsp | Pure for best flavor |
| Salt 🧂 | ¼ tsp | Fine sea salt |
| Cooking Spray 🧴 | 1 can | For greasing pan |
The cereal is the star here. Fruity Pebbles give that rainbow crunch, but any fruity cereal works. I grab mine from Target or Walmart—they always have the big boxes. Rice Krispies are the backbone, so don’t skip them. For the marshmallows, Jet-Puffed or store brand both melt perfectly fine.
No Fruity Pebbles? Froot Loops or generic fruity Os are identical in texture and taste. Out of Rice Krispies? Crispix or Corn Flakes add a similar crunch. Vegan version? Swap regular butter for Earth Balance and use vegan marshmallows like Dandies. The vanilla can be omitted, but it really ties everything together.
These keep at room temp for 3-4 days in an airtight container. Press plastic wrap directly on top to prevent drying out. If stacking, separate layers with parchment. They’re best the first day but still tasty for a week.
Why You’ll Love This Recipe
- One Pot Wonder: I melt the butter and marshmallows in a single saucepan, then stir in both cereals—no fancy equipment, no mess.
- Crunchy Sweet Fix: That first bite with the Fruity Pebbles’ snap and the gooey marshmallow center? Ridiculously good.
- Party or Lunchbox: I pack these for school treats or slice them into squares for potlucks—always a hit with kids and adults alike.
- Budget Stretcher: Between us, a box of each cereal and a bag of marshmallows makes two batches. My wallet loves it.
Step-by-Step Instructions for Fruity Pebbles Rice Krispie Bars
This method guarantees perfectly chewy, colorful treats with minimal effort and maximum crunch.
Step 1: Prep the Pan and Melt the Butter
First, lightly coat a 9×13-inch baking pan with the cooking spray. Make sure to get all the corners and edges so the bars don’t stick. I like to line it with parchment paper too for extra insurance and easier cutting later.
In a large pot, melt the 0.5 cup unsalted butter over low heat. Watch it closely—you want it fully melted but not browned. Once melted, stir in the 1 tsp vanilla extract and 0.25 tsp salt. This flavors the base of your bars beautifully.
Step 2: Melt the Marshmallows
Add all 10 oz mini marshmallows to the melted butter. Keep the heat on low and stir constantly with a silicone spatula. The marshmallows will start to soften and melt within 2-3 minutes.
You’ll know it’s ready when the mixture is smooth with no visible marshmallow lumps. If it seems too thick, remove it from heat—residual warmth will finish the job. Be patient; rushing with high heat can scorch the marshmallows and give your bars a bitter taste.
Step 3: Mix in the Cereals
Remove the pot from heat and immediately add the 6 cups Fruity Pebbles Cereal and 3 cups Rice Krispies Cereal. Use your spatula to fold everything together gently but thoroughly. You want every piece coated in that sticky marshmallow goodness.
The Fruity Pebbles will start to soften slightly as they absorb the warmth. That’s normal—it helps them bind together. Work quickly though; the mixture will start to set as it cools, making it harder to mix evenly.
Step 4: Press and Set
Transfer the mixture to your prepared pan. Use the spatula to spread it evenly, pressing down firmly to compact the bars. For best results, I spray a piece of parchment paper with cooking spray, lay it over the top, and use my hands to press everything into a tight, even layer.
Let the bars cool at room temperature for 1-2 hours until completely set. You’ll know they’re ready when you can touch the surface and it feels firm, not sticky. This cooling time is crucial—cutting too soon will leave you with a gooey mess instead of neat squares.
Step 5: Cut and Serve
Once fully set, use a sharp knife to cut into squares. For clean cuts, I like to dip the knife in hot water and wipe it between each slice. This prevents dragging and keeps the edges sharp.
Store leftovers in an airtight container at room temperature for up to 3 days. If they lose a bit of crispness, a quick stint in the microwave for 10 seconds can bring them back to life. These are best enjoyed the same day, though—the colors are brightest and the texture is perfect.
Pro Tips For Making Fruity Pebbles Rice Krispie Bar
- Melt Butter Low: I learned this the hard way—melting the butter over low heat keeps it from browning and keeps your bars tasting clean and sweet, not bitter.
- Press While Warm: After burning three batches, I finally figured out that pressing the cereal mixture into the pan while it’s still warm helps it stick together better.
- Use Fresh Marshmallows: Sounds weird, but it works: stale mini marshmallows won’t melt as smoothly, so check the bag’s freshness date before starting.
- Grease Everything: My grandmother swore by this, and she was right: butter your spatula, your hands, and the pan—it makes cutting the bars later a breeze.
Dietary Considerations for This Recipe
Gluten-Free Option
Both Fruity Pebbles and Rice Krispies contain gluten, but you can easily make this treat gluten-free. Swap in gluten-free crispy rice cereal (like Nature’s Path or Kellogg’s GF Rice Krispies) and ensure your Fruity Pebbles are certified gluten-free. Always check labels, as formulations can change.
Vegan Adaptation
For a vegan version, use vegan butter (I like Earth Balance) and vegan marshmallows such as Dandies. The vanilla extract should be alcohol-free to avoid animal-derived additives. The texture and taste will be nearly identical to the original.
Dairy-Free Notes
If avoiding dairy, simply use dairy-free butter in place of regular butter. Brands like Miyoko’s or Country Crock Plant Butter work well. The rest of the ingredients are naturally dairy-free, so no other substitutions are needed.
Nut Allergy Safety
This recipe is naturally nut-free, but cross-contamination can be a concern. Use certified nut-free facilities’ products, like Enjoy Life marshmallows, and check cereal labels for allergy warnings. Always prepare in a nut-free environment. 💡
Lower Sugar Version
To reduce sugar, use half the marshmallows and add 1 extra cup of cereal to maintain structure. You can also find sugar-free marshmallows, though they may affect texture. The Fruity Pebbles are high in sugar, so consider using less or a lower-sugar cereal alternative.
Storage Tips
These bars keep well at room temperature in an airtight container for 3-4 days. For longer storage, freeze for up to 1 month. Let them thaw at room temperature before serving. 💛
Nutrition Facts
Frequently Asked Questions
Can I use regular marshmallows instead of mini ones?
Yes, but cut them into smaller pieces first for even melting. Mini marshmallows melt faster and more uniformly, but regular ones work if you slice them into quarters.
How do I keep the bars from getting too hard?
Press them just enough to hold together—over-compacting makes them dense. Store in an airtight container with parchment between layers to maintain texture.
Can I add chocolate chips or sprinkles?
Stir in 1 cup of chocolate chips after melting marshmallows, or press sprinkles on top before cooling. Both add extra fun without changing the base recipe.
Why did my bars turn out crumbly?
This usually means the marshmallows weren’t fully melted or the mixture wasn’t pressed firmly enough. Ensure marshmallows are smooth and liquid before adding cereal, and compact well in the pan.

- Ground Beef Rice and Beans Recipe: Slow-Simmered Savory Harmony - October 17, 2026
- Guyanese Fried Rice Recipe: Caribbean Spice With Wok-Charred Aromatics - October 17, 2026
- Hakka Thunder Tea Rice Recipe: Wok-Charred Herbal Infusion - October 17, 2026