
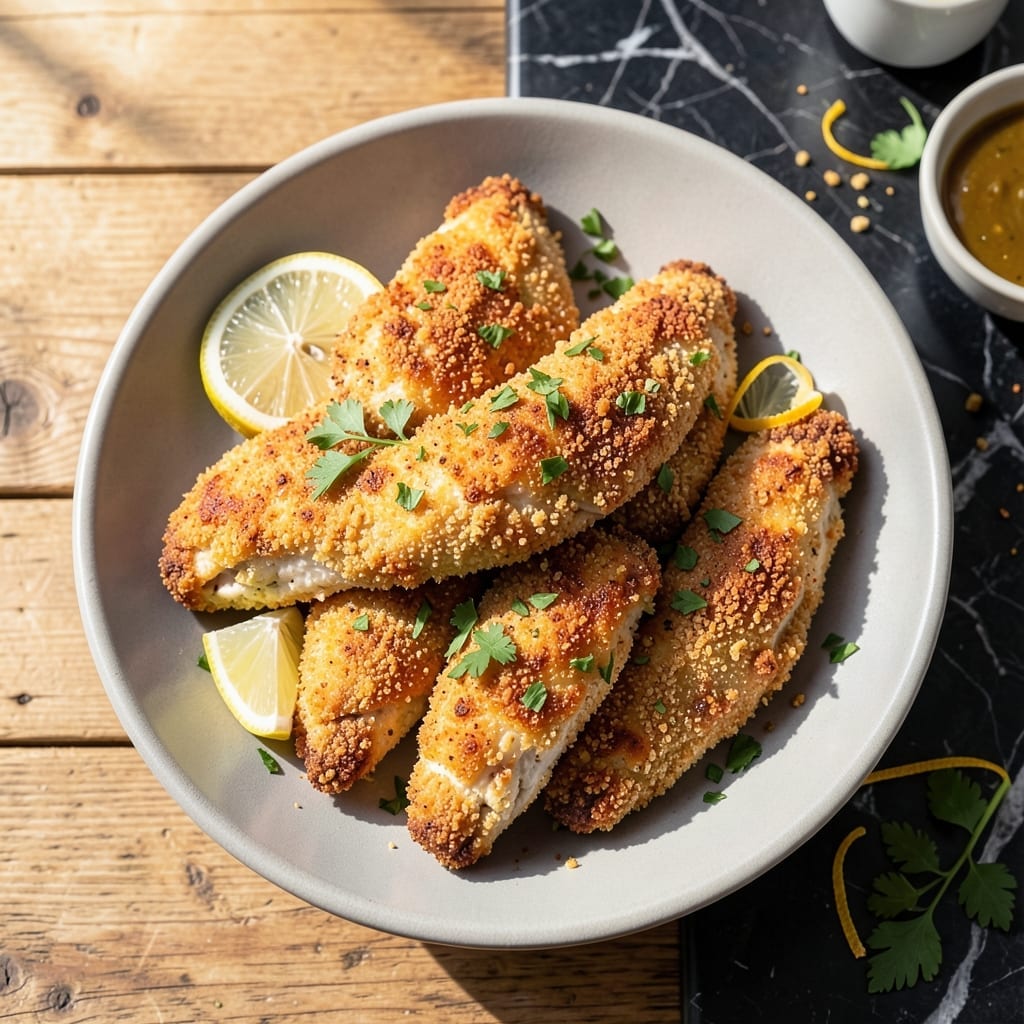
This recipe delivers crispy, tender chicken tenders without the deep fryer. A smart coating technique creates that satisfying crunch while keeping it healthy.
The secret is a double-dredge method using whole wheat flour and egg whites, then baking at high heat. This ensures every piece comes out golden and crisp, not soggy.
You’ll get that classic crunch and juicy interior we all love, but with far less oil and more nutrition. The tenders stay crispy even after cooling.
Perfect for dipping in your favorite sauces or serving as a protein-packed main. These never fail to satisfy.
Ingredients for Healthy Chicken Tenders
Pantry staples plus chicken meet your new favorite crispy tenders. Simple stuff, big crunch.
| Ingredient | Amount | Notes |
|---|---|---|
| Chicken Breast Tenders 🍗 | 1 ½ lb | Boneless, skinless, uniform thickness |
| Whole Wheat Flour 🌾 | 1 cup | Fine grind for even coating |
| Large Egg Whites 🥚 | 2 whole | Lightly beaten for wash |
| Panko Breadcrumbs 🍞 | 1 ½ cups | Japanese-style for extra crunch |
| Olive Oil 🫒 | 2 tbsp | Light or extra-virgin for brushing |
| Paprika 🌶️ | 1 tsp | Sweet or smoked for color |
| Garlic Powder 🧄 | 1 tsp | Freshly ground preferred |
| Onion Powder 🧅 | 1 tsp | Fine powder for even flavor |
| Salt 🧂 | 1 tsp | Kosher or sea salt |
| Black Pepper 🌶️ | ½ tsp | Freshly cracked for best flavor |
| Dijon Mustard 🟡 | 1 tbsp | For dipping or coating boost |
| Cornstarch 🌽 | 2 tbsp | For extra crispiness |
The chicken breast tenders are the foundation, so look for uniform thickness—pound thicker pieces to even out. Whole Foods and Trader Joe’s sell pre-cut tenders, saving you the work. For the panko, Kikkoman brand is my go-to (found in the Asian aisle), but any Japanese-style works. The cornstarch is the secret weapon here—don’t skip it.
No egg whites? Whole eggs work fine (just use 1 per 2 whites). Swap panko for crushed cornflakes or almond flour if you’re gluten-free. Short on olive oil? Avocado oil has a higher smoke point. The spices can be adjusted—add cayenne for heat or swap paprika for Cajun seasoning for a twist.
Bake and serve immediately for peak crispiness, but leftovers keep 3-4 days in the fridge. Reheat in the oven at 375°F for 10 minutes to revive the crunch (microwave = soggy). Freeze uncooked tenders for up to 2 months.
Why You’ll Love This Recipe
- 20-Minute Meal: I can have these in the oven faster than it takes to decide on takeout. Just dip, coat, bake—done.
- Crispy Perfection: That panko crust gets golden and crunchy while the chicken stays juicy. Honestly, I could eat the crust alone.
- Meal Prep MVP: They reheat beautifully, so I make a double batch for lunches. My kids even eat them cold from the fridge.
Step-by-Step Instructions for Healthy Chicken Tenders
Here’s my tested method for achieving that perfect crunch without the deep-fryer guilt.
Step 1: Prep the Chicken and Seasoning Station
Start by patting the 1.5 lb chicken breast tenders completely dry with paper towels. I can’t stress this enough—moisture is the enemy of crispiness. While they dry, set up your breading station with three shallow bowls.
In the first bowl, mix the 1 cup whole wheat flour with the 1 tsp paprika, 1 tsp garlic powder, 1 tsp onion powder, 1 tsp salt, and 0.5 tsp black pepper. In the second, lightly beat the 2 whole large egg whites until frothy. In the third, combine the 1.5 cups panko breadcrumbs with the 2 tbsp cornstarch.
Step 2: Create the Crispy Coating Layers
Working one piece at a time, dredge each tender in the seasoned flour mixture, pressing gently to adhere. Shake off any excess—this prevents clumping. Next, dip it into the egg whites, letting any excess drip off for a clean coat.
Finally, press the tender into the panko-cornstarch mixture, turning to coat completely. I like to press firmly here to ensure the crumbs stick well. Place the breaded tenders on a wire rack set over a baking sheet. This setup allows air circulation for even crisping on all sides.
Step 3: Bake to Golden Perfection
Preheat your oven to 425°F. While it heats, drizzle the breaded tenders lightly with the 2 tbsp olive oil. I use a brush to ensure even coverage without sogginess. The oil helps the panko crisp up beautifully in the oven.
Bake on the middle rack for 12-15 minutes, then flip each tender carefully. Return to the oven for another 8-10 minutes until they’re golden brown and the internal temperature reaches 165°F. You’ll know they’re done when the coating is crisp and the chicken feels firm to the touch.
Step 4: Rest and Serve with Flavor Boost
Let the tenders rest for 5 minutes on the wire rack before serving. This brief pause allows the coating to set fully, preventing it from falling off when you pick them up. The rest also lets the juices redistribute in the meat.
While they rest, mix the 1 tbsp Dijon mustard with a little water to thin it slightly for dipping. Serve the tenders warm—they’re at peak crispiness right out of the oven. Each bite should deliver a satisfying crunch giving way to tender, juicy chicken inside.
Pro Tips For Making Healthy Chicken Tenders
- Pat Dry First: I learned this the hard way—wet tenders won’t crisp up properly. Press them between paper towels for 30 seconds to remove excess moisture before dredging.
- Double Dredge: Dip tenders in flour, then egg whites, then back in flour before the panko. Sounds tedious, but it makes the crust cling like glue and stay put while cooking.
- Skip Cold Oil: Heat your olive oil in the pan for 2 full minutes before adding tenders. After burning three batches, I finally figured out that cold oil = soggy, greasy results.
- Use a Rack: Place cooked tenders on a wire rack, not paper towels. This keeps the bottoms crisp while draining excess oil—my grandmother swore by this, and she was right.
Best Sauces and Condiments for These Flavors
Classic Dipping Sauces
Start with honey mustard—mix 3 tbsp Dijon with 2 tbsp honey and 1 tbsp apple cider vinegar. It’s the perfect sweet-tangy balance that kids and adults both adore. I also love ranch dressing made with Greek yogurt for extra protein. 💛
Spicy and Bold Options
For heat lovers, sriracha mayo is a must—combine ¼ cup mayo with 1 tbsp sriracha and a squeeze of lime. Buffalo sauce works wonderfully too; thin it with a little water for dipping consistency.
Light and Fresh Choices
A simple lemon-dill yogurt dip brightens up the meal. Mix ½ cup Greek yogurt with 1 tbsp lemon juice, 1 tsp dill, and a pinch of salt. It’s refreshing and cuts through the richness.
Global Flavors
Try peanut sauce for an Asian twist—blend ¼ cup peanut butter with 1 tbsp soy sauce, 1 tsp sesame oil, and warm water to thin. Tzatziki also pairs beautifully with its cool cucumber and garlic notes.
Sweet and Fruity
For something different, apricot glaze adds a fruity touch. Simmer ½ cup apricot jam with 1 tbsp apple cider vinegar and 1 tsp Dijon until smooth. Drizzle lightly for a sweet-savory combo. 🔥
Nutrition Facts
Frequently Asked Questions
Can I use chicken breast instead of tenders?
Cut boneless chicken breasts into 1-inch strips for similar results. Pound thicker pieces to ½-inch thickness for even cooking.
Why use panko instead of regular breadcrumbs?
Panko creates a lighter, crispier texture because of its coarser grind. Regular breadcrumbs can work but may yield a denser coating.
How do I keep them crispy when reheating?
Use an oven or toaster oven at 375°F for 8-10 minutes. Avoid microwaves—they’ll make the coating soggy.
Can I make these gluten-free?
Swap whole wheat flour for almond flour and use gluten-free panko. The cornstarch can stay as it’s naturally gluten-free.

- Jollof Rice Sauce Recipe: West African Tomato and Spice Infusion - September 25, 2026
- Japanese Rice Soup Recipe: Umami-Rich Comfort in a Bowl - September 25, 2026
- Homemade Cream Of Rice Recipe: Silk-Smooth Breakfast in Minutes - September 25, 2026