
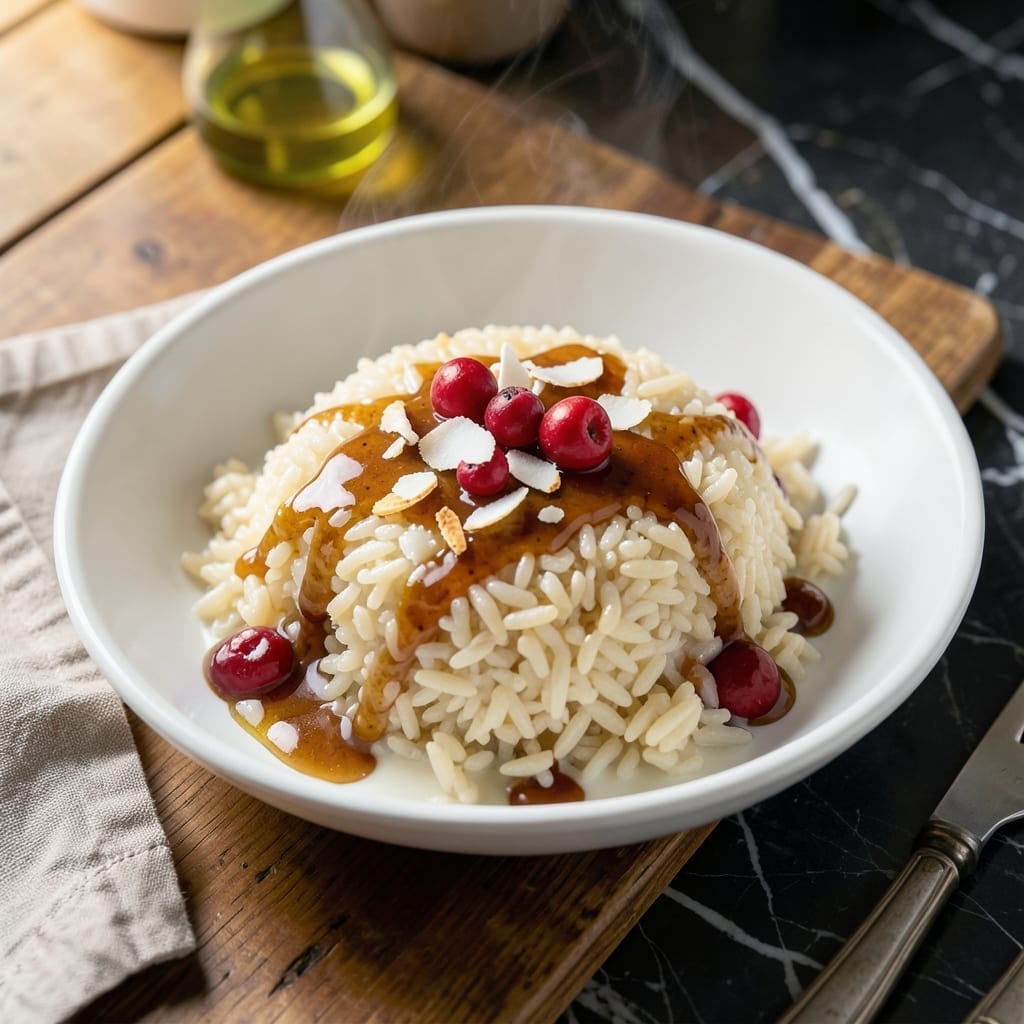
Achieving mochi-soft sweet rice at home is simpler than you think with this Instant Pot method. The pressure cooker transforms ordinary glutinous rice into a tender, chewy dessert that rivals any restaurant version.
By cooking the rice with coconut milk instead of water, each grain absorbs rich, creamy sweetness. The process takes less than 30 minutes from start to finish, with most of that time being hands-off cooking.
What emerges is a perfectly textured sweet rice with a subtle coconut aroma. The grains stay distinct yet cohesive, creating that signature sticky consistency that makes this dessert so satisfying.
Serve warm or at room temperature for a treat that’s equally comfortable as a light dessert or sweet snack.
Ingredients for Instant Pot Sweet Rice
Glutinous rice, coconut milk, and a touch of sugar create this Instant Pot dessert with signature sticky texture.
| Ingredient | Amount | Notes |
|---|---|---|
| Glutinous Rice 🌾 | 1 ½ cups | Rinsed until water runs clear |
| Full-Fat Coconut Milk 🥥 | 1 ½ cups | Canned, well-shaken before measuring |
| Granulated Sugar 🍚 | ½ cup | Adjust to taste preference |
| Water 💧 | ½ cup | For rinsing and cooking balance |
| Salt 🧂 | ¼ tsp | Fine sea salt preferred |
| Vanilla Extract 🌿 | 1 tsp | Pure extract for best flavor |
| Cornstarch 🌾 | 1 tbsp | For thickening if needed |
| Unsalted Butter 🧈 | 1 tbsp | Optional for serving richness |
| Toasted Sesame Seeds 🌰 | 1 tbsp | For garnish and texture |
| Mango Slices 🥭 | 1 cup | Fresh or thawed frozen |
| Coconut Flakes 🥥 | ¼ cup | Toasted for garnish |
The glutinous rice is non-negotiable here—look for Thai sweet rice at Asian markets or the international aisle. Jasmine or basmati won’t give you that chewy, mochi-like consistency. Coconut milk quality matters: Thai Kitchen or Chaokoh brands deliver the richest results. Avoid light coconut milk, as the full-fat version provides the creamy texture this dish demands.
Out of glutinous rice? There’s no perfect substitute, but sushi rice at half the amount gets you closer than other varieties. No coconut milk? Whole milk with a tablespoon of coconut cream (from a can) works in a pinch. The sugar can be swapped for coconut sugar if you prefer a deeper caramel note. Skip the butter for a fully vegan version, or use coconut oil instead.
Store cooked sweet rice in an airtight container at room temperature for up to 2 days, or refrigerate for 4 days. Reheat gently with a splash of coconut milk to restore creaminess. The garnishes—sesame seeds, mango, coconut flakes—add freshness, so prep them right before serving.
Why You’ll Love This Recipe
- Set It & Forget: I toss everything in the Instant Pot, press a button, and walk away—no stirring, no watching, just perfect sweet rice every time.
- Coconut Dream: The full-fat coconut milk soaks into the glutinous rice, making it rich and creamy with just the right hint of sugar.
- Party or Pajamas: I serve this warm as a dessert for guests or straight from the fridge at midnight—honestly, it works both ways.
- Stretches Far: One batch fills my family of four with leftovers for days, and the ingredients cost less than a takeout dessert.
Step-by-Step Instructions for Instant Pot Sweet Rice
Master the technique for perfectly tender sweet rice with minimal hands-on time.
Step 1: Rinse and Prepare the Glutinous Rice
Place the 1.5 cups glutinous rice in a fine-mesh strainer and rinse under cold water, agitating with your hand, until the water runs completely clear. This removes excess starch that could make the final dish gummy rather than pleasantly sticky.
Drain thoroughly, then transfer to the Instant Pot insert. I always do a final shake of the strainer to remove every last drop of water—this prevents the rice from becoming mushy during pressure cooking.
Step 2: Combine Liquids and Sweeteners
Add the 1.5 cups full-fat coconut milk, 0.5 cup granulated sugar, 0.5 cup water, 0.25 tsp salt, and 1 tsp vanilla extract to the pot with the rice. Stir gently to distribute the sugar and salt evenly, but avoid over-stirring which can break the rice grains.
The coconut milk should be well-shaken before measuring to ensure the cream and liquid are fully incorporated. The mixture will look thin at this stage, but the rice will absorb most of the liquid during cooking.
Step 3: Pressure Cook to Perfection
Secure the lid on the Instant Pot and set the valve to sealing position. Cook on high pressure for 5 minutes. The pressure cooking time is short because glutinous rice cooks faster than regular rice, but the steam penetration is what creates that signature mochi-like texture.
After cooking, allow a natural pressure release for 10 minutes, then carefully switch the valve to venting to release any remaining pressure. The rice should be fully tender with no hard centers when tested with a fork.
Step 4: Thicken and Enrich the Mixture
If the mixture appears too liquid after cooking, create a slurry by mixing the 1 tbsp cornstarch with 1 tbsp of cold water. Stir this into the rice and use the sauté function to cook for 2-3 minutes until thickened to your desired consistency.
For added richness, stir in the 1 tbsp unsalted butter at this stage. The butter will melt into the warm rice, creating a luxurious sheen and enhancing the coconut flavor.
Step 5: Garnish and Serve Warm
Transfer the sweet rice to serving bowls while still warm. Top each portion with 1 cup mango slices, 1 tbsp toasted sesame seeds, and 0.25 cup coconut flakes for contrasting textures and additional sweetness.
The sesame seeds add a nutty crunch while the coconut flakes reinforce the tropical flavor profile. Serve immediately for the best texture—the rice will firm up slightly as it cools, but retains its signature stickiness.
Pro Tips For Making Instant Pot Sweet Rice
- Rinse the Rice: Soak glutinous rice for at least 30 minutes before cooking—I learned this the hard way after ending up with a gummy, uneven texture.
- Use Full-Fat Coconut Milk: Skip the light version; full-fat coconut milk gives the rice that rich, creamy consistency that makes a real difference.
- Check the Water Ratio: Stick to a 1:1 ratio of water to rice, or you’ll either have a dry mess or a soupy disaster—yes, even if you’re tempted to eyeball it.
- Natural Release Only: Let the pressure release naturally for 10 minutes, then quick-release the rest. This keeps the rice tender instead of turning it into a sticky, undercooked clump.
Health Benefits of This Recipe
Energy Boost
This dish delivers slow-digesting carbohydrates from glutinous rice, providing steady energy without blood sugar spikes. The medium glycemic index makes it ideal for sustained fuel. I notice it keeps me full for hours after eating. 💪
Digestive Health
Glutinous rice contains resistant starch, which acts as a prebiotic to support gut health. The coconut milk adds medium-chain triglycerides, easily digestible fats that may improve nutrient absorption.
Rich in Minerals
Each serving provides essential minerals like iron and magnesium from the rice, plus manganese which supports bone health. Coconut milk contributes copper and selenium, important for immune function.
Vegan-Friendly Nutrition
Naturally dairy-free and plant-based, this dessert fits perfectly into vegan diets. The coconut milk provides healthy fats while the rice offers B vitamins like thiamine and niacin.
Antioxidant Properties
Coconut contains polyphenols that combat oxidative stress. The vanilla extract adds small amounts of antioxidants too. Together, they help protect cells from damage. ✨
Portion Control
A ½ cup serving contains about 200 calories, making it a reasonable treat. The natural sweetness satisfies cravings without excessive sugar content compared to traditional desserts.
Nutrition Facts
Frequently Asked Questions
Can I use regular rice instead of glutinous?
No, regular rice won’t give you the same sticky, chewy texture. Glutinous rice is essential for that signature mochi-like consistency.
Why does the recipe call for a natural pressure release?
A natural release prevents the rice from becoming mushy. The gradual pressure drop lets the grains absorb liquid evenly, creating perfect texture.
Can I make this ahead of time?
Yes! Store cooked rice in an airtight container at room temperature for up to 2 days. Reheat gently with a splash of coconut milk to restore creaminess.
What if my rice turns out too liquid?
Create a cornstarch slurry with 1 tablespoon each of cornstarch and cold water. Stir into the rice and sauté for 2-3 minutes to thicken.

- Jimmy Dean Sausage and Rice Recipe: Hearty One-Pot Savory Delight - October 19, 2026
- Indian Jasmine Rice Recipe: Fragrant Basmati-Free Elegance - October 19, 2026
- KFC Rizo Rice Recipe: Copycat Side Dish With Savory Spice Blend - October 19, 2026