
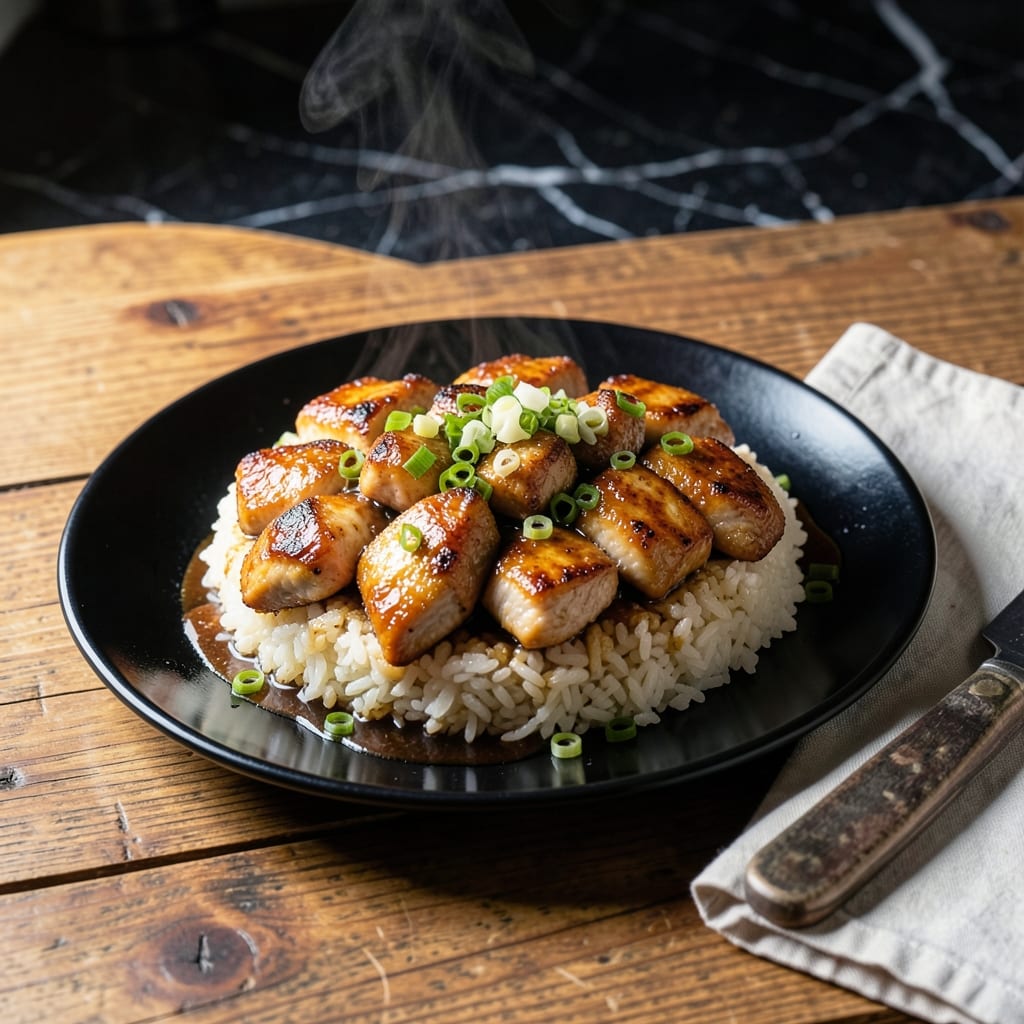
This dish brings the sizzle and aroma of authentic Japanese teppanyaki to your home kitchen. A foolproof method delivers tender chicken and buttery rice with minimal effort.
I perfected this technique after years of studying Asian cooking methods. The key is high heat and constant motion, creating that signature umami-rich flavor profile with every bite.
You’ll achieve restaurant-quality results with simple ingredients and a one-pan approach. The chicken stays juicy while the rice develops a delicious caramelized crust.
Serve immediately for the full hibachi experience, complete with that distinctive wok-tossed presentation.
Ingredients for Japanese Hibachi Chicken and Rice
Simple, fresh ingredients bring hibachi home with that signature umami punch and buttery rice.
| Ingredient | Amount | Notes |
|---|---|---|
| Boneless, Skinless Chicken Breasts 🍗 | 1 ½ lb | Cut into bite-sized pieces |
| Short-Grain White Rice 🍚 | 2 cups | Rinsed until water runs clear |
| Soy Sauce 🫒 | ⅓ cup | Low-sodium preferred for balance |
| Sake 🍶 | ¼ cup | Dry variety for cooking |
| Mirin 🍯 | 2 tbsp | Sweet rice wine for glaze |
| Garlic Cloves 🧄 | 4 cloves | Minced for maximum flavor |
| Fresh Ginger Root 🌿 | 1 tbsp | Grated, peeled first |
| Butter 🧈 | 4 tbsp | Unsalted, divided for rice and chicken |
| Vegetable Oil 🫒 | 3 tbsp | High smoke point for searing |
| Granulated Sugar 🍚 | 1 tbsp | Balances savory flavors |
| Scallions 🧅 | 4 whole | Thinly sliced for garnish |
| Sesame Seeds 🌾 | 2 tbsp | Toasted for garnish |
| Chicken Stock 🍲 | 1 cup | Low-sodium for controlled seasoning |
The chicken quality matters here. Boneless, skinless thighs work too (and are more forgiving), but breasts stay juicier if you don’t overcook them. Trader Joe’s or Whole Foods have good options if your regular store’s selection looks sad. For the rice, short-grain white is non-negotiable—it gets that sticky, caramelized crust. Sushi rice works perfectly (that’s what most hibachi places use).
No sake? Dry white wine in a pinch, but mirin plus a splash of water gets closer. Skip the mirin? 1 tbsp sugar plus 1 tbsp water mimics the sweetness. Fresh ginger and garlic are worth it here—jarred minced just doesn’t have the same kick. The scallions can be swapped for chives if that’s what’s growing in your herb garden.
Leftovers keep surprisingly well. The rice actually gets better after a night in the fridge—reheat in a skillet with a pat of butter to revive the crust. Everything’s good for 3-4 days, but the sesame seeds are best fresh-toasted. Don’t add them until serving time.
Why You’ll Love This Recipe
- One Pan Dinner: I love that everything cooks together—chicken, rice, and that glossy soy-mirin glaze—so cleanup is a breeze.
- Umami Bomb: The sake and mirin create this deep, savory-sweet richness that makes the chicken irresistibly juicy.
- Meal Prep Magic: It reheats beautifully, so I make a big batch for lunches all week. Honestly, it tastes even better the next day.
- Budget Friendly: Boneless chicken breasts stretch far with rice, and the sauce is just pantry staples. I’ll be real: it feels fancy for the cost.
Step-by-Step Instructions for Japanese Hibachi Chicken and Rice
Here’s how I nail that restaurant-quality flavor and texture at home every time.
Step 1: Cook the Rice with Buttery Richness
Rinse the 2 cups Short-Grain White Rice until the water runs clear—this removes excess starch and prevents gummy texture. Drain well in a fine-mesh sieve.
Combine the rice, 1 cup Chicken Stock, and 2 tbsp Butter in a rice cooker or pot. I use a 1:1 liquid-to-rice ratio for perfect short-grain texture. Cook according to your rice cooker’s settings or simmer covered for 15-18 minutes on low heat until all liquid is absorbed. Let it steam undisturbed for 10 minutes after cooking.
Step 2: Velouté the Chicken in Umami Sauce
Cut the 1.5 lb Boneless, Skinless Chicken Breasts into uniform 1-inch pieces for even cooking. Pat them completely dry with paper towels—this ensures a good sear rather than steaming.
Heat 3 tbsp Vegetable Oil in a wok or large skillet over high heat until shimmering. Add the chicken in a single layer and sear undisturbed for 2-3 minutes until golden brown on the first side. Flip and cook another 2 minutes until just cooked through. Transfer to a plate and set aside.
Step 3: Build Layered Flavors with Aromatics
In the same hot pan, add the 4 cloves Garlic Cloves and 1 tbsp Fresh Ginger Root. Stir constantly for 30-45 seconds until fragrant but not browned—burnt garlic turns bitter. The ginger should sizzle and release its aroma immediately.
Pour in the 0.33 cup Soy Sauce, 0.25 cup Sake, 2 tbsp Mirin, and 1 tbsp Granulated Sugar. Bring to a boil and let it reduce by half, about 3-4 minutes. The sauce should coat the back of a spoon and smell deeply savory with a hint of sweetness.
Step 4: Finish with Butter and Combine
Reduce heat to medium and whisk in the remaining 2 tbsp Butter until fully melted and emulsified into the sauce. The mixture should turn glossy and slightly thickened. Taste and adjust seasoning if needed—though with low-sodium soy sauce, it should be perfectly balanced.
Return the chicken to the pan and toss to coat evenly in the sauce. Cook for another 1-2 minutes until the chicken absorbs the flavors and the sauce clings beautifully to each piece. The chicken should be glossy and deeply colored from the sauce.
Step 5: Plate with Garnishes and Serve
Divide the cooked rice among four plates and top with the saucy chicken. Drizzle any remaining pan sauce over the rice. Garnish with 4 whole Scallions (thinly sliced) and 2 tbsp Sesame Seeds for freshness and crunch.
Serve immediately while hot. The rice should be tender and slightly sticky, the chicken juicy and coated in that rich umami glaze. The scallions add a bright contrast, while the sesame seeds provide nutty depth to each bite.
Pro Tips For Making Japanese Hibachi Chicken And Rice
- Velocity the Chicken: Crank your grill or skillet to screaming hot before the chicken hits it—I learned this the hard way after too many pale, steamed-looking pieces. You want that quick sear to lock in juices, about 3-4 minutes per side for thinly sliced breasts.
- Rinse the Rice: Swirl your short-grain rice in a bowl of cold water 3-4 times until the water runs clear. Skipping this leaves you with gummy, starchy rice that soaks up all your sauce.
- Skip the Overcrowding: Cook chicken in batches if needed—crowding the pan drops the temperature fast and you end up boiling it in its own juices instead of getting that hibachi char.
- Marinate 30 Minutes: Mix soy sauce, sake, and mirin with the chicken for a full 30 minutes before cooking. Any less and the flavors don’t penetrate; any more and the sake starts breaking down the meat too much.
Creative Variations of These Flavors
Spicy Yuzu Twist
Add 1 tbsp yuzu juice and ½ tsp red pepper flakes to the sauce for a bright, citrusy heat. This Japanese citrus elevates the dish with its unique floral aroma. I discovered this variation during my time studying in Charleston. 🌶️
Vegetable Hibachi
Swap chicken for 1.5 lb mixed vegetables like zucchini, mushrooms, and bell peppers. Sear them in the same sauce for 4-5 minutes until tender-crisp. The umami sauce works beautifully with any fresh produce.
Teriyaki Fusion
Replace mirin with ¼ cup honey and add 1 tbsp teriyaki sauce for a sweeter, thicker glaze. This crowd-pleasing version bridges traditional hibachi with modern flavors. The honey caramelizes beautifully in the pan.
Sesame-Ginger Boost
Stir in 1 tbsp toasted sesame oil and 1 tsp grated ginger at the end for extra depth. The nutty sesame pairs perfectly with the ginger’s warmth. I always keep sesame oil in my pantry for this exact reason.
Kimchi Hibachi
Fold in 1 cup chopped kimchi with the chicken for a Korean-Japanese fusion. The fermented spice adds complexity that balances the buttery rice. It’s a trick I picked up from a chef friend in Atlanta. 🔥
Coconut Curry Style
Add ½ cup coconut milk and 1 tsp curry powder to the sauce. Simmer until thickened for a creamy, aromatic twist. This works surprisingly well with the sticky rice base.
Nutrition Facts
Frequently Asked Questions
What kind of pan works best for this?
A wok or large cast iron skillet is ideal for even heat distribution. Avoid nonstick for high-heat searing.
Can I use chicken thighs instead?
Yes! Thighs stay juicier and are more forgiving. Adjust cooking to 3-4 minutes per side.
How do I prevent the rice from sticking?
Rinse the rice thoroughly and let it steam undisturbed for 10 minutes after cooking.
What if I don’t have sake?
Substitute dry white wine or 1 tbsp rice vinegar plus 2 tbsp water for similar acidity.

- Jollof Rice Sauce Recipe: West African Tomato and Spice Infusion - September 25, 2026
- Japanese Rice Soup Recipe: Umami-Rich Comfort in a Bowl - September 25, 2026
- Homemade Cream Of Rice Recipe: Silk-Smooth Breakfast in Minutes - September 25, 2026