
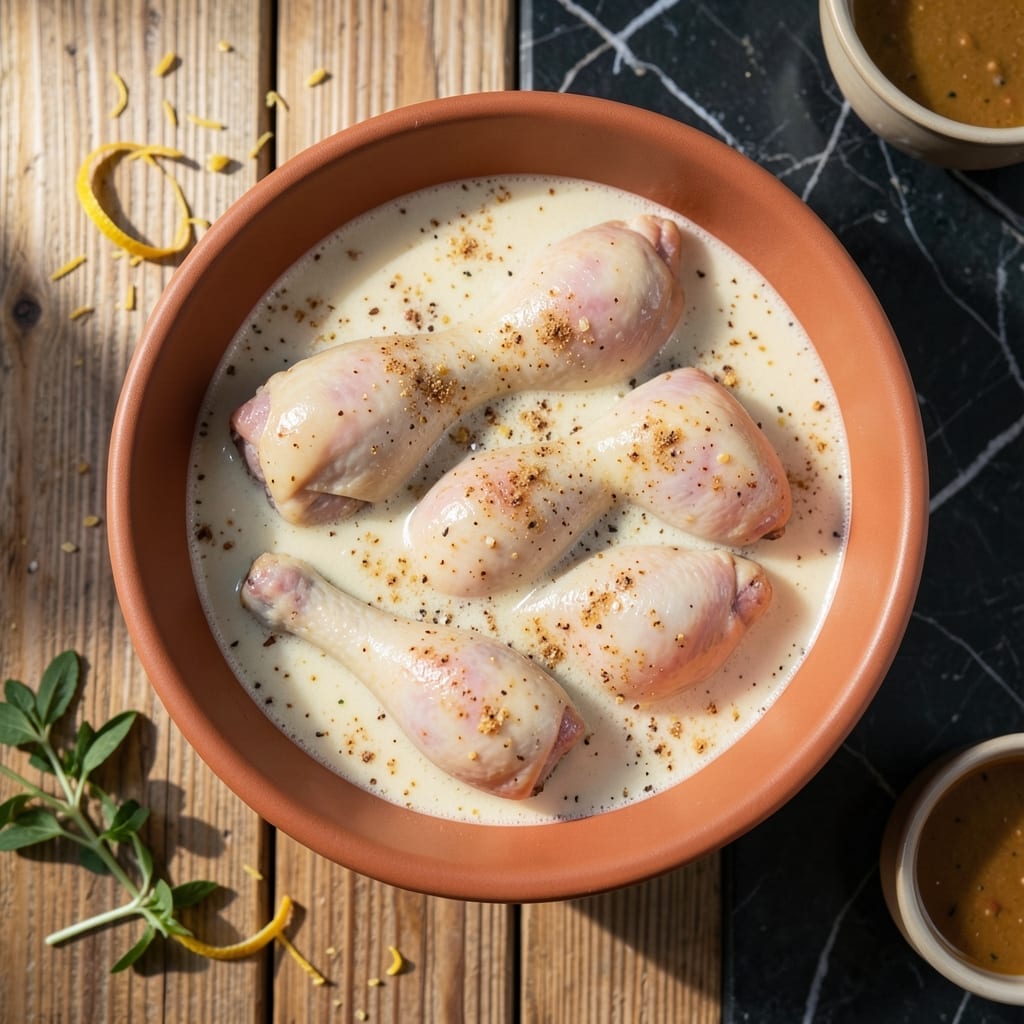
This buttermilk brine transforms ordinary chicken into crispy, juicy perfection. The acidity tenderizes while the dairy creates a coating that fries up golden and shatteringly crisp.
I developed this method after years of testing—overnight marinating ensures flavor penetrates deep. The buttermilk also helps the seasoned coating adhere better during frying.
The result is chicken with a crispy exterior and moist interior. The buttermilk works double duty as both brine and binder for the flour coating.
Serve hot for maximum crunch. This technique guarantees restaurant-quality fried chicken at home with minimal effort.
Ingredients for Marinate Chicken for Frying
Buttermilk, spices, and flour create that shatteringly crisp coating everyone loves on fried chicken.
| Ingredient | Amount | Notes |
|---|---|---|
| Chicken Thighs and Drumsticks 🍗 | 3 lb | Bone-in, skin-on for maximum crispiness |
| Buttermilk 🥛 | 4 cups | Full-fat for optimal tenderness and coating adhesion |
| Kosher Salt 🧂 | ¼ cup | Diamond Crystal preferred for even distribution |
| Granulated Sugar 🍚 | 2 tbsp | Balances salt and promotes browning |
| Garlic Powder 🧄 | 1 tbsp | Freshly ground for intense flavor |
| Onion Powder 🧅 | 1 tbsp | Enhances depth of seasoning |
| Smoked Paprika 🌶️ | 1 tbsp | Adds subtle smokiness to the crust |
| Black Pepper 🌶️ | 1 tbsp | Freshly ground for best results |
| Cayenne Pepper 🔥 | ½ tsp | Adjust to preferred heat level |
| All-Purpose Flour 🌾 | 3 cups | For the crispy outer coating |
| Cornstarch 🌽 | ½ cup | Ensures extra crispiness in the crust |
| Baking Powder 🧂 | 1 tsp | Helps coating puff and crisp |
| Vegetable Shortening 🫒 | 4 cups | For deep frying, maintains high heat |
The buttermilk is non-negotiable here—full-fat from a trusted dairy like Organic Valley or a local creamery ensures maximum tenderness and coating adhesion. For the chicken, bone-in, skin-on thighs and drumsticks yield the juiciest, most flavorful results. Look for pieces with consistent sizing for even cooking. The Diamond Crystal kosher salt (found at most Whole Foods locations) dissolves evenly, preventing overly salty spots.
Out of buttermilk? Whole milk plus 1 tbsp vinegar or lemon juice per cup works in a pinch (let it sit 5 minutes). For the flour coating, swap up to half with rice flour for extra crunch. If avoiding deep frying, an air fryer at 375°F with a light oil spray gets you close. The cayenne can be reduced or omitted for milder heat—half the amount still adds depth without spice.
The brine can be prepped 12-24 hours ahead—in fact, it’s better that way. Store raw marinated chicken in the fridge for up to 2 days. Fry in batches and keep warm in a 200°F oven on a wire rack. Leftovers? They’re best fresh, but reheat in a 350°F oven for 10-15 minutes to revive crispiness.
Why You’ll Love This Recipe
- 5-Minute Prep: I just whisk buttermilk, salt, sugar, and garlic powder then dump in the chicken—no chopping, no fuss.
- Crave That Crust: The buttermilk marinade makes the skin so crispy it crackles, with a sweet-garlicky punch in every bite.
- Feeds the Weekend: I batch-marinate on Friday and fry fresh for Saturday lunch, Sunday picnic, or even Monday tacos.
- Stretch the Budget: Thighs and drumsticks stay juicy and cheap, so I get two meals for the price of one.
Step-by-Step Instructions for Buttermilk-Brined Crispy Chicken
This method ensures maximum tenderness and a perfectly crisp coating every time.
Step 1: Prepare the Buttermilk Brine
In a large bowl, whisk together the 4 cups Buttermilk, 0.25 cup Kosher Salt, and 2 tbsp Granulated Sugar until the salt and sugar fully dissolve. This brine will both season and tenderize the chicken deeply.
Add the 1 tbsp Garlic Powder, 1 tbsp Onion Powder, 1 tbsp Smoked Paprika, 1 tbsp Black Pepper, and 0.5 tsp Cayenne Pepper. Stir thoroughly to distribute the spices evenly. The buttermilk’s acidity will help break down proteins for juicier meat.
Step 2: Brine the Chicken
Submerge all 3 lb Chicken Thighs and Drumsticks in the brine, ensuring each piece is fully coated. I press down gently to eliminate air pockets between the meat and brine. Cover the bowl and refrigerate for at least 12 hours, or up to 24 hours for optimal flavor penetration.
The longer marinating time allows the spices to work deep into the meat while the buttermilk’s enzymes tenderize the chicken. Don’t rush this step—it’s the foundation for both flavor and texture in your final dish.
Step 3: Prepare the Crispy Coating
In a separate large bowl, combine the 3 cups All-Purpose Flour, 0.5 cup Cornstarch, and 1 tsp Baking Powder. The cornstarch creates an extra-crispy crust while the baking powder helps the coating puff slightly during frying.
Whisk until the mixture is completely uniform with no visible streaks. This dry mix will create a shatteringly crisp exterior that contrasts perfectly with the juicy, brined meat inside.
Step 4: Coat and Rest the Chicken
Remove the chicken from the brine and let excess drip off. Immediately dredge each piece in the flour mixture, pressing firmly to adhere the coating to all surfaces. Shake off any excess flour—too much will create a thick, gummy layer rather than a crisp one.
Place the coated chicken on a wire rack set over a baking sheet. Let it rest at room temperature for 15-20 minutes to allow the coating to set. This resting period helps the crust adhere better during frying and prevents it from falling off.
Step 5: Heat the Frying Medium
In a deep, heavy pot or Dutch oven, melt the 4 cups Vegetable Shortening over medium heat until it reaches 350°F on a deep-fry thermometer. Use enough oil to submerge the chicken pieces completely for even cooking.
Maintain the oil temperature carefully—if it drops below 325°F, the chicken will absorb oil and become greasy. If it exceeds 375°F, the outside may burn before the inside cooks through. The shortening’s high smoke point makes it ideal for this application.
Pro Tips For Making Marinate Chicken For Frying
- Marinate overnight: I learned this the hard way—chicken needs at least 12 hours in the buttermilk to tenderize properly, so plan ahead.
- Pat dry thoroughly: After soaking, pat the chicken completely dry with paper towels to guarantee a crispy crust when fried.
- Skip the sugar: Sounds weird, but it works: omit the granulated sugar if you want a savory crust instead of a sweet one.
- Use full-fat buttermilk: My grandmother swore by this, and she was right: the higher fat content actually changes the outcome, making the chicken juicier.
Essential Equipment for This Recipe
Deep Frying Setup
For consistent results, I rely on a 5-quart Dutch oven—my Lodge enamel cast iron distributes heat evenly and maintains stable oil temperature. The heavy base prevents hot spots that can burn your chicken. A candy/deep-fry thermometer is non-negotiable for monitoring oil temp between 325-375°F. 🌡️
Temperature Control Tools
Clip the thermometer to the pot side, ensuring the probe doesn’t touch the bottom. I prefer Taylor Precision or ThermoWorks models for accuracy. Maintain 350°F by adjusting your burner heat as needed—gas stoves offer more precise control than electric.
Draining Station
Set up a wire rack over a baking sheet near your frying station. This allows excess oil to drip off while keeping the chicken crisp. I line the sheet with parchment paper for easy cleanup. Never drain directly on paper towels—it creates a soggy bottom.
Safety Equipment
Keep a fire extinguisher rated for grease fires nearby—never use water on oil fires. I also wear heat-resistant gloves and use long-handled tongs to avoid burns. A splatter screen helps contain oil pops during frying.
Alternative Frying Options
For smaller batches, a deep fryer with temperature control works well. I’ve had success with Cuisinart’s 4-quart model. For air frying, preheat to 375°F and spray pieces lightly with oil for crispiness. 🔥
Post-Fry Tools
A wire cooling rack is essential for maintaining crispness. I use a stainless steel one that fits over my half-sheet pan. Keep finished pieces warm in a 200°F oven while frying remaining batches.
Nutrition Facts
Frequently Asked Questions
What’s the minimum marinating time for crispy results?
For noticeable tenderness and flavor, 12 hours is the absolute minimum. The buttermilk needs this time to penetrate the meat and begin breaking down proteins. Less than this, and you risk dry, bland chicken.
Why does the coating sometimes fall off during frying?
This usually happens if the chicken wasn’t rested after coating or the oil temperature was too low. Resting for 15-20 minutes helps the flour adhere. Oil below 325°F creates a greasy, loose crust instead of a crisp one.
Can I use milk instead of buttermilk in a pinch?
Yes, but add 1 tbsp vinegar or lemon juice per cup of milk and let it sit for 5 minutes to mimic buttermilk’s acidity. Full-fat milk works best for richness and coating adhesion.

- Jollof Rice Sauce Recipe: West African Tomato and Spice Infusion - September 25, 2026
- Japanese Rice Soup Recipe: Umami-Rich Comfort in a Bowl - September 25, 2026
- Homemade Cream Of Rice Recipe: Silk-Smooth Breakfast in Minutes - September 25, 2026