
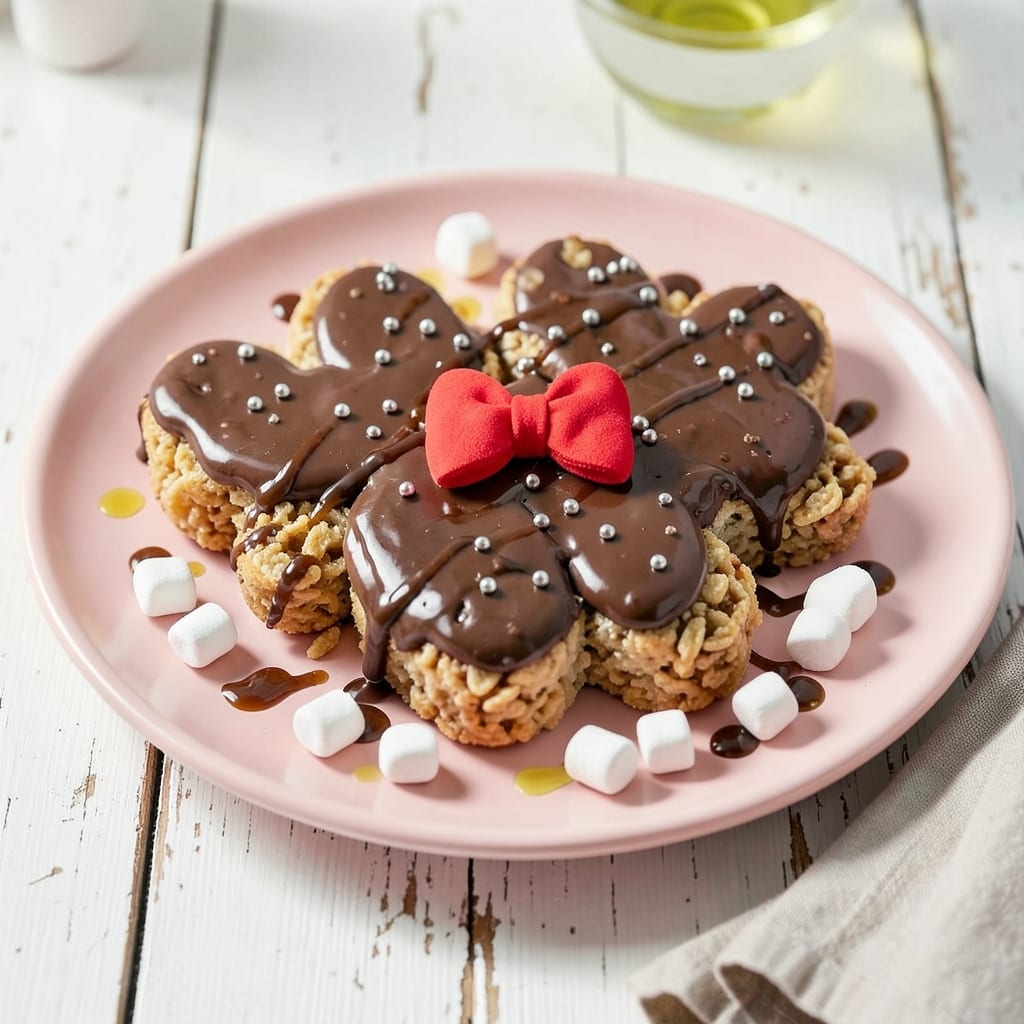
These Rice Krispie treats bring Disney magic to your kitchen with minimal effort. The classic recipe gets a playful twist with simple shaping and decoration techniques.
I’ve perfected the method to create perfectly chewy squares every time, using just a few pantry staples. The key is melting the marshmallows and butter just enough to coat the cereal without making it soggy.
Transforming them into Minnie Mouse treats is easier than you think. A round cookie cutter and a few chocolate details add her signature look without fuss.
Ideal for parties, lunchboxes, or a fun weekend project with kids. The results are as delightful as they are delicious.
Ingredients for Minnie Mouse Rice Krispie Treats
Pantry staples plus a few fun decorations bring this playful treat to life.
| Ingredient | Amount | Notes |
|---|---|---|
| Rice Krispies Cereal 🥣 | 6 cups | Standard variety preferred |
| Mini Marshmallows ⚪ | 10 oz | Fresh for best melt |
| Unsalted Butter 🧈 | ½ cup | Cut into pieces for melting |
| Vanilla Extract 🌿 | 1 tsp | Pure for best flavor |
| Salt 🧂 | ¼ tsp | Fine grain preferred |
| Milk Chocolate Chips 🍫 | 1 cup | For Minnie’s ears and bow |
| White Chocolate Chips ⚪ | ½ cup | For Minnie’s face details |
| Black Icing Gel ⚫ | 1 tbsp | For Minnie’s eyes and nose |
| Red Sprinkles 🎀 | ¼ cup | For Minnie’s signature bow |
| Round Cookie Cutter 🍪 | 1 whole | About 3 inches in diameter |
The marshmallows are key here—Jet-Puffed or Kraft brands melt the smoothest. Use fresh marshmallows (not the stale ones lurking in your pantry) for that perfect stretchy texture. Butter quality matters less, but unsalted keeps the flavor clean. I grab mine from Walmart or whatever’s on sale. For the cereal, Kellogg’s Rice Krispies are the gold standard, but any crispy rice cereal works.
No mini marshmallows? Large ones cut into quarters work fine (just melt them slower). Out of milk chocolate? Semi-sweet chips at half the amount give a deeper flavor. The white chocolate can be swapped for candy melts if that’s what you have. For the black details, a sharpie food marker works in a pinch (or use chocolate chips melted with a tiny bit of oil).
These keep at room temp for 2-3 days in an airtight container. If it’s humid, pop them in the fridge to prevent stickiness. Decorate the day you make them—the chocolate details can get soft if left too long. Perfect for parties (or 30 minutes of quiet kid time while you prep).
Why You’ll Love This Recipe
- 5-Minute Magic: I melt the butter, toss in marshmallows, and before the kids finish arguing over who gets the red bowl, we’re pressing Minnie-shaped treats.
- Nostalgic Crunch: That buttery vanilla hit with the Rice Krispies snap takes me straight back to childhood—only now I’m the one sneaking seconds.
- Party Ready: Honestly, they’re my secret for birthday parties, school events, and yes, even a Tuesday night pick-me-up.
- Pennywise Perfection: A box of cereal, a bag of mini marshmallows, and I’ve got a crowd-pleaser that costs less than a fancy coffee.
Step-by-Step Instructions for Minnie Mouse Rice Krispie Treats
Transform simple ingredients into these adorable treats with a few easy shaping steps.
Step 1: Melt and Mix the Base
In a large pot, melt the 0.5 cup Unsalted Butter over low heat. Once fully melted, add all 10 oz Mini Marshmallows and stir constantly until completely smooth and creamy—this takes about 5-7 minutes.
Remove from heat and quickly stir in the 1 tsp Vanilla Extract and 0.25 tsp Salt. Then fold in all 6 cups Rice Krispies Cereal until every piece is evenly coated. Work fast—the mixture thickens as it cools.
Step 2: Shape the Minnie Mouse Faces
Grease your hands lightly with butter or oil to prevent sticking. Scoop about ½ cup of the mixture and press it firmly into the Round Cookie Cutter to form the face. Place on parchment paper and remove the cutter carefully.
Repeat until you’ve used about half the mixture for faces. Let them cool for 10 minutes to set before adding details. The circles should hold their shape but still be slightly tacky for decorations to adhere.
Step 3: Add Chocolate Ears and Bow
Melt the 1 cup Milk Chocolate Chips in the microwave in 20-second intervals, stirring between each until smooth. Use a spoon to pipe two rounded ear shapes on either side of each face circle. For the bow, pipe a small circle at the base of the face.
Immediately sprinkle the 0.25 cup Red Sprinkles onto the bow area while the chocolate is still wet. Press gently so they stick. Let the chocolate set for 5 minutes before moving.
Step 4: Create Face Details
Melt the 0.5 cup White Chocolate Chips the same way as the milk chocolate. Use a toothpick or small piping bag to pipe two small circles for eyes and a larger circle for the snout area on each face.
While the white chocolate is still wet, use the 1 tbsp Black Icing Gel to dot the pupils and add a tiny nose in the center of the snout. Let everything set completely—about 15 minutes at room temperature.
Pro Tips For Making Minnie Mouse Rice Krispie Treats
- Melt Butter Slow: Use low heat when melting the butter and marshmallows—I learned this the hard way after scorching two batches. Medium-low heat gives you smooth, even melting without that burnt caramel taste.
- Use Fresh Marshmallows: Skip the stale mini marshmallows, even if they’re on sale. Fresh ones melt more evenly and give that perfect stretchy texture that holds the Rice Krispies together.
- Press While Warm: Don’t wait for the mixture to cool before shaping the Minnie Mouse ears. Press it into the pan or molds right away—it sets fast, and you’ll lose the window for clean edges.
- Butter Your Hands: Rub a little unsalted butter on your hands before shaping the treats. Sounds simple, but it keeps the mix from sticking and makes smoothing those iconic Minnie Mouse curves way easier.
Flavor Customization for minnie mouse rice krispie treats
Chocolate Varieties
Swap milk chocolate for dark chocolate chips to give Minnie a more sophisticated look. The deeper color contrasts beautifully with white chocolate details. I prefer Ghirardelli for its smooth melting properties. 💛
Colorful Ears
For a playful twist, use pink or purple candy melts instead of milk chocolate for the ears. This adds a pop of color while keeping the classic Minnie silhouette. The candy melts set faster than chocolate chips.
Alternative Bow Styles
Try chocolate jimmies or nonpareils instead of red sprinkles for the bow. These add texture and a different visual effect. Press them gently into the melted chocolate so they adhere properly.
Flavor Boosters
Add ½ tsp almond extract with the vanilla for a subtle nutty flavor. Or mix in 1 tbsp peanut butter with the melted marshmallows for a rich, nutty twist that kids love.
Gluten-Free Option
Use gluten-free Rice Krispies (like Kellogg’s GF version) to make these treats safe for everyone. The texture is identical to the original, so no one will notice the difference.
Seasonal Themes
For holidays, swap the red sprinkles for green and red at Christmas or pastel colors for Easter. The basic technique stays the same, just change the colors to match the occasion. ✨
Nutrition Facts
Frequently Asked Questions
Can I use regular marshmallows instead of mini?
Yes! Cut 10 large marshmallows into quarters for even melting. They’ll take slightly longer to dissolve but work just as well. Stir constantly to prevent burning.
How do I keep the treats from sticking to the cookie cutter?
Grease the cutter lightly with butter or cooking spray before each use. Press the mixture in firmly, then tap the sides gently to release.
Can I make these ahead of time?
Prepare the base a day early, but add decorations the same day. The chocolate details soften if left overnight. Store undecorated treats in an airtight container at room temperature.
What if my chocolate doesn’t melt smoothly?
Microwave in 15-second bursts, stirring between each. Overheating causes clumping. Add ½ tsp coconut oil to thin if needed.

- Lump Rice Recipe Sri Lanka: Traditional Island-Style Texture - November 4, 2026
- Laos Sticky Rice Recipe: Traditional Steamed Perfection - November 4, 2026
- Magic Rice Recipe: One-Pot Aromatic Wonder - November 4, 2026