
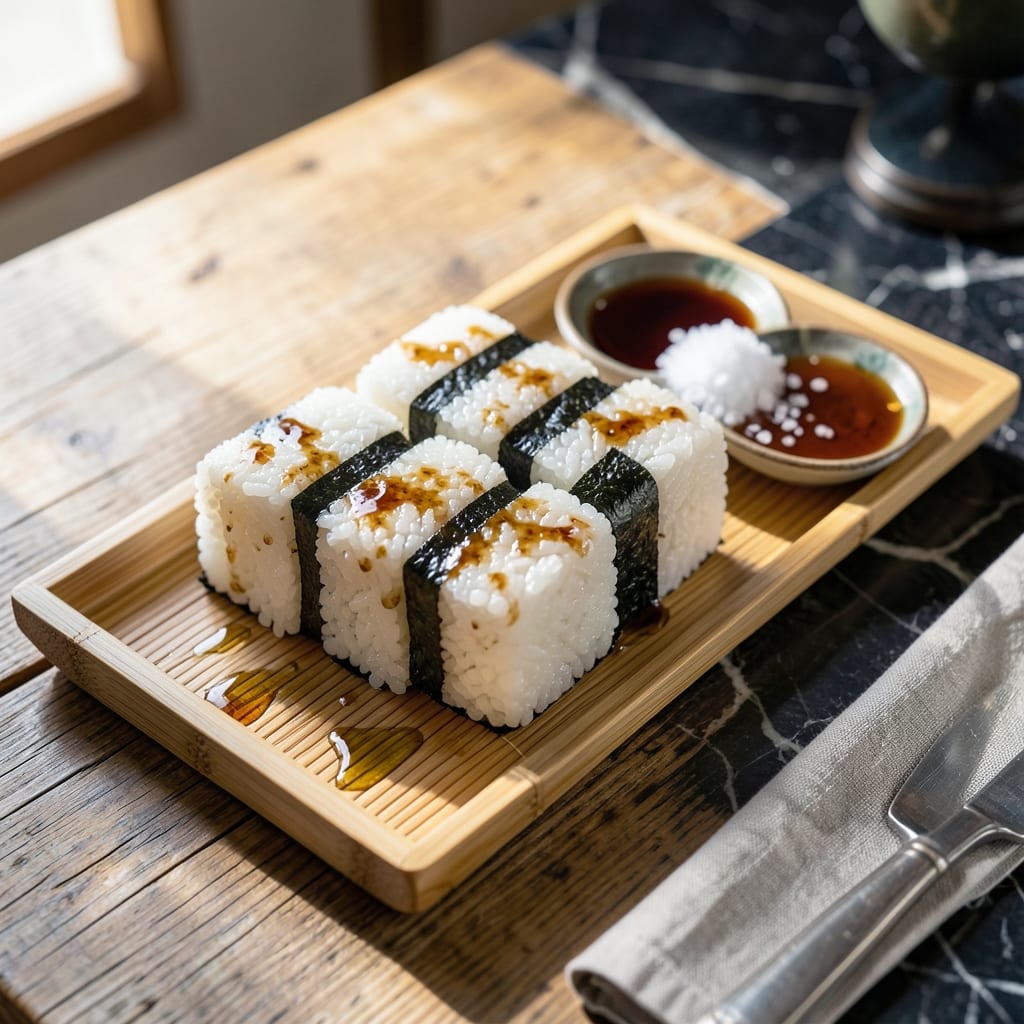
This recipe delivers the perfect balance of sweet and sticky rice that defines authentic musubi. I’ve refined the technique to achieve the ideal texture—firm enough to hold its shape, yet tender enough to melt in your mouth.
The secret lies in the precise ratio of rice to seasoning and proper steaming. This foundation works for classic Spam musubi or creative variations like umeboshi or teriyaki chicken. The rice must be fresh and warm when shaping for best results.
You’ll create handheld bites with the signature glossy sheen and subtle sweetness that makes musubi irresistible. The nori wrap adds the final touch, transforming simple ingredients into a portable, satisfying meal.
Master this base and you’ll have endless possibilities for fillings and flavor combinations. The technique ensures consistent quality every time.
Ingredients for Musubi Rice
Simple ingredients, perfect texture. Warm rice holds shape beautifully for handheld bites.
| Ingredient | Amount | Notes |
|---|---|---|
| Japanese Short-Grain White Rice 🍚 | 2 cups | Rinsed until water runs clear |
| Water 💧 | 2 ½ cups | For cooking rice |
| Rice Vinegar 🍶 | ⅓ cup | Unseasoned variety preferred |
| Granulated Sugar 🍚 | 2 tbsp | Dissolved in vinegar mixture |
| Sea Salt 🧂 | 1 tsp | Fine grain for even distribution |
| Soy Sauce 🥢 | 1 tbsp | Low-sodium for balance |
| Nori Sheets 🍙 | 2 sheets | Cut into strips for wrapping |
| Sesame Seeds 🌰 | 1 tsp | Toasted for garnish |
| Green Onions 🧅 | 2 whole | Thinly sliced for garnish |
| Neutral Oil 🫒 | 1 tsp | For greasing mold |
The rice is non-negotiable here—Japanese short-grain like Koshihikari or Calrose is essential. Nishiki or Botan brands at any Asian market (or Whole Foods) work great. Rinse until the water runs completely clear to remove excess starch (this prevents gumminess). I’ve tried jasmine and basmati before—don’t. The texture just isn’t the same for musubi’s signature stickiness.
No rice vinegar? Apple cider vinegar in a pinch, but the flavor won’t be as clean. Short on nori? Furikake seasoning adds a similar umami punch. The sugar can be swapped for honey (1:1 ratio), but traditional recipes stick with granulated. For extra shine, brush the shaped musubi with a little mirin or extra soy sauce before wrapping.
Cooked rice stays fresh for 1 day at room temp (covered), but it’s best used immediately. Shaped musubi keep in the fridge for 3-4 days—wrap tightly in plastic. Freezing works too (up to 1 month), but reheat gently to avoid drying out. The nori sheets? Store in a cool, dark place to prevent sogginess.
Why You’ll Love This Recipe
- One Pot Wonder: I just dump rice, water, and a splash of vinegar into my rice cooker—no stirring, no fuss.
- Sweet-Savory Balance: The sugar and sea salt in the vinegar mix hit that perfect sweet-tangy note every time.
- Lunchbox Hero: Honestly, it’s my kids’ favorite to grab and go, and it keeps beautifully for days.
- Pocket-Friendly Staple: Japanese short-grain rice stretches so far, and I always have the ingredients on hand.
Step-by-Step Instructions for Musubi Rice
This method guarantees perfectly seasoned, sticky rice that holds its shape beautifully in every bite.
Step 1: Rinse and Cook the Japanese Short-Grain White Rice
Place the 2 cups Japanese Short-Grain White Rice in a fine-mesh strainer and rinse under cold water until the water runs completely clear. This removes excess starch that could make the rice gummy rather than perfectly sticky.
Combine the rinsed rice with the 2.5 cups Water in a rice cooker or heavy pot. Cook according to your rice cooker’s instructions or bring to a boil, then reduce to a simmer, cover, and cook for 15 minutes. Remove from heat and let it steam, covered, for an additional 10 minutes.
Step 2: Prepare the Seasoning Mixture
While the rice cooks, combine the 0.33 cup Rice Vinegar, 2 tbsp Granulated Sugar, 1 tsp Sea Salt, and 1 tbsp Soy Sauce in a small saucepan. Heat over medium-low heat just until the sugar and salt dissolve completely—this should take 2-3 minutes.
Don’t let the mixture boil, as this can cause the vinegar to evaporate too quickly and concentrate the flavors unevenly. You want a smooth, balanced seasoning liquid that will distribute perfectly through the warm rice.
Step 3: Season the Cooked Rice
Transfer the warm cooked rice to a large wooden or glass bowl. Using a rice paddle or silicone spatula, gently fold in the vinegar mixture with a cutting motion. Continue folding for 2-3 minutes until the rice is evenly coated and has a glossy appearance.
Let the seasoned rice cool for 10 minutes at room temperature. As it cools, you’ll notice the grains firm up slightly while maintaining their stickiness—this is exactly what you want for musubi that holds together without falling apart.
Step 4: Shape and Wrap the Musubi
Lightly grease a musubi mold or your hands with the 1 tsp Neutral Oil to prevent sticking. Take a handful of the seasoned rice (about ½ cup) and press it firmly into the mold or shape it into a rectangular block by hand, compacting it well.
Cut the 2 sheets Nori Sheets into strips about 1 inch wide. Wrap a strip around each rice block, pressing gently to adhere. The nori should encircle the rice completely with a slight overlap.
Step 5: Garnish and Serve
Toast the 1 tsp Sesame Seeds in a dry pan over medium heat for 30-60 seconds until fragrant and just beginning to brown. Thinly slice the 2 whole Green Onions and sprinkle both over the musubi.
Serve immediately while the rice is still warm and the nori is crisp. Each bite should deliver the perfect balance of sweet, salty, and umami flavors with that characteristic sticky texture that makes musubi so satisfying.
Pro Tips For Making Musubi Rice
- Rinse the Rice: Wash the Japanese short-grain rice until the water runs clear—this removes excess starch so your musubi rice sticks together without turning gummy.
- Use Vinegar Last: Fold in the rice vinegar, sugar, and salt mixture only after the rice is cooked and still warm, so the flavors absorb evenly.
- Keep It Warm: Cover the rice with a damp towel while shaping to prevent drying out—cold rice crumbles and ruins the texture.
- Salt the Mix: Dissolve the sea salt and sugar fully in the rice vinegar before mixing into the rice, or you’ll get uneven seasoning and grainy bites.
Essential Equipment for Perfect Results
Rice Cooker Essentials
Invest in a quality Japanese rice cooker like the Zojirushi Neuro Fuzzy for foolproof musubi rice. Its precise temperature control ensures even cooking and the perfect sticky texture. I’ve tried cheaper models, but the consistency isn’t the same. 💪
Wooden Rice Paddle
A wooden rice paddle (shamoji) is non-negotiable for handling the sticky rice. The flat surface and slight curve help fold the seasoning evenly without crushing the grains. Avoid metal utensils that can damage your cookware.
Musubi Mold
While you can shape by hand, a musubi mold (about $10 on Amazon) creates perfectly uniform blocks every time. Look for BPA-free plastic or wooden molds. Lightly oil it before each use to prevent sticking.
Nori Cutting Tool
A nori cutter or sharp kitchen shears makes quick work of cutting sheets into 1-inch strips. I use Kai brand shears – they cut cleanly without tearing. Regular scissors work too, but may crush the delicate seaweed.
Place nori on a cutting board and slice in one motion for clean edges.
Steaming Setup
If cooking rice on the stovetop, a heavy pot with a tight-fitting lid is essential. After boiling, reduce to lowest heat for 15 minutes, then steam off-heat for 10 minutes. This mimics a rice cooker’s performance.
Cooling Rack
Spread seasoned rice on a wire cooling rack to cool evenly before shaping. This prevents the bottom from getting soggy. I let mine cool for 10 minutes – just enough to handle but still warm for shaping.
Nutrition Facts
Frequently Asked Questions
Can I use sushi rice instead of short-grain?
Yes! Sushi rice is just a type of short-grain rice, so it works perfectly. Rinse it until water runs clear to remove excess starch for the best texture.
How do I prevent the rice from sticking to my hands?
Wet your hands with water before handling the rice, or use a light coat of oil. A musubi mold also eliminates this problem entirely.
Why is my musubi falling apart?
If the rice isn’t sticky enough, you may need to adjust the vinegar mixture ratio or press harder when shaping. Use warm rice for best cohesion.
How long can I store shaped musubi?
Wrap tightly in plastic and refrigerate for up to 3-4 days. For longer storage, freeze for up to 1 month and thaw before eating.

- Lump Rice Recipe Sri Lanka: Traditional Island-Style Texture - November 4, 2026
- Laos Sticky Rice Recipe: Traditional Steamed Perfection - November 4, 2026
- Magic Rice Recipe: One-Pot Aromatic Wonder - November 4, 2026