
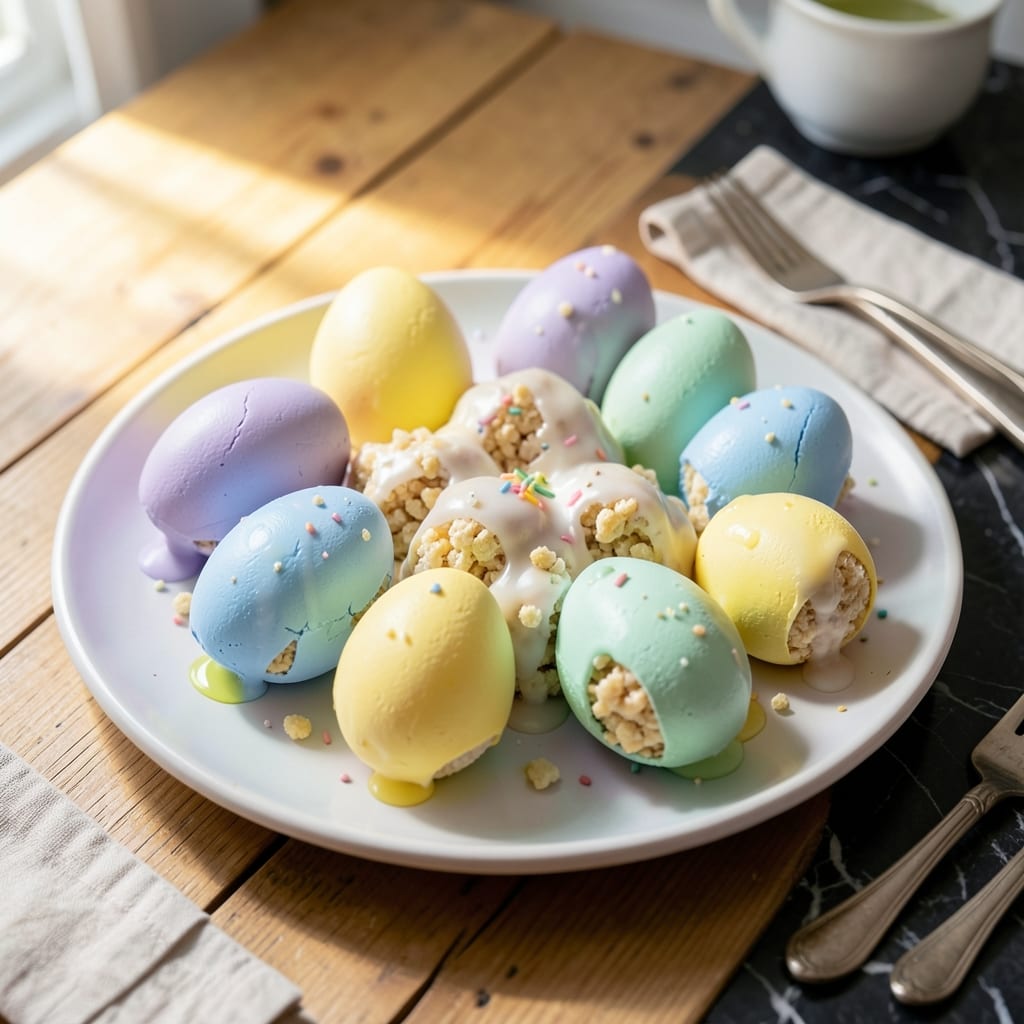
I developed this no-bake method after one too many Easter baskets filled with store-bought treats that couldn’t compare to homemade. These require just a few simple ingredients and come together in 15 minutes without turning on the oven.
The beauty lies in the simplicity: melted marshmallows and butter bind crispy rice cereal into moldable shapes. I use a greased egg mold to create perfect forms, but plastic eggs work equally well for a forgiving, kid-friendly project.
You’ll end up with colorful, festive treats that are as fun to make as they are to eat. The marshmallow mixture stays pliable just long enough to shape before setting into perfectly crisp eggs ready for decorating.
Customize with pastel food coloring or leave them classic. Either way, they’ll disappear faster than you can hide them.
Ingredients for Recipe for Rice Krispie Easter Eggs
Simple ingredients transform into festive no-bake treats in minutes. Perfect for Easter baskets.
| Ingredient | Amount | Notes |
|---|---|---|
| Rice Krispies Cereal 🥣 | 6 cups | Crispy rice cereal, fresh |
| Mini Marshmallows 🍬 | 10 oz | About 4 cups unpacked |
| Unsalted Butter 🧈 | 4 tbsp | For binding and flavor |
| Pastel Food Coloring 🎨 | ½ tsp | Gel or liquid type |
| Vanilla Extract 🌿 | 1 tsp | Pure extract preferred |
| Pinch of Salt 🧂 | 1 pinch | Enhances sweetness balance |
| Cooking Spray 🫒 | 1 can | For greasing molds |
| Plastic Easter Eggs 🥚 | 12 pieces | For shaping, or egg mold |
| White Chocolate Chips 🍫 | ½ cup | Optional for drizzling |
| Sprinkles 🎉 | ¼ cup | Pastel colors preferred |
The marshmallows are key here—Jet-Puffed or Kraft melt the smoothest. I grab mine from Target or Walmart in the baking aisle. Fresh Rice Krispies make a difference (the good stuff, not the stale box at the back of the pantry). Butter quality matters less here since it’s just for binding, but Land O’Lakes is my go-to for consistency.
No mini marshmallows? Large ones cut in half work just as well. Want to skip the food coloring? These are just as cute au naturel. The vanilla extract can be swapped for almond extract for a different flavor twist. If you’re out of cooking spray, butter on a paper towel does the trick for greasing molds (worth the extra minute).
Store leftovers in an airtight container at room temperature for up to 3 days. They’ll soften slightly but still taste great. For longer storage, freeze for up to 1 month—thaw at room temperature before serving.
Why You’ll Love This Recipe
- No Fuss Melting: I just melt butter and marshmallows in one pot, stir in cereal, and we’re halfway to Easter treats.
- Vanilla-Kissed Crunch: That hint of vanilla in the gooey marshmallow mix makes every crispy bite taste like a little celebration.
- Holiday Crowd Pleaser: I shape them into pastel eggs for the kids’ baskets or set them out at brunch—everyone grabs seconds.
- Budget Basket Filler: A box of cereal and a bag of mini marshmallows make two dozen eggs for the cost of a single chocolate bunny.
Step-by-Step Instructions for Rice Krispie Easter Eggs
This no-bake method delivers perfectly shaped treats with minimal effort and maximum festive charm.
Step 1: Melt and Color the Marshmallow Mixture
In a large pot over low heat, melt the 4 tbsp unsalted butter completely. Add the 10 oz mini marshmallows and stir constantly with a silicone spatula until fully melted and smooth. This takes about 5-7 minutes—watch for the mixture to pull away from the sides of the pot slightly.
Remove from heat and immediately stir in the 0.5 tsp pastel food coloring, 1 tsp vanilla extract, and 1 pinch pinch of salt. The color will deepen as it incorporates, so mix thoroughly for even distribution. The vanilla adds depth while the salt balances the sweetness perfectly.
Step 2: Incorporate the Rice Krispies Cereal
Working quickly while the mixture is still warm, add all 6 cups Rice Krispies Cereal to the pot. Fold gently but firmly with your spatula until every piece is evenly coated. You’ll notice the cereal begins to soften slightly as it absorbs the warm marshmallow mixture.
Stop mixing as soon as the cereal is fully incorporated—overworking will make the treats dense. The mixture should look glossy and hold together when pressed between your fingers. If it seems too sticky, let it cool for 1-2 minutes before proceeding.
Step 3: Shape Using Plastic Easter Eggs
Generously coat the inside of 12 pieces plastic Easter eggs with cooking spray. This prevents sticking and ensures clean release. Spoon the Rice Krispies mixture into both halves of each egg, pressing firmly to fill completely and create a smooth surface.
Close the eggs and let them set at room temperature for 15-20 minutes. The treats are ready when they hold their shape when gently pressed. If your kitchen is warm, a 10-minute chill in the refrigerator will speed up the process.
Step 4: Decorate with White Chocolate and Sprinkles
Microwave the 0.5 cup white chocolate chips in 20-second intervals, stirring between each, until fully melted and smooth. Drizzle over the set Easter eggs using a fork or piping bag for decorative lines.
Immediately sprinkle with 0.25 cup sprinkles while the chocolate is still wet. I like to use pastel colors for a cohesive look. Let the chocolate set completely for 10 minutes before serving or packaging. The final result should be vibrant, crisp on the outside, and perfectly chewy inside.
Pro Tips For Making Recipe For Rice Krispie Easter Eggs
- Melt Butter First: Always melt the butter completely before adding marshmallows, or they’ll stick and burn. I learned this the hard way after scraping charred marshmallow bits off the pan.
- Use Fresh Marshmallows: Stale mini marshmallows turn hard and won’t melt smoothly—check the bag’s date, or your eggs will be grainy instead of gooey.
- Color Before Adding Cereal: Mix the food coloring into the melted marshmallow-butter mixture first, not after the cereal goes in. It distributes evenly and saves you from dye-stained hands.
- Butter Your Hands: Lightly coat your hands with butter before shaping the eggs—it prevents sticking and makes the process way less messy.
Essential Equipment for This Recipe
Essential Pot
I use my 5-quart Dutch oven for melting the marshmallow mixture—its heavy base prevents scorching at low heat. A large pot gives you room to stir without spilling as the marshmallows expand. Avoid nonstick if possible, as the silicone spatula can scratch the surface. 🔥
Silicone Spatula
A heat-resistant silicone spatula is non-negotiable here. It scrapes every last bit of melted marshmallow from the pot and folds the cereal without crushing it. I keep a red OXO Good Grips one dedicated to sweet projects to avoid savory cross-contamination.
Plastic Easter Eggs
These are your molds—look for smooth plastic eggs that snap together tightly. I found a 12-piece set at Target for under $5 last year. Pro tip: if you can’t find eggs, a greased muffin tin works for nest shapes instead.
Cooking Spray
Don’t skip the cooking spray—it’s the difference between perfect release and a sticky disaster. I use PAM Baking with its flour blend for extra insurance. Spray generously and reapply between batches if making multiple colors.
Parchment Paper
Line your workspace with parchment paper for easy cleanup. When shaping freeform eggs, the paper prevents sticking to your counter. I buy the pre-cut sheets from Trader Joe’s—they’re the perfect size for this project.
Decorating Tools
For the white chocolate drizzle, a fork works fine, but a piping bag gives you more control. I also keep a small offset spatula handy for smoothing any rough edges before the chocolate sets. ✨
Nutrition Facts
Frequently Asked Questions
Can I use regular marshmallows instead of mini?
Yes, just cut them into smaller pieces first. Mini marshmallows melt faster and more evenly, but regular ones work in a pinch. Expect the melting process to take about 2-3 minutes longer.
How do I keep the eggs from sticking to the molds?
Coat the plastic eggs thoroughly with cooking spray before adding the mixture. For extra insurance, lightly spray your hands when pressing the cereal into the molds. This ensures clean release every time.
Can I make these ahead of time?
Store undecorated eggs in an airtight container at room temperature for up to 3 days. Add the white chocolate drizzle and sprinkles the day of serving for the freshest look.
What if my mixture hardens before I finish shaping?
No worries—just microwave the mixture in the pot for 10-15 seconds to soften it. Work quickly, as it sets fast once it starts cooling. Avoid reheating more than once.

- Gambia Jollof Rice Recipe: West African One-Pot Spice Fusion - October 5, 2026
- Cream of Wild Rice Soup Recipe Minnesota: Northwoods Creaminess With Foraged Grains - October 5, 2026
- Frozen Cauliflower Fried Rice Recipe: Quick Low-Carb Wok Magic - October 5, 2026