
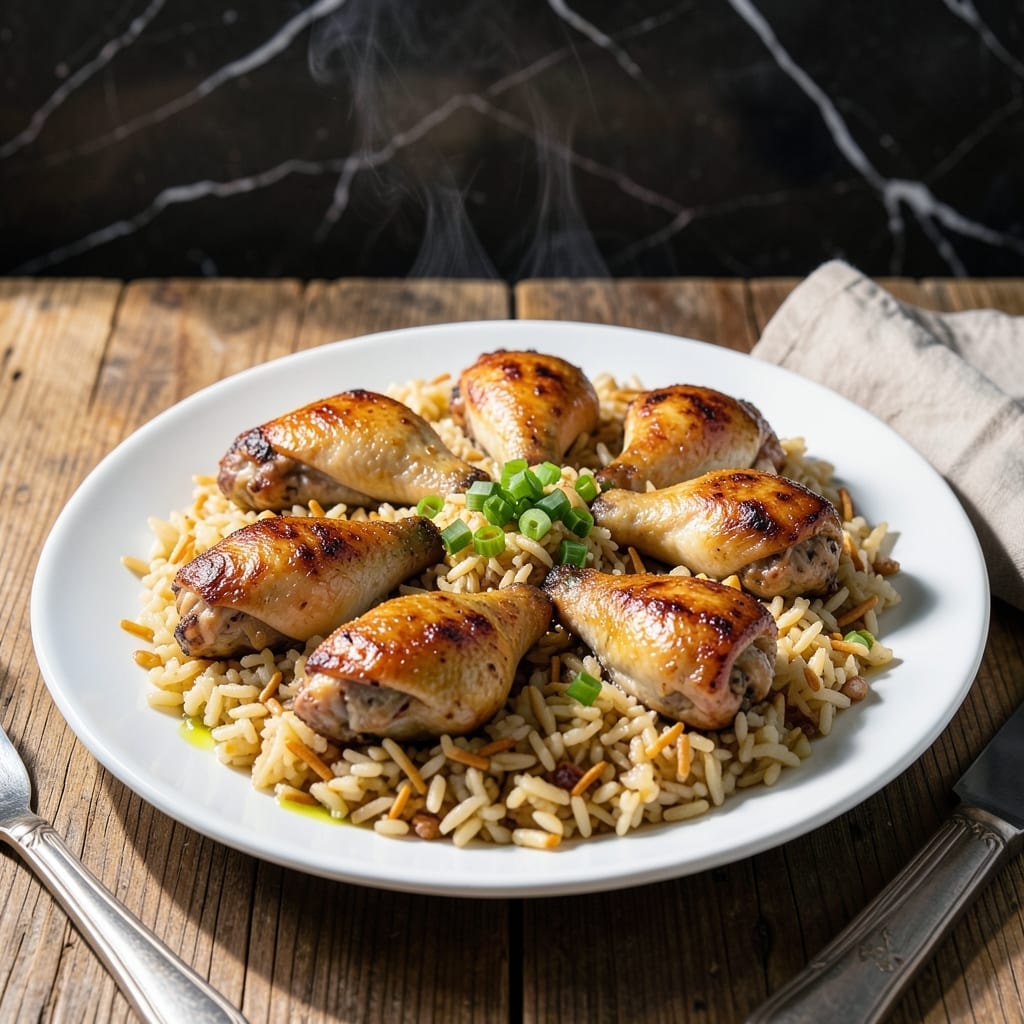
This dish combines tender chicken with savory Rice-A-Roni for a one-pan meal that’s both hearty and hassle-free. The chicken emerges with a golden crust, while the grains soak up all the juices, creating a flavorful base.
I developed this method after years of testing, ensuring the chicken cooks evenly and the rice absorbs just the right amount of moisture. It’s a foolproof approach that delivers consistent results every time.
What you’ll get is juicy chicken atop perfectly seasoned rice, with every bite packed with savory depth. The simplicity of this recipe makes it ideal for busy weeknights or casual gatherings.
Serve it straight from the oven for a meal that’s as satisfying as it is easy to prepare.
Ingredients for Rice a Roni Baked Chicken
Golden chicken and savory rice unite in this one-pan wonder with minimal prep.
| Ingredient | Amount | Notes |
|---|---|---|
| Chicken Thighs 🍗 | 6 pieces | Boneless, skin-on for crispiness |
| Rice-A-Roni 🍚 | 2 boxes | Beef or chicken flavor |
| Butter 🧈 | 4 tbsp | Unsalted, melted |
| Chicken Broth 🥣 | 2 ½ cups | Low-sodium preferred |
| Garlic Powder 🧄 | 1 tsp | For enhanced seasoning |
| Onion Powder 🧅 | 1 tsp | Balances savory notes |
| Paprika 🌶️ | 1 tsp | Smoked or sweet variety |
| Salt 🧂 | ½ tsp | Kosher or sea salt |
| Black Pepper 🌶️ | ½ tsp | Freshly ground preferred |
| Olive Oil 🫒 | 2 tbsp | For searing chicken |
| Fresh Parsley 🌿 | ¼ cup | Chopped, for garnish |
The chicken thighs are non-negotiable for that golden crust—skin-on, bone-in delivers the crispest results. I source mine from Whole Foods or a trusted local butcher for consistent quality. Rice-A-Roni (beef or chicken flavor) is the base here; the seasoning packet is already perfectly balanced, so resist the urge to over-season.
Out of chicken thighs? Bone-in breasts work but may dry out faster—reduce cooking time by 5 minutes. No Rice-A-Roni? Near East or Knorr’s rice pilaf mixes are solid stand-ins. For extra richness, swap the butter for ghee. The broth can be homemade, but Swanson’s low-sodium is my go-to for convenience.
Leftovers reheat beautifully. Store in an airtight container for up to 4 days in the fridge or freeze for 3 months. The crispy chicken skin softens upon storage, but the flavors deepen—worth every bite.
Why You’ll Love This Recipe
- One Pan Magic: I toss the chicken thighs and Rice-A-Roni in a dish, pour in the broth, and let the oven do the rest.
- Garlic Butter Bliss: The butter and garlic powder soak into the chicken and rice, making every bite rich and savory.
- Weeknight Hero: Between us, this is my go-to for busy evenings when I need dinner on the table fast.
- Budget Friendly: Chicken thighs and Rice-A-Roni stretch farther than you’d think, and it tastes like a million bucks.
Step-by-Step Instructions for Rice A Roni Baked Chicken
Here’s the method to achieve perfectly crispy chicken thighs atop flavorful, savory rice.
Step 1: Season and Sear the Chicken Thighs
Pat the 6 pieces Chicken Thighs dry with paper towels to ensure maximum crispiness. Season both sides evenly with 1 tsp Garlic Powder, 1 tsp Onion Powder, 1 tsp Paprika, 0.5 tsp Salt, and 0.5 tsp Black Pepper.
Heat 2 tbsp Olive Oil in a large oven-safe skillet over medium-high heat. Once shimmering, add the chicken skin-side down and sear for 5-6 minutes until the skin is deep golden brown and crisp. Flip and sear the other side for 3-4 minutes. Remove and set aside.
Step 2: Prepare the Rice-A-Roni Base
In the same skillet, reduce heat to medium and melt 4 tbsp Butter. Add the 2 boxes Rice-A-Roni and stir for 1-2 minutes until the rice and vermicelli noodles are lightly toasted. This enhances their nutty flavor and prevents a mushy texture.
Pour in 2.5 cups Chicken Broth and stir, scraping up any browned bits from the bottom of the skillet. These fond bits add depth of flavor to the rice. Bring the mixture to a gentle simmer.
Step 3: Combine and Bake
Return the seared chicken thighs to the skillet, nestling them skin-side up into the Rice-A-Roni mixture. Cover the skillet tightly with a lid or aluminum foil to trap steam, which ensures the chicken cooks through while the rice absorbs the liquid.
Transfer the skillet to a preheated 375°F oven and bake for 25-30 minutes. The chicken is done when it reaches an internal temperature of 165°F and the rice is tender with no remaining liquid.
Step 4: Rest and Garnish
Remove the skillet from the oven and let it rest, covered, for 5 minutes. This allows the juices in the chicken to redistribute, ensuring moist, flavorful meat.
Sprinkle with 0.25 cup Fresh Parsley just before serving. The parsley adds a pop of color and a fresh contrast to the rich, savory dish. Serve hot, with each portion featuring a crispy chicken thigh atop the seasoned rice.
Pro Tips For Making Rice A Roni Baked Chicken
- Brown the Chicken First: Sear the chicken thighs in the same pan you’ll bake in—about 3-4 minutes per side until golden. I learned this the hard way: skipping this step leaves the skin flabby and the rice bland from lack of fond.
- Use Hot Broth: Swap cold chicken broth for hot—straight from the tap or microwaved for 1-2 minutes. It jumpstarts the Rice-A-Roni cooking and prevents that weird crunchy patch in the middle.
- Skip the Water: Replace the water called for on the Rice-A-Roni box with extra chicken broth. Sounds obvious, but it actually changes the outcome—way more flavor in every bite.
- Cover Tightly: Press foil directly onto the baking dish before adding the lid or a second layer of foil. After burning three batches, I finally figured out that steam is non-negotiable for tender rice.
Pro Cooking Tips for This Recipe
Perfect Searing Technique
Pat those 6 chicken thighs bone-dry—this is non-negotiable for crispy skin. I use paper towels and press hard. Heat your oven-safe skillet (I swear by my vintage Lodge cast iron) until the 2 tbsp olive oil shimmers, then lay the chicken skin-side down without crowding. 🔥
Rice Toasting Trick
After removing the chicken, melt 4 tbsp butter in the same skillet. Add the 2 boxes Rice-A-Roni and toast for 1-2 minutes until golden. This step builds a nutty depth that makes the rice taste homemade, not boxed.
Liquid Ratio Secret
Use 2.5 cups chicken broth instead of water—the low-sodium kind prevents oversalting. Scrape up those browned bits; they’re pure flavor. Bring to a simmer before adding the chicken back in.
Baking Precision
Bake covered at 375°F for 25-30 minutes. Check at 25 minutes—if the rice is dry, add ¼ cup broth. The chicken’s done at 165°F, but I pull it at 170°F for extra juiciness. 💡
Resting Matters
Let it rest 5 minutes covered. This keeps the juices in the meat, not on your plate. Garnish with ¼ cup fresh parsley right before serving for that pop of color.
Nutrition Facts
Frequently Asked Questions
Can I use chicken breasts instead of thighs?
Yes, but use bone-in breasts and reduce baking time by 5 minutes. Thighs stay juicier, while breasts can dry out more easily.
What if my rice is still crunchy after baking?
Add ¼ cup broth, cover, and bake for another 5-10 minutes. Check liquid levels halfway through next time.
Do I need an oven-safe skillet?
A cast iron or stainless steel skillet works best for stovetop-to-oven cooking. Avoid nonstick unless labeled oven-safe.
Can I make this ahead?
Prepare up to the baking step, then refrigerate for up to 2 hours. Add 5 minutes to baking time if starting cold.

- Jollof Rice Sauce Recipe: West African Tomato and Spice Infusion - September 25, 2026
- Japanese Rice Soup Recipe: Umami-Rich Comfort in a Bowl - September 25, 2026
- Homemade Cream Of Rice Recipe: Silk-Smooth Breakfast in Minutes - September 25, 2026