
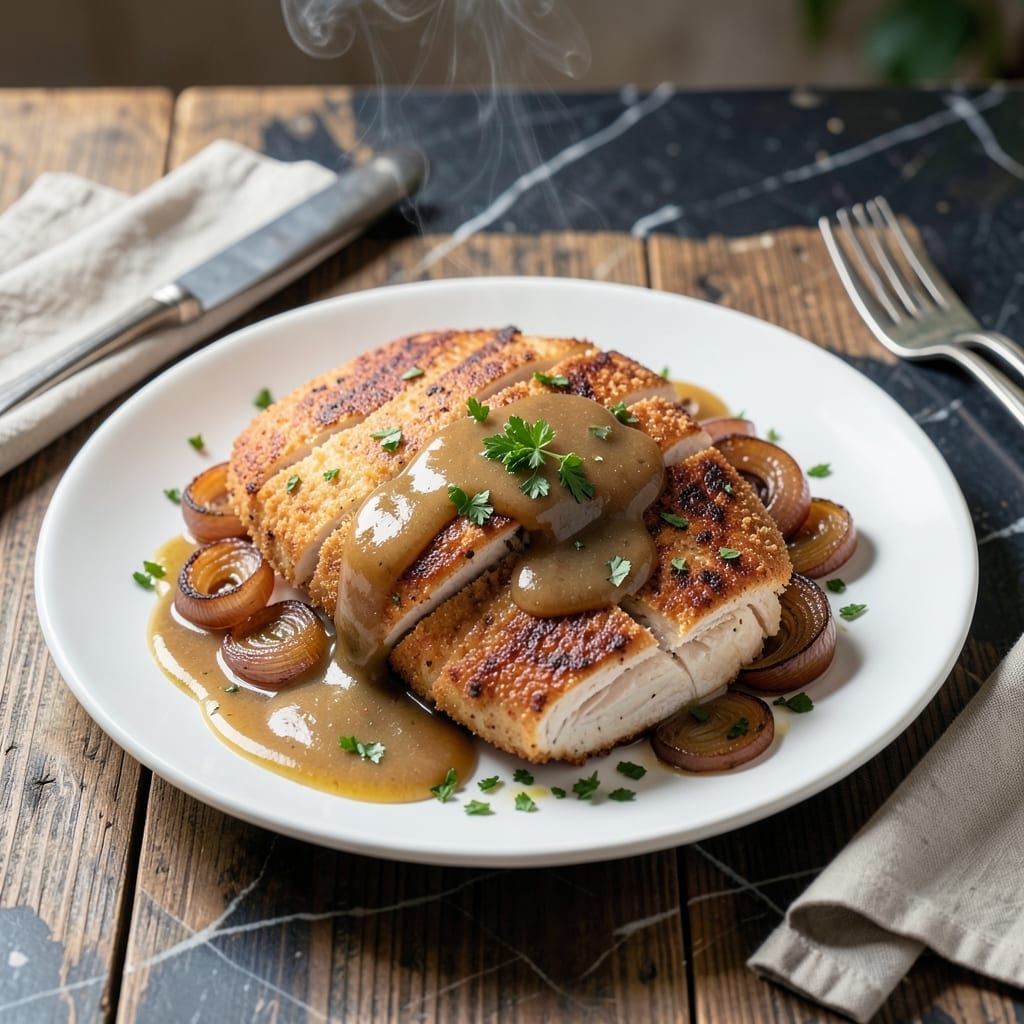
This smothered chicken breast delivers tender cutlets blanketed in a rich, velvety gravy that transforms an ordinary meal into something extraordinary. The key is searing the chicken until golden, then building layers of flavor in the same pan.
I use a simple technique of deglazing with broth to capture all the browned bits, then thicken the liquid into a luscious gravy. The chicken finishes cooking in this sauce, absorbing every bit of flavor while staying juicy and tender.
The result is chicken so succulent it nearly falls apart, topped with a gravy so thick and flavorful you’ll want to soak it up with every bite. Serve this with mashed potatoes or buttered noodles for the perfect comfort meal.
This method ensures consistent results every time, with minimal effort and maximum flavor. Here’s how to make it at home.
Ingredients for Smothered Chicken Breast
Simple ingredients create extraordinary flavor with tender chicken and rich gravy.
| Ingredient | Amount | Notes |
|---|---|---|
| Boneless Skinless Chicken Breasts 🍗 | 1 ½ lb | Pounded to even thickness |
| All-Purpose Flour 🌾 | ½ cup | For dredging chicken |
| Kosher Salt 🧂 | 1 ½ tsp | Divided for seasoning |
| Black Pepper 🌶️ | ¾ tsp | Freshly ground preferred |
| Garlic Powder 🧄 | 1 tsp | For gravy flavor |
| Onion Powder 🧅 | 1 tsp | Balances savory notes |
| Chicken Broth 🥣 | 2 cups | Low-sodium preferred |
| Whole Milk 🥛 | ½ cup | For creamy gravy |
| Unsalted Butter 🧈 | 3 tbsp | Divided for cooking and gravy |
| Olive Oil 🫒 | 1 tbsp | For searing chicken |
| Fresh Thyme 🌿 | 2 tsp | Chopped, for garnish |
| Worcestershire Sauce 💧 | 1 tsp | For depth of flavor |
The chicken quality matters most. Boneless, skinless breasts from Whole Foods or Costco stay juicier than pre-cut tenders. Pound them to even thickness (about ½-inch) so they cook uniformly. For the broth, Swanson low-sodium works well—avoid the overly salty generic brands. The butter should be European-style for better flavor in the gravy.
No fresh thyme? Dried thyme at one-third the amount works fine. Out of chicken broth? Vegetable broth plus a pinch of poultry seasoning gets close. For a dairy-free version, swap the milk for unsweetened almond milk and use olive oil instead of butter. The Worcestershire can be omitted, but it adds a nice depth.
Store raw chicken in the coldest part of your fridge and use within 2 days. The gravy thickens as it cools—reheat gently with a splash of broth. Leftovers keep 4-5 days refrigerated or freeze the chicken and gravy separately for 3 months.
Why You’ll Love This Recipe
- One Pan Meal: I love that I can sear the chicken, make the gravy, and serve it all from the same skillet—minimal cleanup.
- Garlic-Kissed Goodness: The garlic powder in the flour gives the chicken that warm, savory depth before it even hits the smothering sauce.
- Weeknight MVP: Honestly, it’s my go-to for busy evenings when I need something hearty that still feels like a treat.
- Stretches Far: Leftovers taste even better the next day, and the ingredients won’t break the bank.
Step-by-Step Instructions for Smothered Chicken Breast
This method guarantees tender chicken and rich gravy with every bite.
Step 1: Pound and Season the Chicken
Place the boneless skinless chicken breasts between two sheets of plastic wrap. Pound them to an even ½-inch thickness using a meat mallet. This ensures even cooking and prevents dry, overdone edges.
Season both sides generously with 1 tsp kosher salt and 0.75 tsp black pepper. The even thickness means the chicken will cook through at the same rate, keeping every piece juicy and tender.
Step 2: Dredge and Sear the Chicken
Spread the 0.5 cup all-purpose flour on a plate and mix in the remaining 0.5 tsp kosher salt. Lightly dredge each piece of chicken, shaking off any excess flour. This creates a golden crust and helps thicken the gravy later.
Heat 1 tbsp olive oil and 1 tbsp unsalted butter in a large skillet over medium-high heat until the butter foams. Add the chicken and cook for 4-5 minutes per side until golden brown. Transfer to a plate and tent with foil to keep warm.
Step 3: Build the Gravy Base
In the same skillet, reduce heat to medium and add the remaining 2 tbsp unsalted butter. Once melted, sprinkle in any leftover flour from the dredging plate. Stir constantly for 1-2 minutes to cook off the raw flour taste—this forms a light roux.
Gradually whisk in the 2 cups chicken broth, 0.5 cup whole milk, 1 tsp garlic powder, 1 tsp onion powder, and 1 tsp Worcestershire sauce. The mixture will thicken as it simmers. Stir frequently to prevent lumps.
Step 4: Simmer and Finish
Return the chicken to the skillet, spooning the gravy over the top. Reduce heat to low and simmer for 5-7 minutes until the chicken is cooked through and the gravy coats the back of a spoon. The internal temperature should reach 165°F.
Stir in the 2 tsp fresh thyme and adjust seasoning with additional salt and pepper if needed. The thyme adds a subtle earthy note that complements the rich, velvety gravy.
Pro Tips For Making Smothered Chicken Breast
- Pound the Breasts: Use a meat mallet to even out the thickness to ½ inch—this guarantees they cook through without drying out, especially since smothered chicken needs that long simmer.
- Season the Flour: Mix the kosher salt, black pepper, and garlic powder right into the flour before dredging; it sticks better and seasons every bite instead of just the surface.
- Skip the Overcrowding: I learned this the hard way—browning too many pieces at once steams the chicken instead of searing it, so work in batches if your pan isn’t huge.
- Deglaze for Flavor: After removing the chicken, pour in a splash of water or broth to lift those browned bits—it’s the easiest way to build a rich gravy without extra effort.
Pro Cooking Tips for smothered chicken breast
Perfect Pounding Technique
Place chicken between plastic wrap and use a meat mallet to pound to an even ½-inch thickness. This ensures uniform cooking and prevents dry spots. I use a Norpro meat mallet for consistent results. 💡
Ideal Searing Temperature
Heat your skillet to medium-high heat until the butter foams. The chicken should sizzle when added—if it doesn’t, your pan isn’t hot enough. A cast iron skillet works best for even heat distribution.
Gravy Thickness Control
After adding broth, simmer until the gravy coats the back of a spoon. If too thin, mix 1 tbsp cornstarch with 1 tbsp water and stir in. If too thick, thin with additional chicken broth. 🔥
Resting is Key
Let the chicken rest in the gravy for 5 minutes off heat before serving. This allows juices to redistribute, keeping the meat moist. Cover with foil to retain heat during this crucial step.
Flavor Layering
Add Worcestershire sauce and seasonings to the gravy early so flavors meld. Taste before final seasoning—you may need less salt if using regular broth instead of low-sodium.
Equipment Essentials
A heavy-bottomed skillet prevents scorching, and a whisk ensures smooth gravy. I prefer Lodge cast iron for its heat retention. The right tools make this dish foolproof.
Nutrition Facts
Frequently Asked Questions
What’s the best way to pound chicken evenly?
Place chicken between plastic wrap and use a meat mallet to reach ½-inch thickness. This ensures even cooking and prevents dry spots.
Can I use chicken thighs instead?
Yes! Boneless thighs work well and may stay juicier. Reduce cooking time by 2-3 minutes since thighs cook faster than breasts.
How do I fix lumpy gravy?
Whisk vigorously to break up lumps, or strain through a fine-mesh sieve. For prevention, add broth gradually while stirring constantly.
Should I cover the pan while simmering?
No, leave it uncovered to allow the gravy to thicken properly. Covering traps steam, which thins the sauce.

- Jollof Rice Sauce Recipe: West African Tomato and Spice Infusion - September 25, 2026
- Japanese Rice Soup Recipe: Umami-Rich Comfort in a Bowl - September 25, 2026
- Homemade Cream Of Rice Recipe: Silk-Smooth Breakfast in Minutes - September 25, 2026