
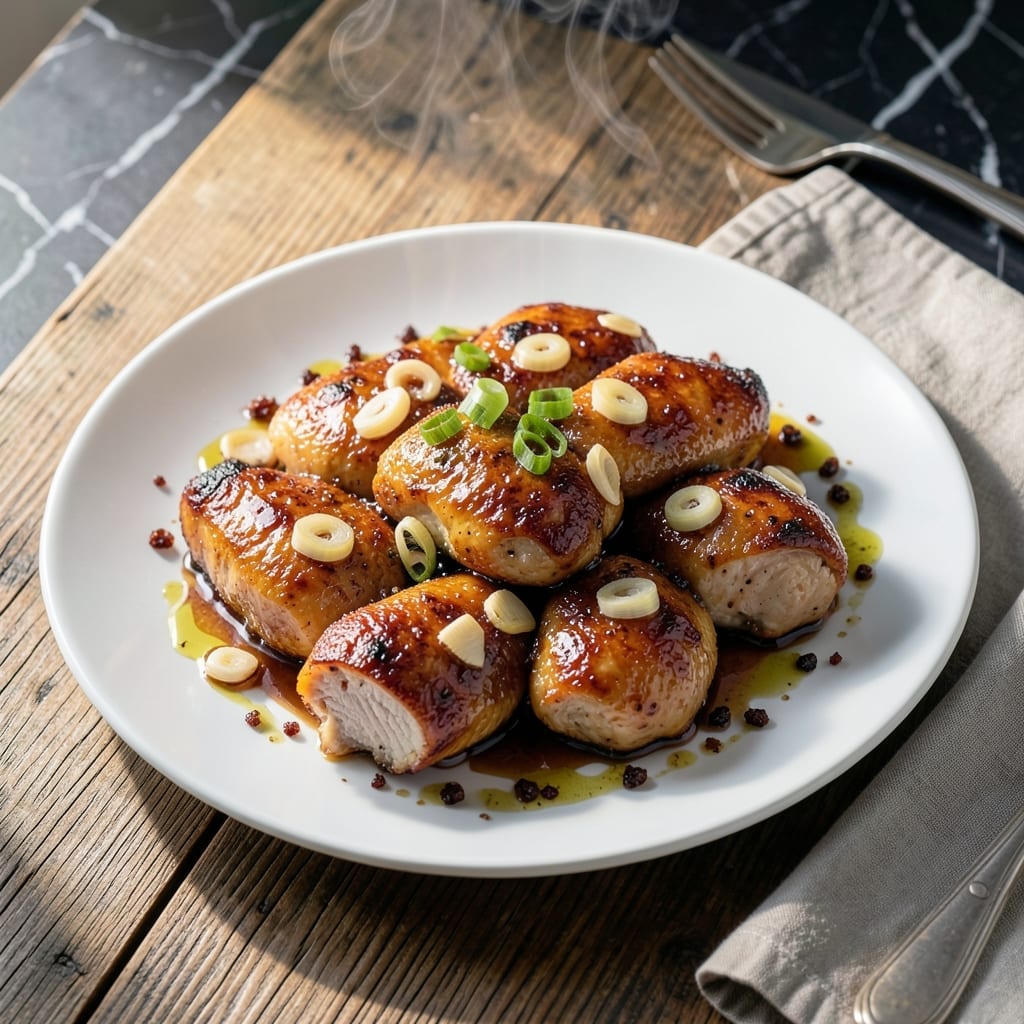
This pan-seared chicken delivers umami-rich flavor with every bite, thanks to a simple soy-garlic marinade that transforms ordinary chicken into something extraordinary. The key is balancing the salty depth of soy sauce with the pungent sweetness of fresh garlic.
I developed this method after years of testing, focusing on achieving golden-brown searing while keeping the meat juicy and tender. The sauce reduces in the same pan, creating a glossy glaze that clings to each piece of chicken.
The result is a dish that’s both elegant and approachable—perfect for weeknight dinners or impressing guests. Serve it with steamed rice and steamed veggies to soak up every drop of that savory sauce.
Here’s how to make this restaurant-quality meal at home with minimal effort and maximum flavor.
Ingredients for Soy Garlic Chicken
These thoughtful ingredients create a restaurant-quality pan-seared chicken with bold umami depth and glossy finish.
| Ingredient | Amount | Notes |
|---|---|---|
| Boneless Skinless Chicken Thighs 🍗 | 1 ½ lb | Patted dry for even searing |
| Soy Sauce 🫒 | ½ cup | Low-sodium preferred for balance |
| Fresh Garlic Cloves 🧄 | 6 cloves | Minced for maximum flavor release |
| Brown Sugar 🍚 | 2 tbsp | Light or dark for caramelization |
| Rice Vinegar 🍯 | 2 tbsp | Adds tangy brightness to sauce |
| Sesame Oil 🫒 | 1 tbsp | Toasted for nutty aroma |
| Cornstarch 🌾 | 1 tbsp | For velvety sauce thickening |
| Neutral Oil 🫒 | 2 tbsp | High smoke point for searing |
| Fresh Ginger 🌿 | 1 tbsp | Finely grated for depth |
| Green Onions 🧅 | 3 whole | Thinly sliced for garnish |
| Sesame Seeds 🌾 | 1 tsp | Toasted for crunchy finish |
| Red Pepper Flakes 🌶️ | ¼ tsp | Optional for heat (adjust to taste) |
The chicken thighs are non-negotiable here—boneless, skinless from Whole Foods or Costco ensures consistent quality and juiciness. Look for pieces with even thickness (trimming if necessary) to guarantee uniform cooking. The soy sauce should be low-sodium to maintain control over seasoning; Kikkoman is a reliable brand. Fresh garlic and ginger are essential for that vibrant, aromatic base—avoid pre-minced versions at all costs.
No soy sauce? Tamari or coconut aminos work in a pinch (adjust salt accordingly). Brown sugar can be swapped for honey or maple syrup, though the flavor profile will shift slightly. If you lack rice vinegar, apple cider vinegar at half the amount provides similar acidity. For a gluten-free version, use tamari instead of soy sauce and ensure cornstarch is certified gluten-free.
The marinade keeps 24 hours in the fridge, but the chicken should marinate no longer than 4 hours (the acid can start to break it down). Leftovers store beautifully for 3-4 days—reheat gently to preserve moisture. The sauce thickens further upon cooling, so thin with a splash of water if needed.
Why You’ll Love This Recipe
- One Pan Wonder: I toss everything in a single skillet—chicken, garlic, soy sauce—and let the oven do the work.
- Sticky Sweet Savory: The brown sugar caramelizes with the soy and garlic, coating every bite in this addictive glaze.
- Meal Prep MVP: I make a double batch on Sunday and it reheats beautifully for lunches all week.
- Budget Friendly: Boneless thighs stay juicy and cost half what breasts do, without sacrificing flavor.
Step-by-Step Instructions for Soy Garlic Chicken
Master this technique and you’ll achieve restaurant-quality results with a perfect balance of savory and sweet.
Step 1: Prep and Season the Chicken
Pat the 1.5 lb boneless skinless chicken thighs completely dry with paper towels. This step is crucial for achieving a proper sear and preventing the meat from steaming in the pan. I always trim any excess fat or connective tissue for a cleaner presentation.
Season both sides generously with salt and pepper. Meanwhile, in a small bowl, combine the 1 tbsp cornstarch with 2 tbsp neutral oil to create a light slurry that will help the chicken develop a crispy coating when cooked.
Step 2: Sear the Chicken to Golden Perfection
Heat a large skillet over medium-high heat. Add the chicken thighs and cook for 5-6 minutes per side until they develop a deep golden brown crust and reach an internal temperature of 165°F. The cornstarch in the oil will create a beautiful lacquered effect on the surface.
Work in batches if necessary to avoid crowding the pan, which would cause the chicken to steam rather than sear. Transfer the cooked chicken to a plate and set aside. The residual heat will continue cooking the meat as it rests.
Step 3: Build the Umami-Rich Sauce Base
In the same skillet, reduce heat to medium and add the 6 cloves fresh garlic cloves and 1 tbsp fresh ginger. Sauté for 30-45 seconds until fragrant but not browned. Immediately pour in the 0.5 cup soy sauce, 2 tbsp brown sugar, 2 tbsp rice vinegar, and 0.25 tsp red pepper flakes.
Stir to combine and bring the mixture to a gentle simmer. The brown sugar will begin to caramelize, creating a glossy, syrupy base for your sauce. Scrape up any browned bits from the bottom of the pan to incorporate those concentrated flavors.
Step 4: Finish with Aromatics and Thicken
Return the chicken to the skillet along with any accumulated juices. Stir in the 1 tbsp sesame oil and simmer for 2-3 minutes to allow the flavors to meld. The sauce should begin to thicken slightly as it coats the chicken.
For a more velvety consistency, create a quick slurry with 1 tsp cornstarch and 1 tbsp water, then stir it into the sauce. Cook for an additional 1-2 minutes until the sauce clings beautifully to the chicken.
Step 5: Garnish and Serve Immediately
Transfer the chicken to a serving platter and spoon the sauce over the top. Garnish with the 3 whole green onions, thinly sliced, and the 1 tsp sesame seeds. The green onions add a fresh, crisp contrast to the rich sauce, while the sesame seeds provide a nutty crunch.
Serve immediately while hot, with steamed rice or noodles to soak up every last bit of the flavorful sauce. The chicken should be tender and juicy with a glossy, caramelized exterior that glistens under the sauce.
Pro Tips For Making Soy Garlic Chicken
- Sear the Thighs First: Get a hot pan with oil and sear the chicken thighs until golden—about 3-4 minutes per side. This builds a deep flavor base that the soy garlic sauce can cling to.
- Mince Garlic Fine: Fresh garlic is non-negotiable here, and mincing it super fine (almost paste-like) ensures it distributes evenly in the sauce and doesn’t burn before the chicken cooks through.
- Skip Overcrowding: I learned this the hard way—cook the thighs in batches if needed to avoid steaming them. Crowding the pan turns the sauce watery and the chicken rubbery.
- Reduce the Sauce: After adding the soy sauce, brown sugar, and rice vinegar, let it simmer for 2-3 minutes until it thickens slightly. This turns a good sauce into a glossy, sticky glaze that coats the chicken.
Essential Equipment for soy garlic chicken
Essential Pan
I always use a 12-inch stainless steel skillet from All-Clad for this recipe. It distributes heat evenly and develops the perfect sear. A heavy-bottomed pan prevents hot spots that can burn your garlic. 🔥
Thermometer Importance
An instant-read thermometer like the ThermoWorks ThermoPop ensures chicken reaches 165°F without overcooking. I check the thickest piece to guarantee doneness while keeping meat juicy.
Wooden Spoon
A wooden spoon is my go-to for stirring the sauce. It won’t scratch your pan and helps scrape up those flavorful browned bits. Plus, it feels natural in my hand during the 2-3 minute simmering process.
Mixing Bowls
Have 2 medium mixing bowls ready: one for the cornstarch slurry and one for resting chicken. I prefer Pyrex glass because it’s durable and microwave-safe for reheating leftovers.
Tongs
Use 12-inch locking tongs for flipping chicken. They give you precise control and keep your hands safely away from the hot pan. I recommend OXO Good Grips for comfort.
Fine Grater
For the ginger, a Microplane fine grater extracts maximum flavor with minimal effort. It creates a paste-like consistency that blends seamlessly into the sauce, enhancing the dish’s depth. 💡
Nutrition Facts
Frequently Asked Questions
Can I use chicken breasts instead of thighs?
Yes, but they cook faster and can dry out. Reduce cooking time to 4-5 minutes per side and monitor internal temperature closely. Thighs stay juicier due to higher fat content.
How do I prevent the sauce from being too salty?
Use low-sodium soy sauce and taste before adding extra salt. The sauce reduces significantly, so start with less and adjust to preference.
Can I make this ahead of time?
The dish tastes best fresh, but you can prep the marinade 24 hours ahead. Store cooked chicken in sauce for up to 3-4 days in the fridge. Reheat gently.
What if my sauce isn’t thickening?
Simmer longer or make a cornstarch slurry with 1 tsp cornstarch and 1 tbsp water. Stir in and cook for 1-2 minutes until glossy.

- Jollof Rice Sauce Recipe: West African Tomato and Spice Infusion - September 25, 2026
- Japanese Rice Soup Recipe: Umami-Rich Comfort in a Bowl - September 25, 2026
- Homemade Cream Of Rice Recipe: Silk-Smooth Breakfast in Minutes - September 25, 2026