
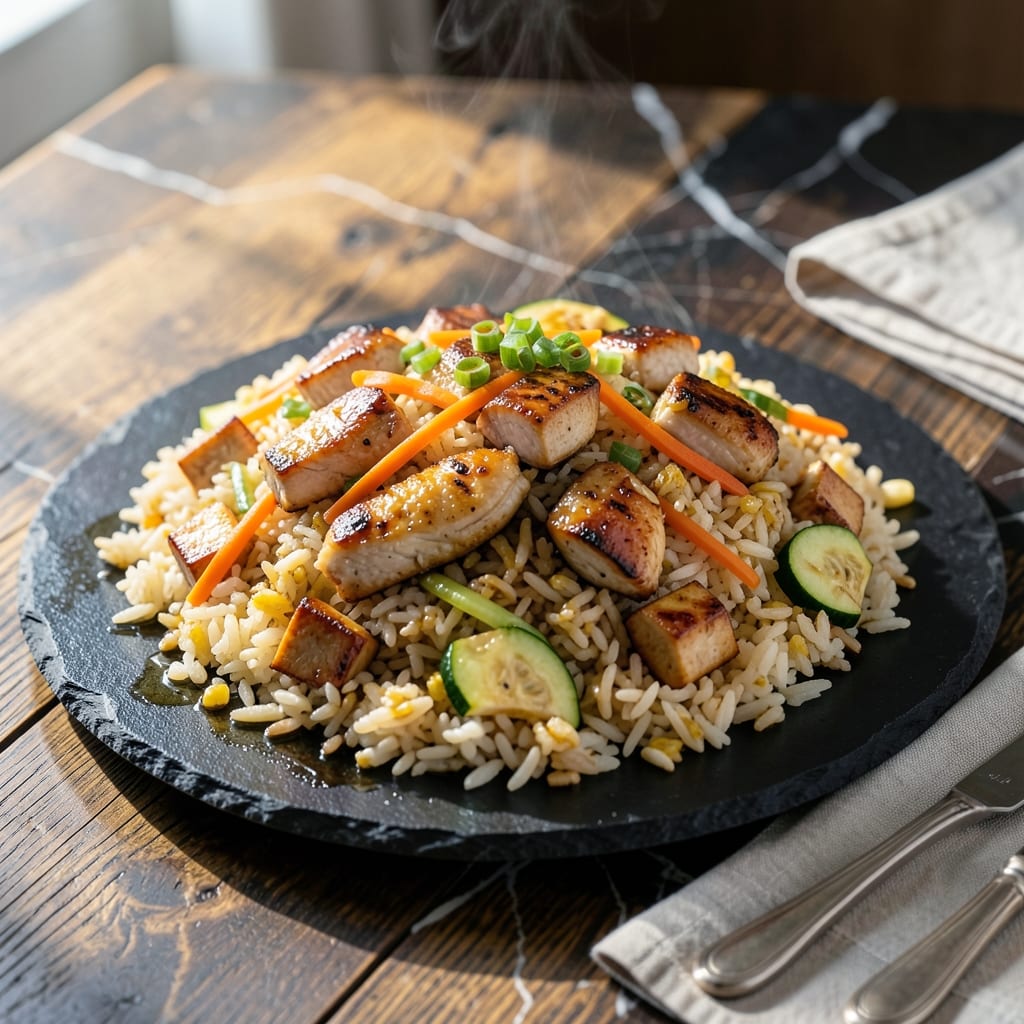
Teppanyaki chicken fried rice brings the hibachi experience to your home kitchen with minimal effort. This dish captures the smoky, savory flavors of restaurant-style cooking through a few strategic techniques.
The secret lies in using day-old rice and high heat to achieve that signature slightly charred texture. Chicken, vegetables, and soy sauce combine for a balanced, umami-packed meal that comes together in 20 minutes.
What emerges is a plate of tender chicken, crisp vegetables, and rice with that coveted wok-seared flavor. The egg adds richness while maintaining the dish’s light, fresh quality.
Serve immediately for the most authentic experience. The results rival your favorite hibachi restaurant.
Ingredients for Teppanyaki Chicken Fried Rice
Day-old rice and fresh veggies meet tender chicken for that iconic hibachi flavor at home.
| Ingredient | Amount | Notes |
|---|---|---|
| Day-Old Cooked White Rice 🍚 | 4 cups | Cold, preferably overnight |
| Boneless Chicken Thighs 🍗 | 1 lb | Cut into small cubes |
| Large Eggs 🥚 | 2 whole | Lightly beaten |
| Carrot 🥕 | 1 whole | Medium, finely diced |
| Zucchini 🥒 | 1 whole | Medium, finely diced |
| Green Onions 🧅 | 3 whole | Thinly sliced, whites and greens separated |
| Garlic Cloves 🧄 | 3 cloves | Minced finely |
| Soy Sauce 🫒 | 3 tbsp | Low-sodium preferred |
| Sesame Oil 🫒 | 1 tbsp | Toasted, for finishing |
| Vegetable Oil 🫒 | 3 tbsp | High smoke point, divided |
| Butter 🧈 | 2 tbsp | Unsalted, for authentic teppanyaki flavor |
| Salt 🧂 | ½ tsp | Or to taste |
| Black Pepper 🌶️ | ¼ tsp | Freshly ground |
The rice is non-negotiable—day-old, cold, and dry is what gives you that authentic texture. I grab mine from Trader Joe’s or just make a batch the night before. For the chicken, thighs stay juicier than breasts, but either works if cut small. The veggies? Carrot and zucchini are classic, but bell peppers or peas would be great too (whatever’s fresh at your local market).
No sesame oil? Toast a teaspoon of sesame seeds in the oil instead for that nutty finish. Swap soy sauce for tamari if gluten-free. Out of zucchini? Mushrooms or snap peas add great texture. The butter might seem odd, but it’s a hibachi restaurant trick—gives that rich, slightly sweet depth. Don’t skip it (or use vegan butter if needed).
Leftovers keep 3-4 days in the fridge, but honestly, this dish is best fresh off the heat. Reheat in a skillet with a splash of oil to revive the texture. Freezing works for up to 3 months, but the veggies may soften a bit.
Why You’ll Love This Recipe
- One Pan Wonder: I toss everything from the chicken thighs to the zucchini in the same pan—no extra dishes, just flavor.
- Umami Bomb: The soy and garlic hit different with those juicy chicken bits. Honestly, I lick the spatula every time.
- Lunchbox Hero: Day-old rice works best, and leftovers taste even better cold the next day.
- Budget Stretch: Boneless thighs and veggies I already have? This feeds four for the cost of takeout for one.
Step-by-Step Instructions for Teppanyaki Chicken Fried Rice
Master the hibachi technique with these precise steps for authentic restaurant-quality results at home.
Step 1: Prep and Cook the Chicken
Heat 1 tbsp Vegetable Oil and 2 tbsp Butter in a large skillet or wok over medium-high heat until the butter melts and begins to foam. Add the 1 lb Boneless Chicken Thighs and season with 0.5 tsp Salt and 0.25 tsp Black Pepper.
Cook for 5-6 minutes, stirring occasionally, until the chicken is lightly browned and cooked through. The edges should be caramelized but not burnt. Transfer the chicken to a plate and set aside—the residual heat will keep it warm.
This step builds the foundation of flavor. The combination of vegetable oil and butter mimics the rich taste of teppanyaki grills while ensuring the chicken stays juicy and tender.
Step 2: Scramble the Eggs and Sauté Vegetables
In the same skillet, add another 1 tbsp Vegetable Oil if needed. Pour in the 2 whole Large Eggs and scramble quickly over medium heat until just set but still slightly soft. Remove the eggs and set aside with the chicken.
Add the remaining 1 tbsp Vegetable Oil to the skillet. Toss in the finely diced 1 whole Carrot, 1 whole Zucchini, and the white parts of the 3 whole Green Onions. Sauté for 3-4 minutes until the vegetables soften and begin to take on a slight char.
Add the 3 cloves Garlic Cloves and cook for 30 seconds until fragrant. Be careful not to burn the garlic—it should smell aromatic, not bitter.
Step 3: Combine Rice and Season
Increase the heat to high and add the 4 cups Day-Old Cooked White Rice, breaking up any clumps with your spatula. The rice should sizzle when it hits the pan. Stir-fry for 2-3 minutes until the rice is hot and slightly crispy in spots.
Return the chicken and eggs to the skillet. Drizzle the 3 tbsp Soy Sauce evenly over everything. Stir well to distribute the soy sauce and combine all ingredients. Cook for another 2 minutes to let the flavors meld together.
This is where the magic happens. The high heat ensures the rice gets that signature slightly crispy texture, while the soy sauce infuses every grain with savory flavor.
Step 4: Finish and Garnish
Remove the skillet from heat. Drizzle the 1 tbsp Sesame Oil over the fried rice and stir to incorporate. Taste and adjust seasoning if needed, though the soy sauce should provide enough saltiness.
Garnish with the green parts of the 3 whole Green Onions for a pop of color and freshness. The sesame oil adds a nutty aroma that takes this dish to the next level, so don’t skip it.
Serve immediately while hot. Each bite should deliver tender chicken, fluffy rice, crisp vegetables, and that unmistakable hibachi flavor. The texture should be slightly crispy in parts, with everything well-coated in the savory sauce.
Pro Tips For Making Teppanyaki Chicken Fried Rice
- Chill the Rice: Use day-old, refrigerated rice—it’s drier and fries up fluffier. I learned this the hard way after my first batch turned mushy.
- Cut Chicken Small: Dice the boneless thighs into ½-inch pieces so they cook through fast and stay tender, not chewy.
- Hot Pan First: Crank the heat to high and let the pan or griddle scream before adding oil—this is what gives you that classic teppanyaki sear.
- Push Eggs Aside: Scramble the eggs in one corner of the pan, then slide them to the side before mixing in. Sounds weird, but it keeps them soft and distinct.
Make-Ahead Tips for This Recipe
Prep Ahead Strategy
I always cook the rice 1-2 days ahead—this dish needs cold, dry grains to achieve that perfect texture. Spread it on a baking sheet to cool quickly, then refrigerate. The chicken can be cubed and stored in an airtight container for up to 24 hours before cooking. 💡
Veggie Prep
Dice the carrot and zucchini the night before and store them together in a sealed container. Slice the green onions and mince the garlic up to 12 hours ahead—this saves precious minutes during the high-heat cooking process.
Sauce Mix
Combine the soy sauce and sesame oil in a small bowl and set aside. This ensures even distribution when you add it to the wok. I also measure out the butter and vegetable oil in advance to avoid fumbling mid-cook.
Egg Prep
Beat the eggs with a pinch of salt the morning of cooking. They’ll keep in the fridge for up to 8 hours without losing their fluffy texture. This small step makes the scrambling process smoother when it’s time to cook.
Equipment Ready
Have all your tools—spatula, bowls for holding cooked ingredients, and serving plates—ready to go. Teppanyaki-style cooking moves fast, so organization is key. I keep my wok or skillet on the stove with the heat already on medium-high to save time. ⚡
Reheating Tips
If making this for a crowd, cook in batches and keep finished portions warm in a 200°F oven. The rice stays crispy, and the flavors hold beautifully. Avoid holding it too long, though—this dish shines brightest when served fresh off the heat.
Nutrition Facts
Frequently Asked Questions
Why use day-old rice for this dish?
Day-old rice is drier, preventing the dish from becoming mushy. Fresh rice contains too much moisture, which steams instead of frying. This gives you that authentic, slightly crispy texture.
Can I substitute chicken breast for thighs?
Yes, but thighs stay juicier due to their higher fat content. If using breast, cut it into small pieces and cook for only 4-5 minutes to prevent dryness.
What if I don’t have a wok?
A large skillet with high sides works perfectly. Just ensure it’s hot before adding ingredients and cook in batches if needed to avoid overcrowding.
How do I prevent the eggs from overcooking?
Scramble them quickly over medium heat until just set, then remove immediately. They’ll finish cooking when added back to the hot rice later.

- Jollof Rice Sauce Recipe: West African Tomato and Spice Infusion - September 25, 2026
- Japanese Rice Soup Recipe: Umami-Rich Comfort in a Bowl - September 25, 2026
- Homemade Cream Of Rice Recipe: Silk-Smooth Breakfast in Minutes - September 25, 2026